
BriefBuilder is frequently used in tender procedures as a single source of truth where tenderers can find all relevant information about a project’s scope, objectives, and technical and functional requirements.
Instead of distributing large specification documents, access is provided to a structured online requirements model. For commissioning clients, this provides the possibility to define and manage requirements – and changes to requirements – in a highly systematic way. For tenderers, it becomes much easier to search, browse, and understand requirements without navigating lengthy PDF documents.
When using BriefBuilder in a tender procedure, careful preparation of the model is essential, permissions must be configured correctly, and access should be managed throughout the process.
This article explains the recommended steps for preparing your model (from the client’s perspective) and using it during a tender procedure.
Step 1: Clean up your model
Before sharing your model with tenderers, ensure it only contains relevant and appropriate information.
Review the model for:
- Objects that are no longer relevant (e.g. folders named ‘old’ or ‘imported’, or typicals that haven’t been used).
- Internal comments that should not be shared.
- Table or report definitions that have been created for internal use only.
- Analysis properties that are no longer needed.
- Verification data used for internal reviews.
- Definitions for tables, diagrams and reports that are no longer valid (definitions generate an error if they reference objects that no longer exist).
Step 2: Pre-define reports and tables
Tenderers can generate their own reports and tables, but predefined views help them to navigate the model quickly.
Consider preparing:
- Discipline-specific cross tables (e.g. all spaces and their acoustic requirements, their furnishing requirements, etc.)
- Discipline- and or phase-specific reports (e.g. technical brief, architectural programme, strategic brief)
- Diagrams (e.g. adjacency diagrams)
- Analysis tables (e.g. overview of the prioritisation of requirements)
- Verification tables (e.g. planned verifications per project phase)
- BIM/IFC comparison tables (e.g. comparison of room heights, sizes and quantities)

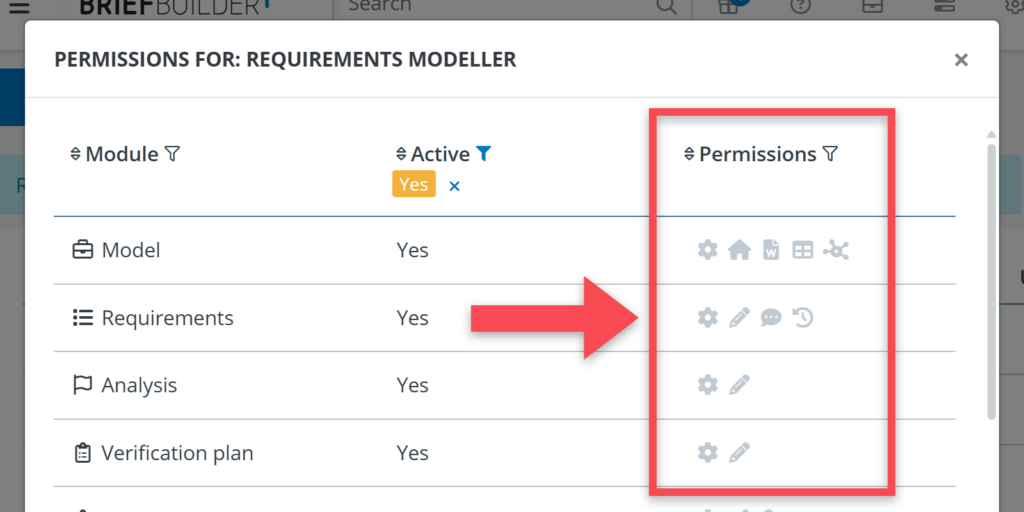
Step 3: Revoke edit permissions
Once the model is ready for tendering, prevent any unintended or unapproved changes.
Recommended approach:
- Assign the role Viewer to all user accounts
- Only allow edit permissions for designated requirement/tender managers
- Review whether any user accounts should be removed entirely
Alternatively, adjust permissions for people’s existing roles, by revoking the edit permissions per role.
Step 4: Publish the model
When you are happy with the content and set-up of the model, create a published version. This is a ‘frozen’ version of the model that cannot be edited. Tenderers will typically get access to this version.
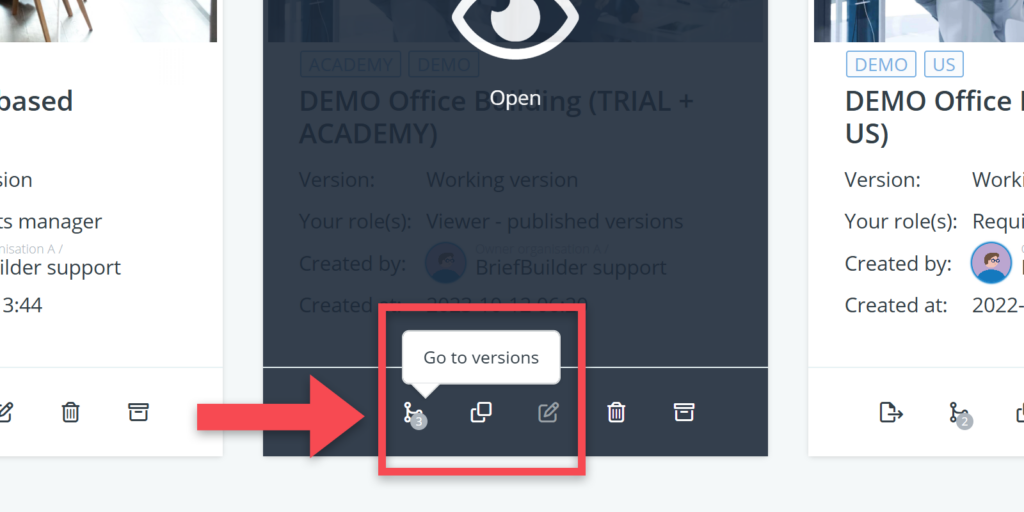
To publish:
- Click on the versioning button on the project tile in the environment
- Click on the Create static version button
- Add a clear description (e.g. Version 1.0 – Tender release)
- Publish the static version by clicking on the publish button.
You will now have:
- A published version for tenderers
- A working version for implementing changes (this version can then be published at a later stage).
If you expect multiple publication moments during your tender, use a clear version numbering system (e.g. 1.0, 1.1, 2.0).
Step 5: Create accounts for the tenderers
Step 4 gives you a published version of the model, but the tenderers do not yet have access to it.
To enable access, you need to create accounts for the tenderers.
Recommended process:
- Request a list of users from each tenderer (per user: name, email, organisation), ideally in Excel format, to be able to import the information.
- Import or create accounts via the user management menu
- Assign environment role: Project user (the default)
- Link the user to the project model with the project role: Viewer — published versions
- Send activation emails
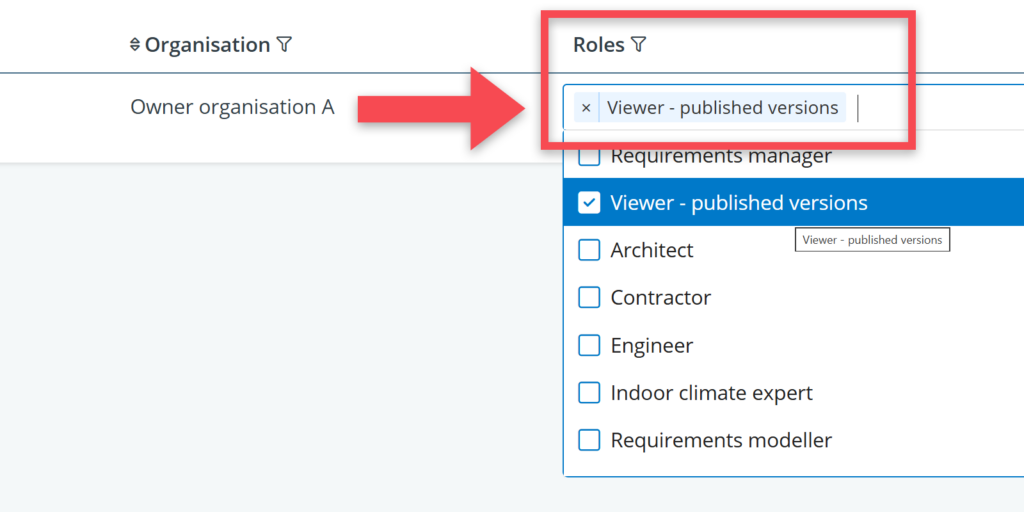
The role Viewer – published versions is ideal for tender situations because users:
- Only see published versions
- Cannot edit any data
- Cannot view history data
- Only see populated tables/properties
- Do not see model creator information
At the same time, this role still gives you full search, report, and export capabilities so tenderers can still actively explore and work with the requirements.
Step 6: Manage changes during the tender
If you want to make changes to your requirements during the tender:
- Implement changes in the working version of the model
- Publish a new version when changes have been implemented, reviewed and approved
- Communicate to tenderers that there is a new version (NB they can also get an email notification about that)
Tenderers can compare versions using BriefBuilder’s version comparison reports to clearly identify changes.
Step 7: Post-tender permissions
After the contract is awarded, the selected party may require broader permissions to be able to actively work with the requirements. Common permissions include:
- Entering verification results
- Creating requests for change (RFCs)
- Creating comments
These permissions can be adjusted in the roles menu.

Additional recommendations:
Provide a manual
Although BriefBuilder is easy to use, the provision of a manual can help tenderers navigate and use the requirements model. The manual could contain the following topics:
- A general explanation about the model’s structure.
- How to request user accounts.
- How to access the model.
- How to create exports and reports (incl. version comparison reports).
- Post-tender workflow expectations (e.g. with regard to verification or BIM integration).
- Support contact / where to go for help.
Organise an introduction session
Consider hosting an introductory session for the tenderers to demonstrate key features such as:
- Searching
- Cross tables
- Version comparisons
You can make such a session highly practical by giving the participants small assignments (e.g. find all requirements concerning a particular topic, make a report, define a cross tale), turning it into a workshop.
Facilitate dialogue
Encourage tenderers to raise questions concerning the requirements. Their feedback can only make your requirements stronger.
In this, ask tenderers for the requirements IDs that are being used in the model so that everybody knows exactly to which requirement(s) a comment or question refers.
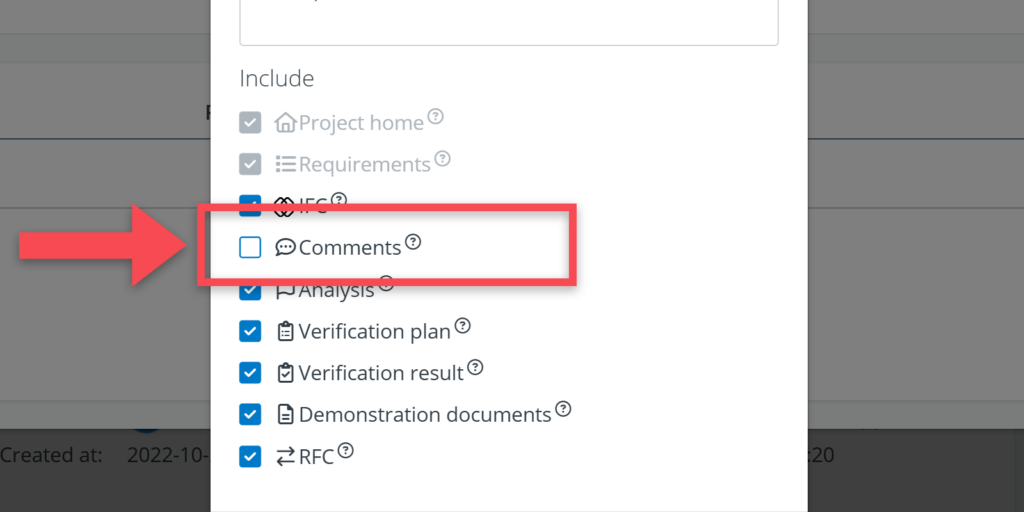
It is also an option to use BriefBuilder’s commenting or RFC feature. In that case, however, you have to consider how anonymity and moderation should be handled. As accounts are personalised, the best solution is then to create a separate clone of the model for each tenderer.