
When working in a requirement model, you sometimes want to add a remark or pose a question. In this entry we will explain how to use the comments feature for that purpose.
Making comments
Making comments can be done at two levels:
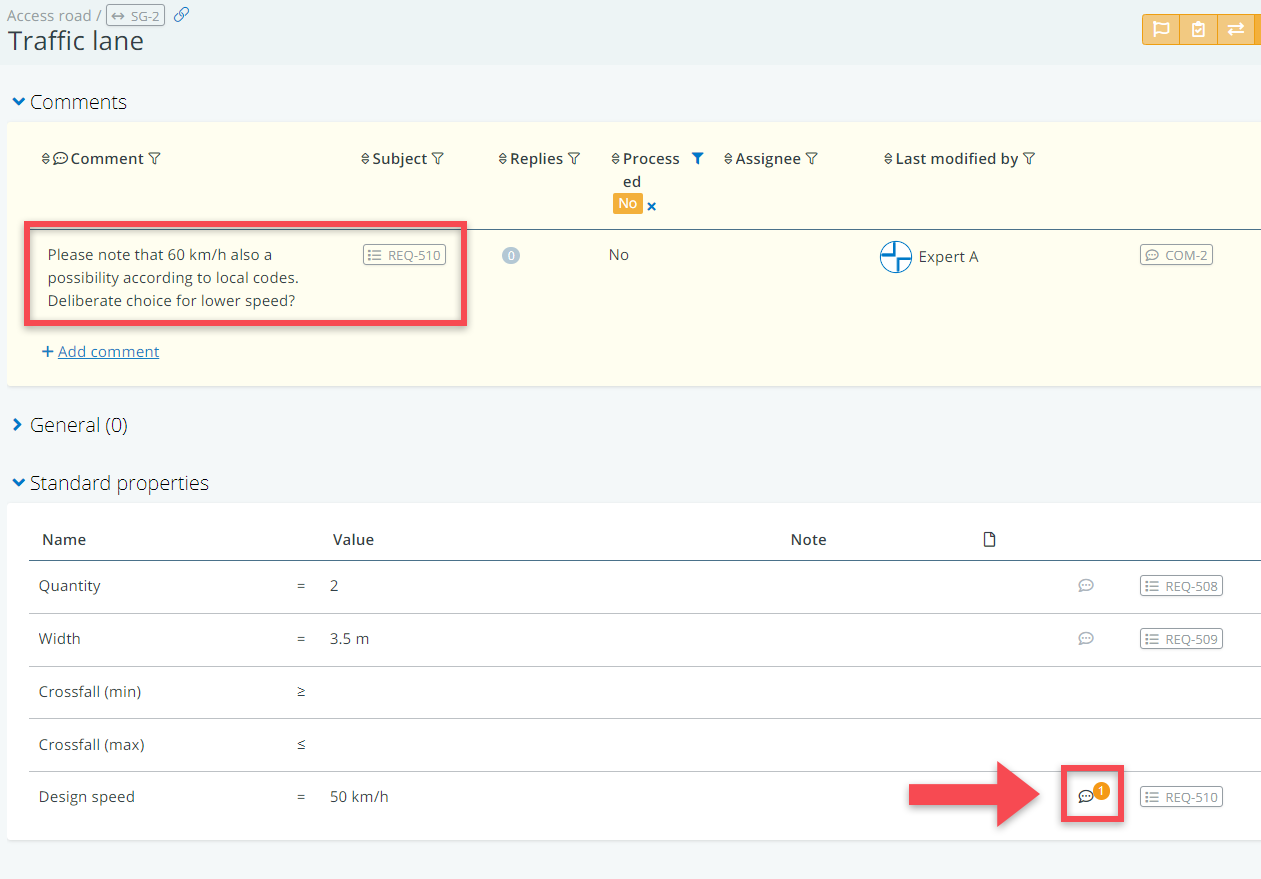
(1) For the object as whole: this can be done in the comments table that can be found at the top of each detail view. You can add comments by clicking on the Add comment button.

(2) For individual properties/relations: this can be done via the comment icon behind each property/relation.
NB If you create a comment there, it will also be shown in the comments table at the top of the detail view.
Referring to objects and requirements
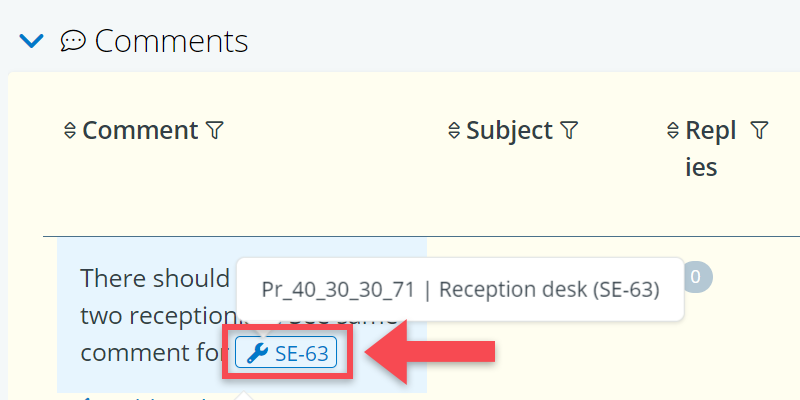
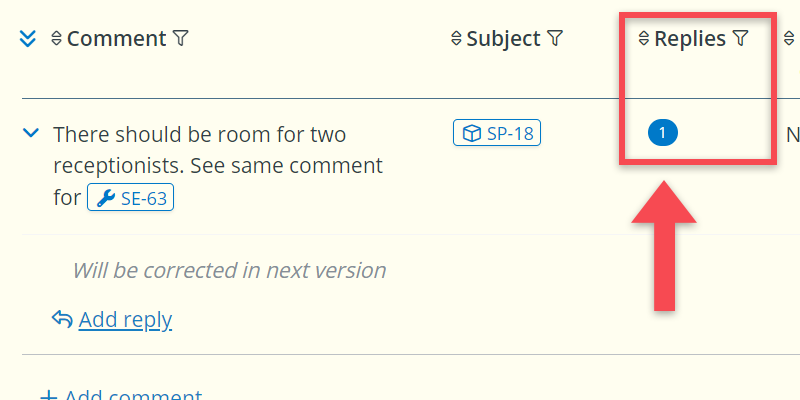
In your comment, you may want to refer to specific requirements or objects elsewhere in the model. If you use requirement numbers (e.g. REQ-2) and object ID’s (e.g. SE-63) for this purpose, these automatically become clickable links.
Assigning comments
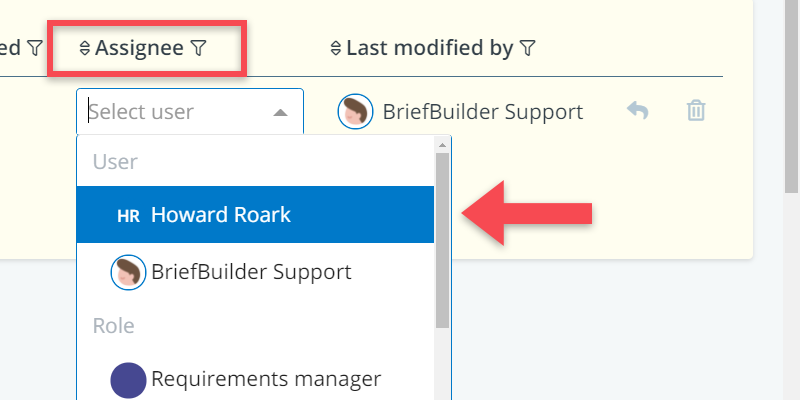
When placing a comment, you can assign a comment to a specific person by clicking on Assignee. A drop-down pick-list will open up showing you all the registered users with access to this model, plus all the roles and organisations that are relevant to the project.
Replying to comments
To respond on a comment, you have to click on the Add reply button, after which you can type in your reply.
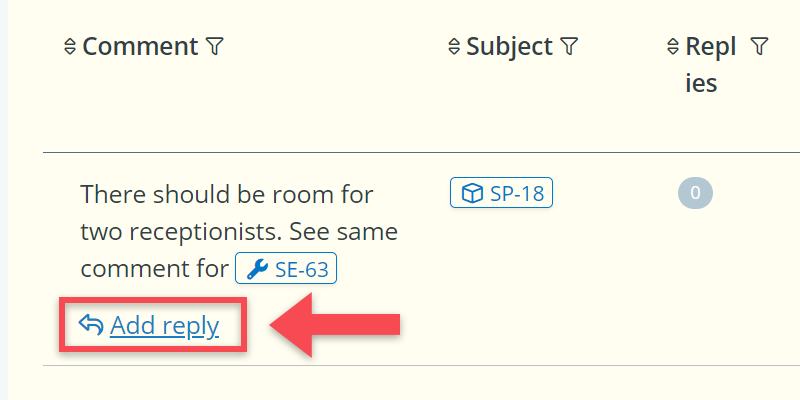
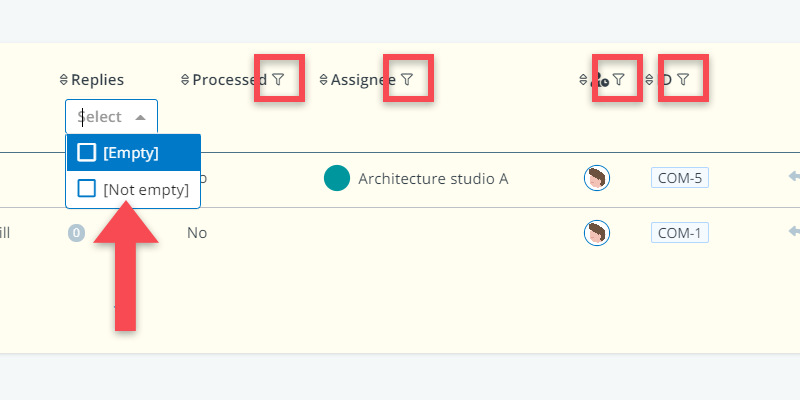
Note that the number of replies is indicated in the Replies column.
Processing requirements
If the person who has created the comment is satisfied with the assignee’s answer (or if it has been solved in another way), the comment can be put on processed.
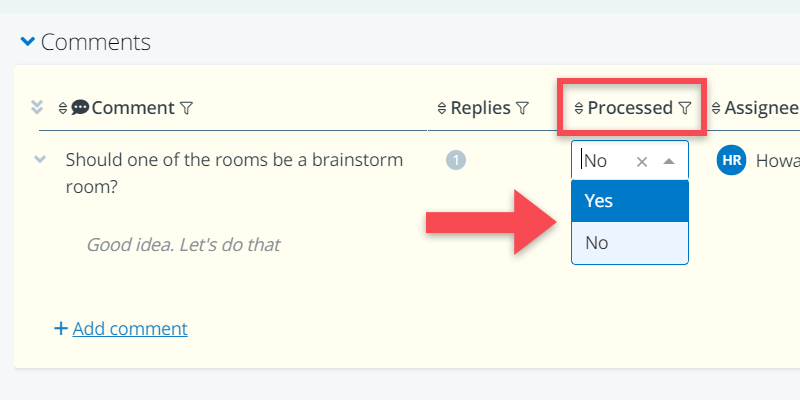
Comments that are processed can still be found in the comments overview, but they are not shown on the detail views anymore (unless you change the default filter setting for the comments table, by clicking on the x icon).
Comments assigned to you
Comments that are assigned to you (or to your role or you organisation), and that are not yet processed, can be found at the bottom of the project homepage, which is the page that you get to see when accessing the model.
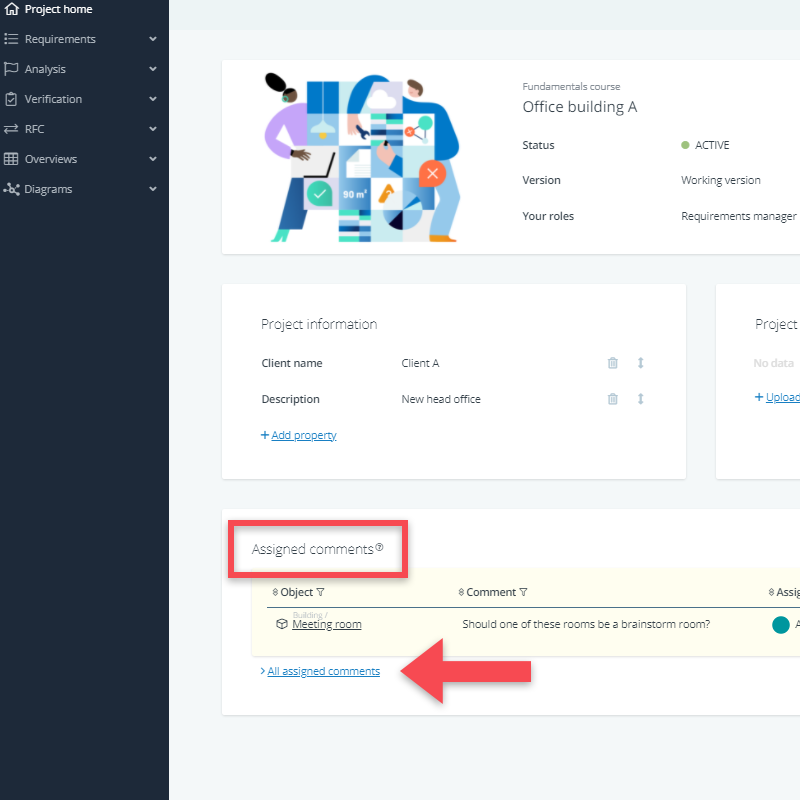
From there, you can jump to the comment overview (see below), or to the detail views of the objects where the comments have been made, where you can then deal with them.
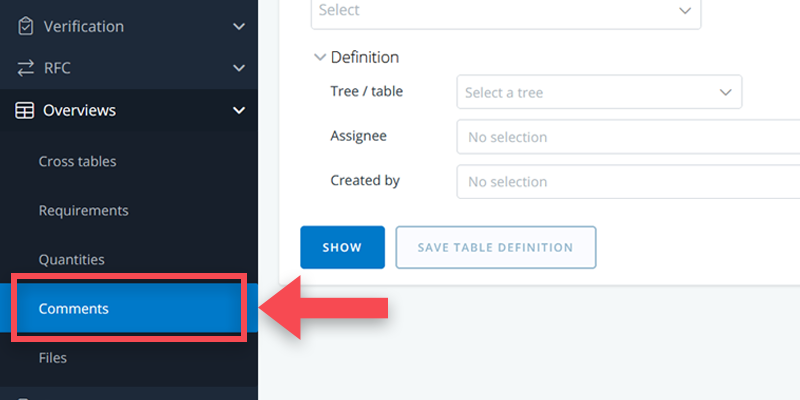
Comments overview
The comments overview shows all the comments in the model and can be found under Overviews in the navigation menu.
Here you will find a selection menu, that can be used to narrow down the selection of comments.
There are three selection options:
- Tree / table: here you can select a specific tree or part of the model.
- Assignee: here you can choose users, roles and/or organisations. You can also select [empty] to view comments that do not yet have an assignee.
- Created by: here you can choose which user or organization’s comments you want to display.
As with other tabular overviews in BriefBuilder, it is possible to save table definitions in the selection menu.
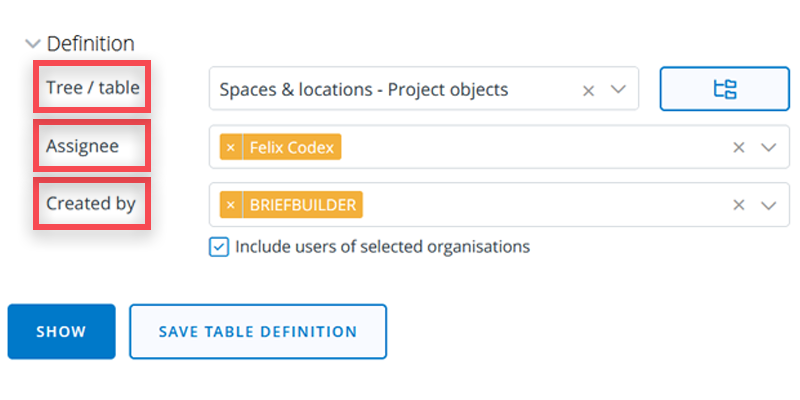
If you would like to view all comments, simply leave all selection fields blank and click Show.
In the overview itself, you can use the various filters (in the column headers) to find what you are looking for.
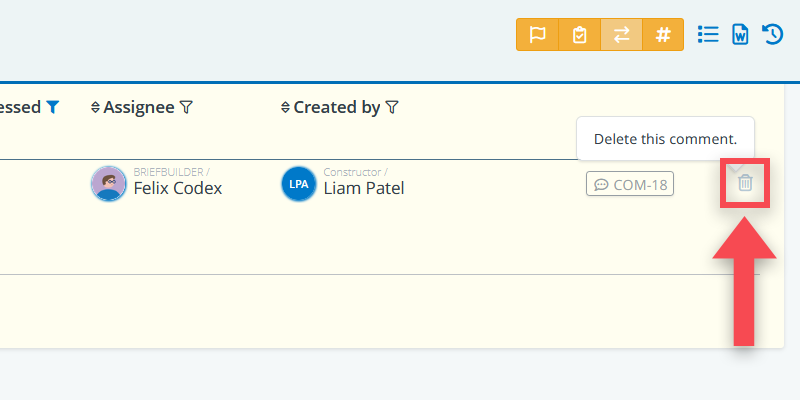
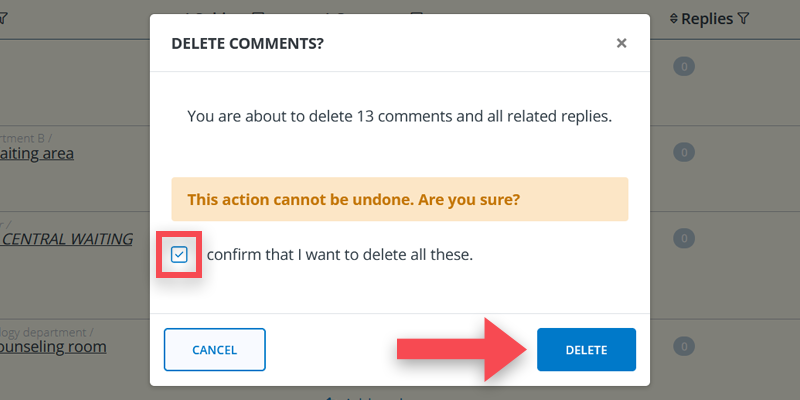
Deleting comments
It is possible to delete comments (both in the comments overview and on the detail views) by clicking on the trash bin icon , on the right hand side.
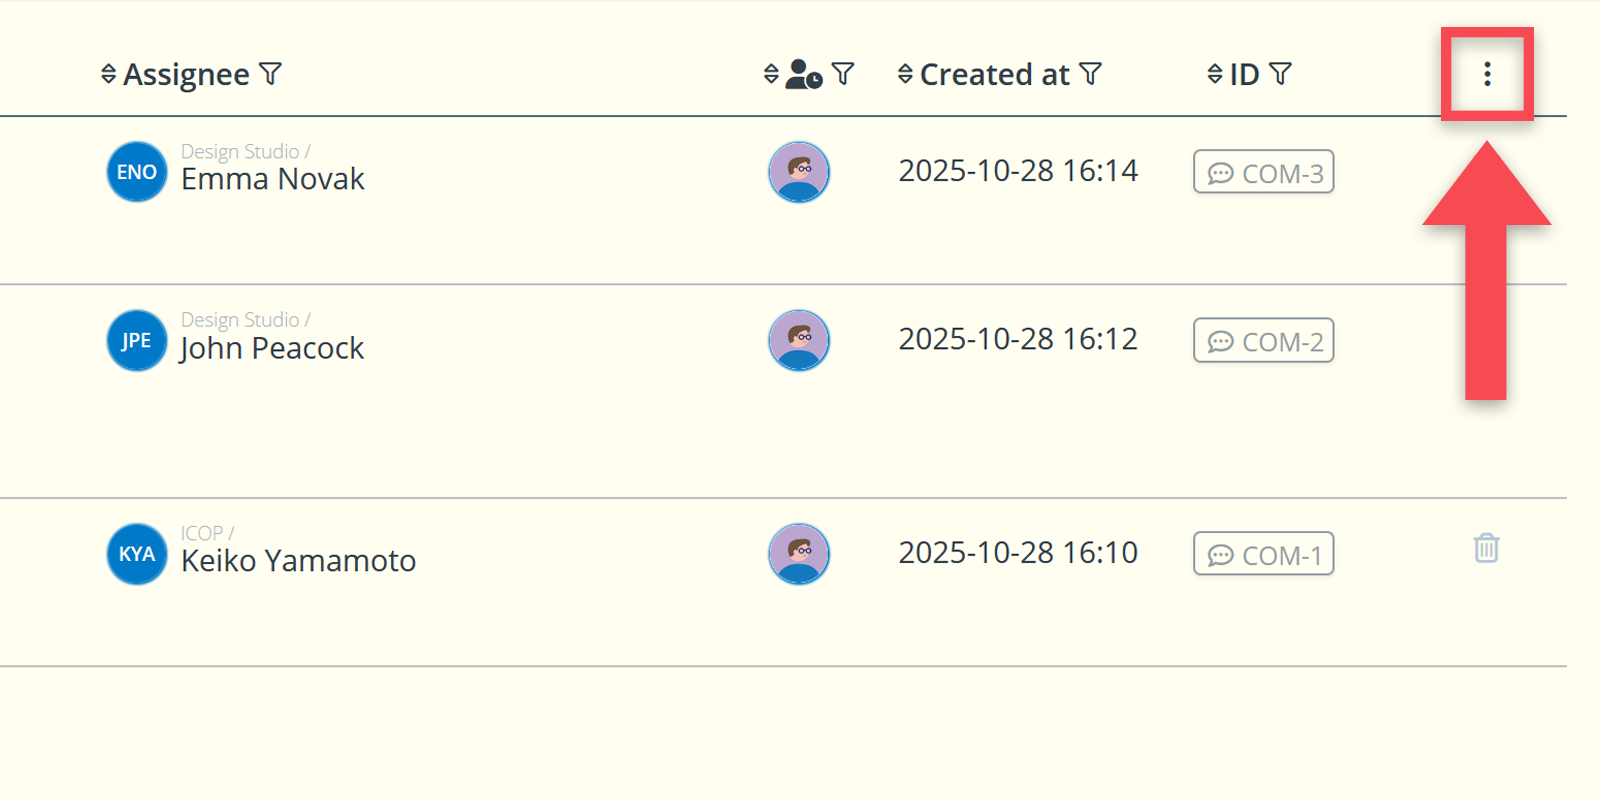
If you want to delete multiple comments at once, it is easiest to work in the comments overview. Multiple comments can be deleted using the menu in the table header:
- Click the three dots on the far right and select Select comments to delete. You can now use the master checkbox or individual boxes to delete comments.
- Click on again and choose Delete X selected comment(s) to remove the selected comments.
- To cancel the action and return to the normal comments table view, click on and select cancel.
Including or excluding comments
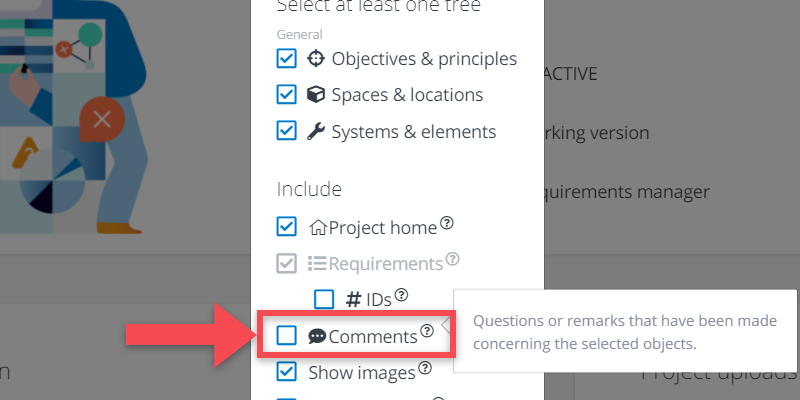
As explained in the beginning, the comments feature is often used for internal communication. Think of a project manager asking questions to one of his or her team members about a particular requirement.
This is typically not the kind of information that you want to include when you are making a clone of a project model for other uses. The default setting therefore is that comments are not included when cloning. It is, however, possible to include comments by using the check box.
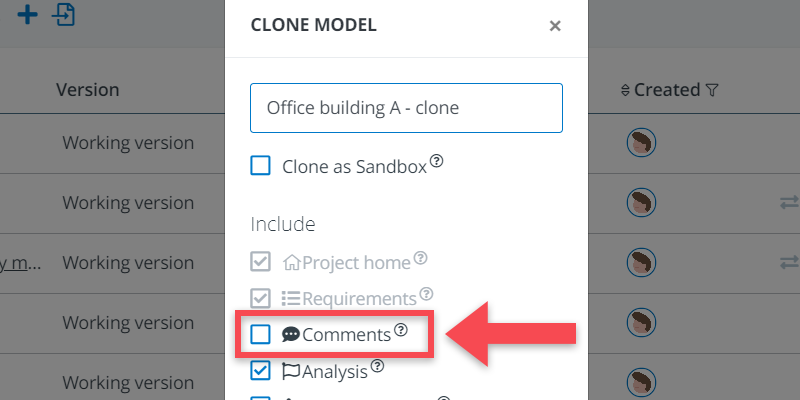
The same goes for when making a Word report. Also there, the default setting is that comments are not included.
Email notifications
As user, you can choose whether you want to be notified by email when someone addressed a comment to you or has answered a comment that you have created.
You can do so under your own profile (upper right corner of the application), where you will find a button email notifications.
More info about this can be found here.