As explained in the theory section, objects in BriefBuilder (spaces, systems, processes etc.) can have particular properties (e.g. size, capacity or width). You can create these properties as object-specific properties on the detail view of an object, but you can also predefine them as standard properties in the requirements settings menu.
You may, for example, want to predefine that spaces should have a property Minimum floor-to-ceiling height, that technical systems should have a property Warranty or that deliverables should have a property Submission moment.
In this articlem we will explain how to do this.
Settings menu
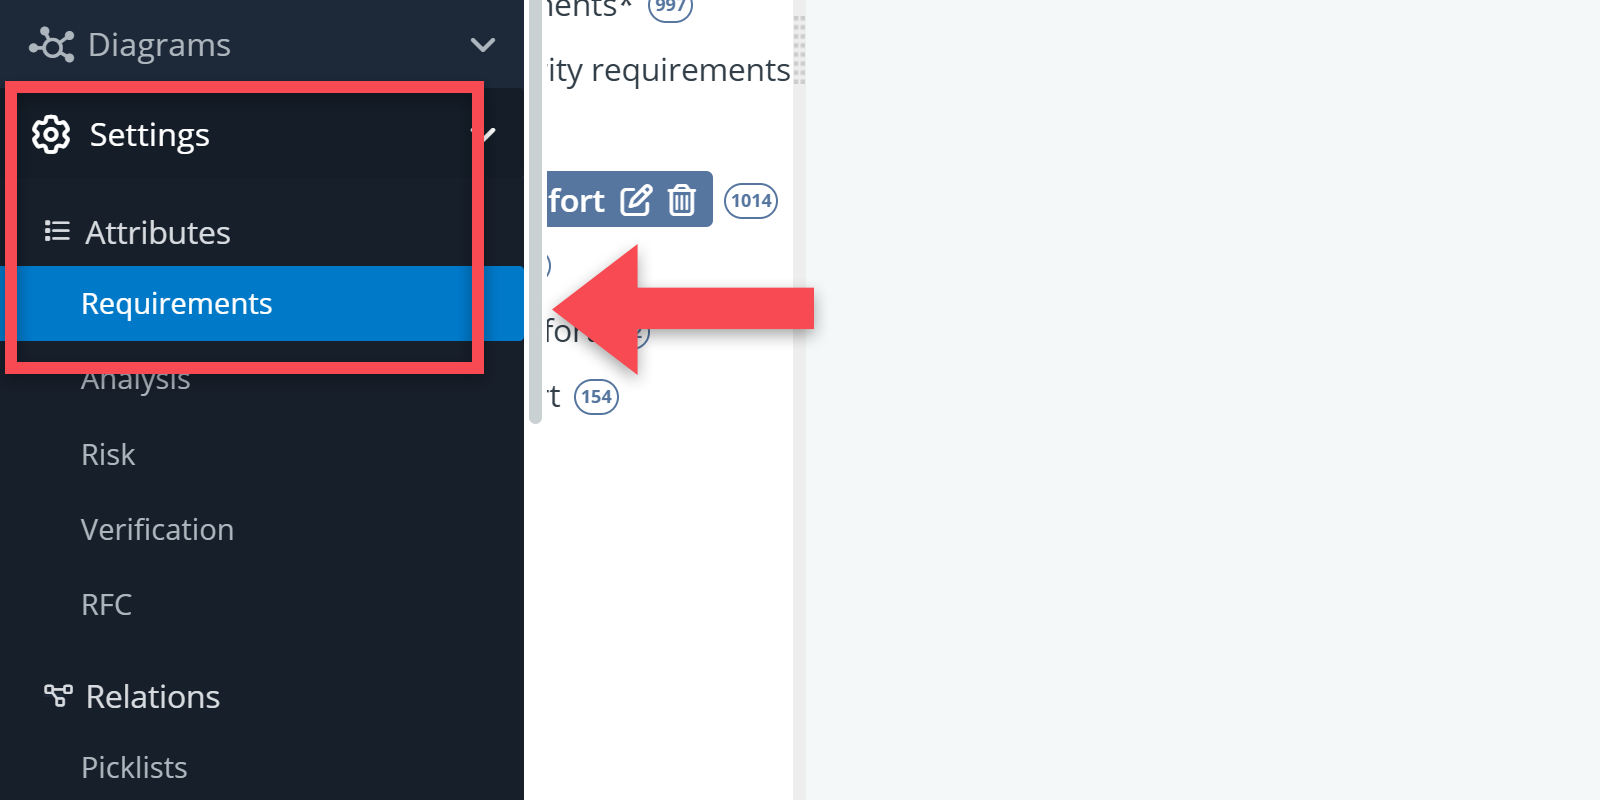
Standard properties can be defined in the requirements part of attributes settings, which can be found at the bottom of the navigation menu.
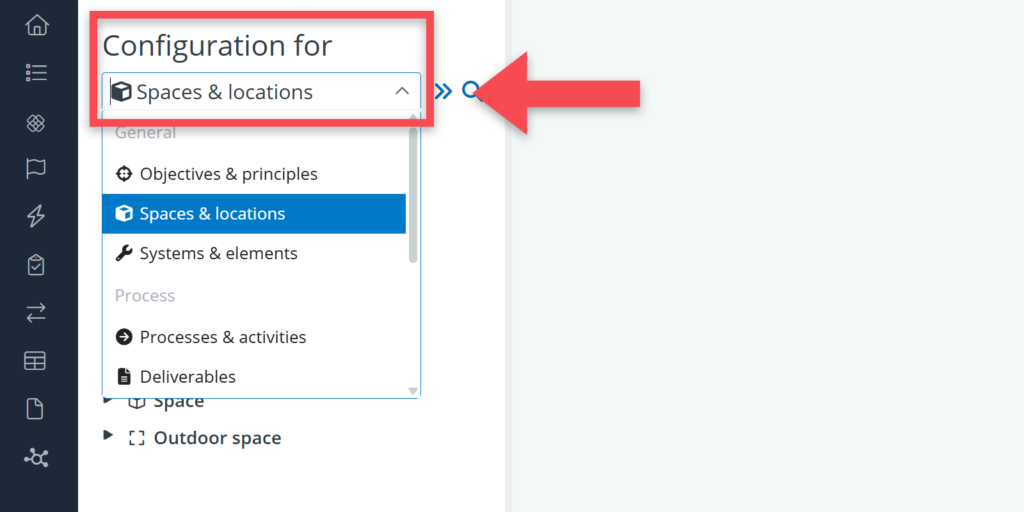
The standard properties can be defined per object type (space, location, system, …). These can found by selecting the relevant model tree (Spaces & locations, Systems & elements, etc.) in the Configuration for field (see screenshot below).
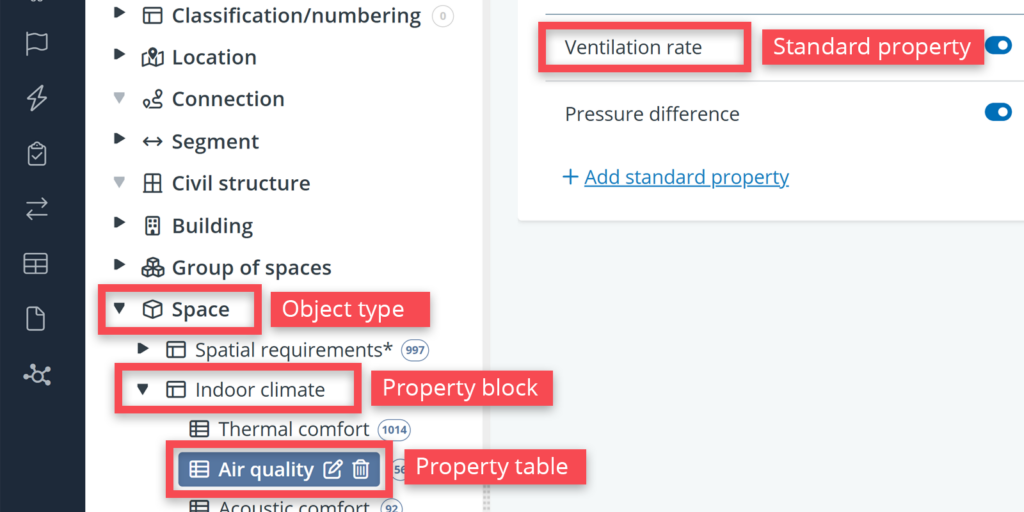
Once you have selected the tree, and then a specific object type, you can see both property blocks and property tables for that object type.
- A property table is the table where you add and define the standard properties.
- A property block is a grouping of one or more property tables.
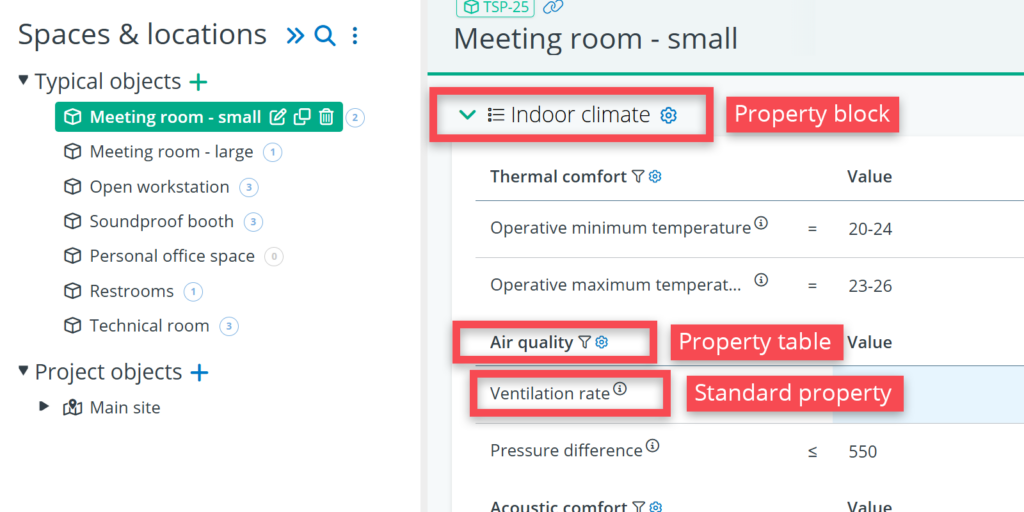
See the example below:
- In the tree Spaces & locations, there is an object type called Space
- This object type has a property block called Indoor climate
- In that block there is a property table called Air quality
- And that property table features a standard property called Ventilation rate.
In the application, the block names and table names will be visible on as headers on the detail views of the relevant objects. See screenshot below for this example.
Adding blocks
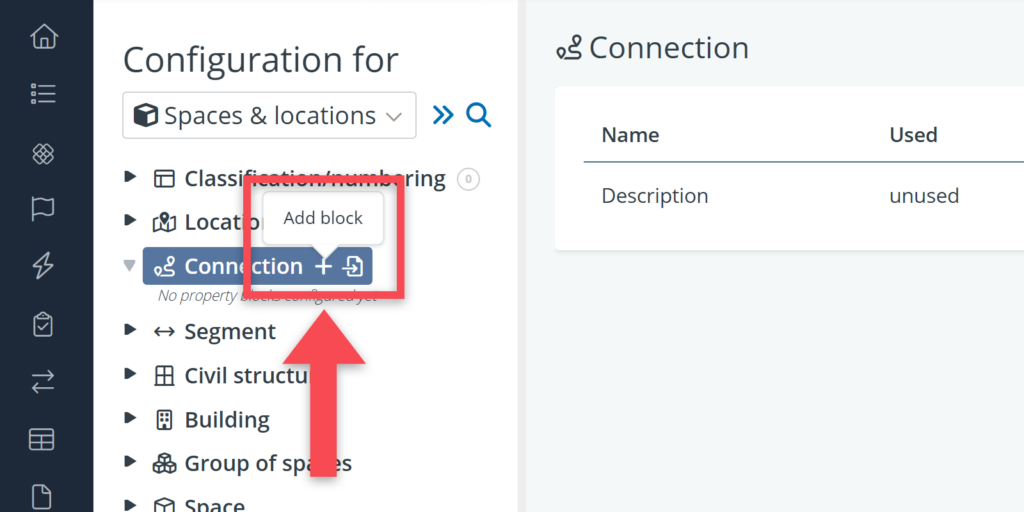
To create and configure standard properties, you have to start by creating a block. You create a block by selecting an object type and clicking on the + Add block button next to its name.
When creating a new block, a pop-up window appears where the block can be named.
The same pop-up window also contains a checkbox to indicate whether the block should be optional or not. See screenshot below.
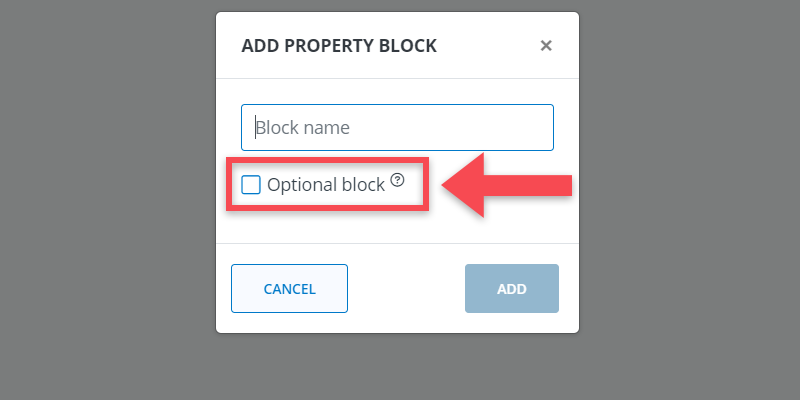
This checkbox is quite important because it determines whether a block will automatically be visible on the detail view of all the objects of that type or not.
When not checking this box, the block will be non-optional, meaning that it will automatically be linked to all objects of that particular type. This is relevant when a block contains properties that are relevant to all objects of the same type, e.g. a block with spatial requirements that are relevant for all spaces.
In contrast, when you do check this box, you will get an optional block, which means that the block is not linked to any object yet, but you then have the option to link it to specific objects, either via the settings menu or via the detail view of an object. This can, for example, be relevant if you have a block called Door properties which is only relevant for the door elements in the model.
Adding tables
When creating a new block, a property table (called Default table) is automatically added, in which you can define the properties. In fact, the mouse cursor will jump straight to this table so you can start defining properties immediately.
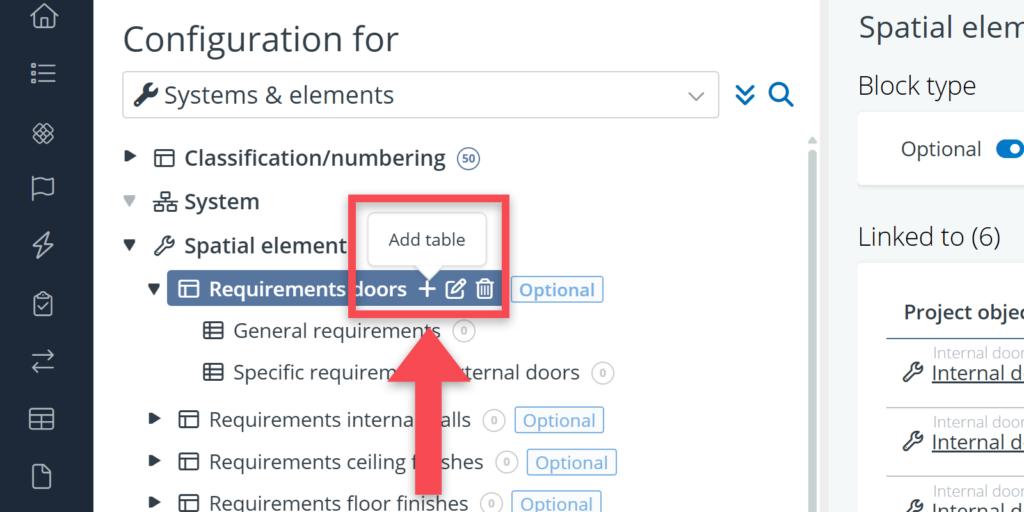
Sometimes, however, it may be preferable to have multiple tables within a block. Useful when your block contains a long list of standard properties that you want to group by discipline or topic.
In that case, you have to click on the block again and click the plus-icon to add a new table. See screenshot below.
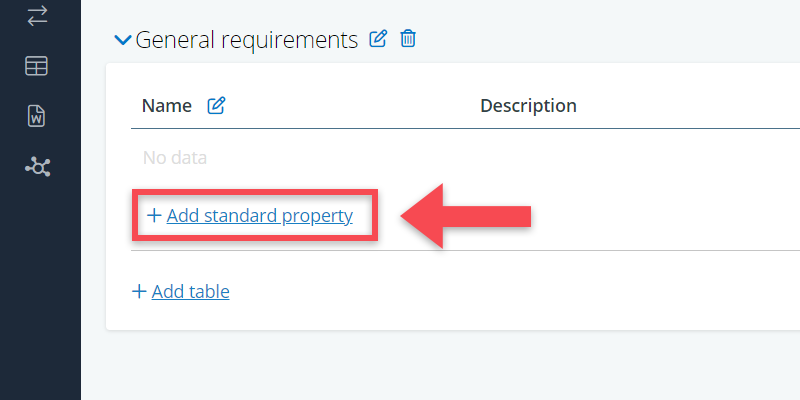
Creating standard properties
Standard properties can be defined on the detail view of the property table. Standard properties can be added by clicking Add standard property at the bottom of the table.
After adding a standard property, a new row is displayed in the table. In this row you can configure the attributes of the standard property. The available attributes are described below.
Name
The name of the property should indicate a specific quality or performance criterion for which you want to define a requirement, e.g. energy usage , capacity or floor area.
Track deviations
In the specific case of spaces and segments as object types, you can enable or disable Deviation tracking. When enabled, any differences between a typical object and its instances are identified and marked as deviations.
Description
This can be an explanatory text describing the property. This may include a formal definition, a reference to an applicable standard (such as ISO or ASTM), an explanation of how the property should be measured or calculated, or guidance on what values should be provided.
Comparator
The comparator is a symbol (>, <, =, etc.) that explains how a property value should be understood. Does it, for example, concern a minimum value (e.g. floor size ≥ 30 m2) or a maximum value (e.g. temperature level ≤ 20 °C).
Input type
The type of input that is allowed in the value field. There are six options:
- Text: allows the entry of text values (the most flexible option).
- Integer: allows only whole numbers (e.g. relevant for quantities of elements).
- Decimal number: allows decimal numbers.
- Picklist: enables you to predefine values (e.g. class A, B and C).
- User/role/organisation: allows you to select (BriefBuilder) users, roles or organisations that are tied to your project model (this option is not that relevant for requirements)
- Date: allows the entering of dates in the format of yyyy-mm-dd.
Unit of measure
The Unit of Measure (UoM) in which a value is expressed. For example: is the property value for floor area referring to square meters or square feet?
Picklist values
If you have chosen picklist as input type (see earlier), this is where you can define the value options by clicking on Add value in the pop-up. You can also add a (short) description for each picklist value.
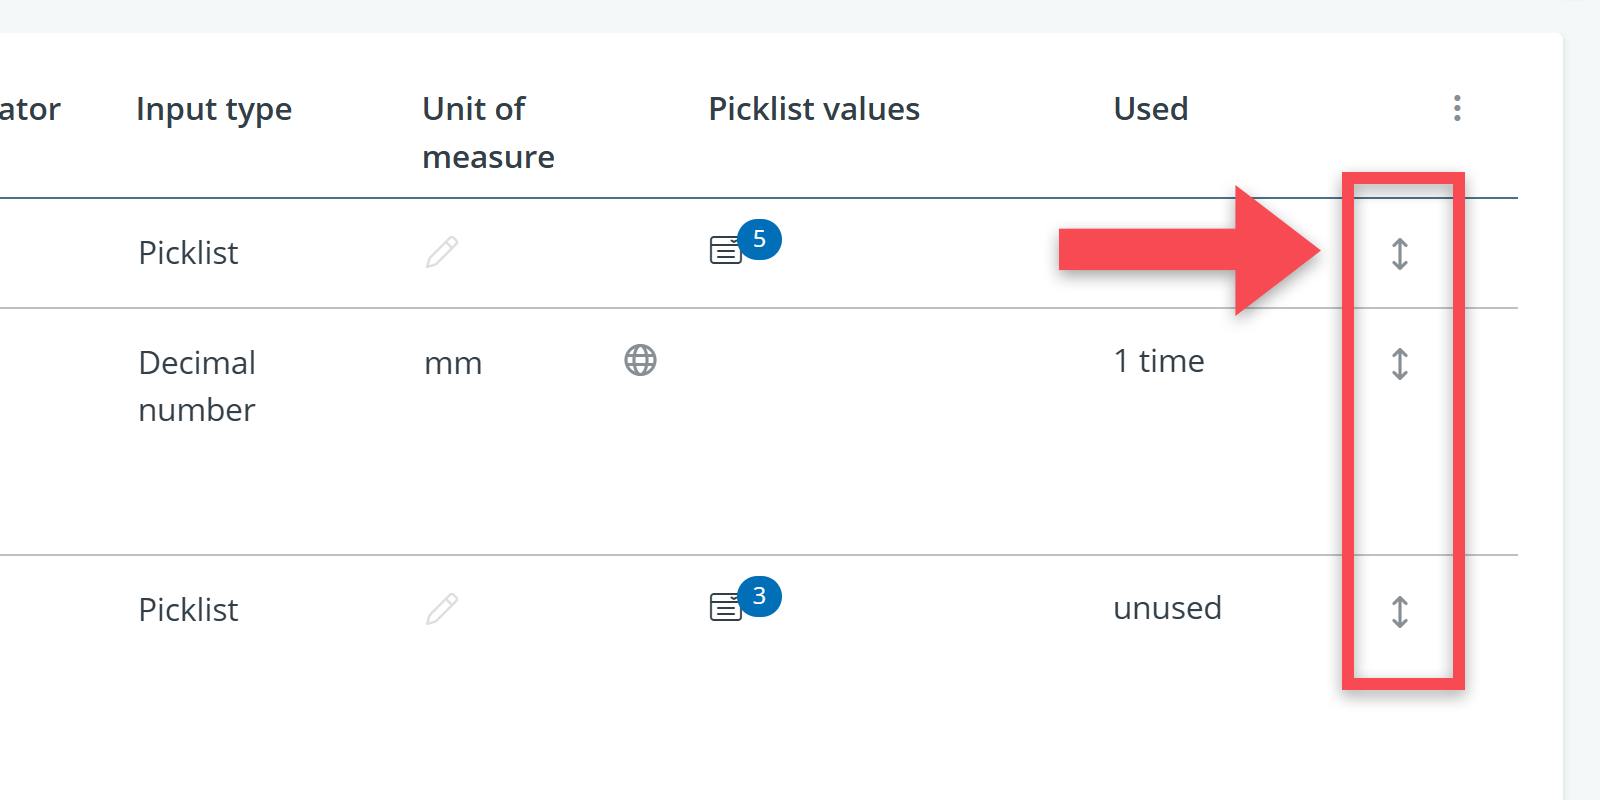
Relevant actions
Changing the sequence of properties
You can change the sequence of standard properties in the table by means of the little arrows behind it (). Click + hold with the left mouse button to move the properties to rows above or below.
Deleting standard properties
Properties can be removed by clicking on the icon next to a property. This opens a sub-menu with multiple options. Next, click on the icon to delete the property. You will get a warning notification to ensure that you actually want to delete that property.
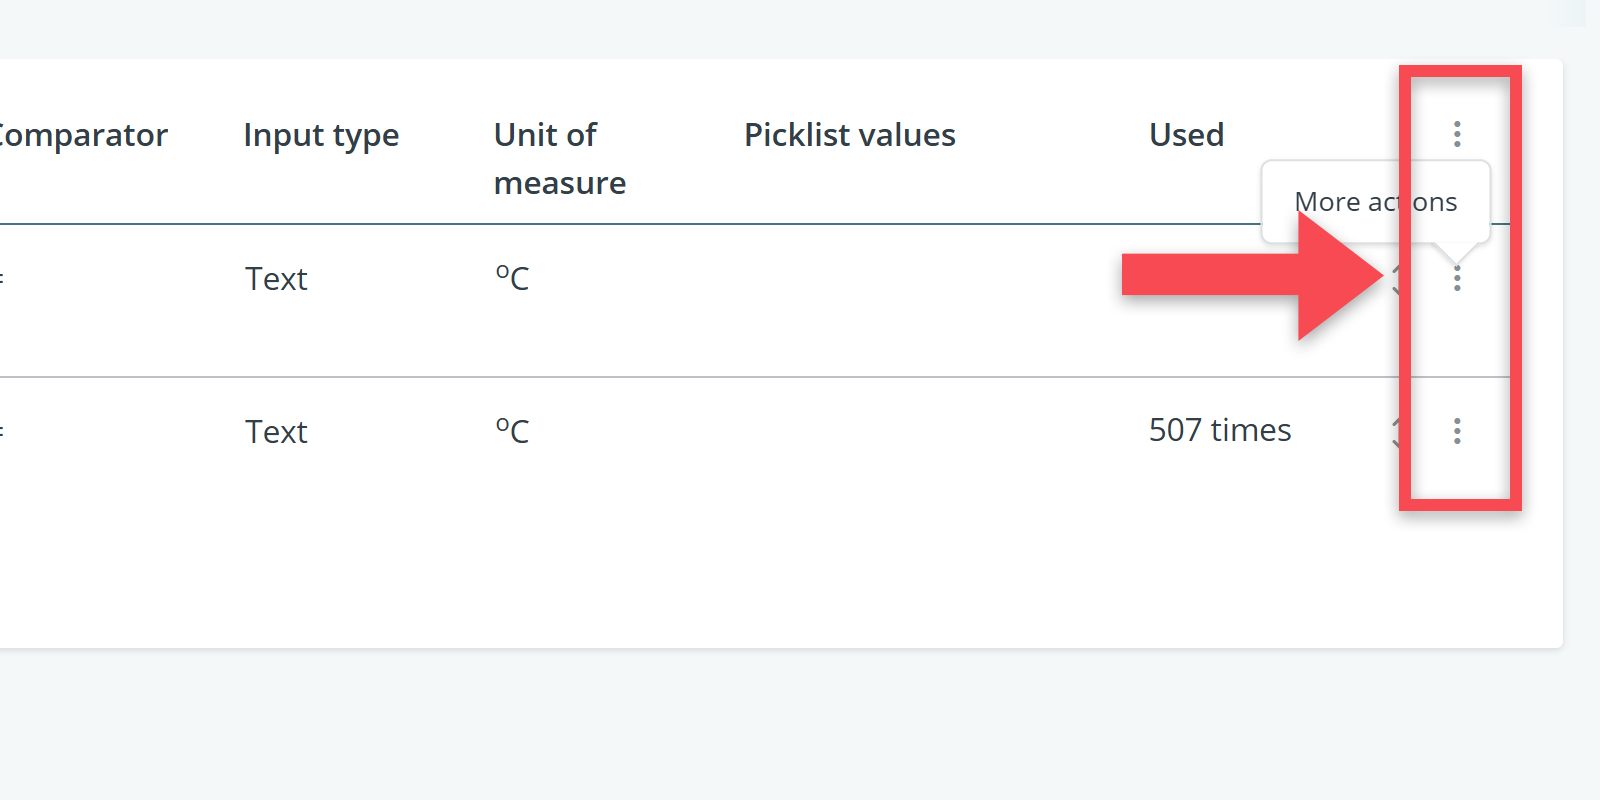
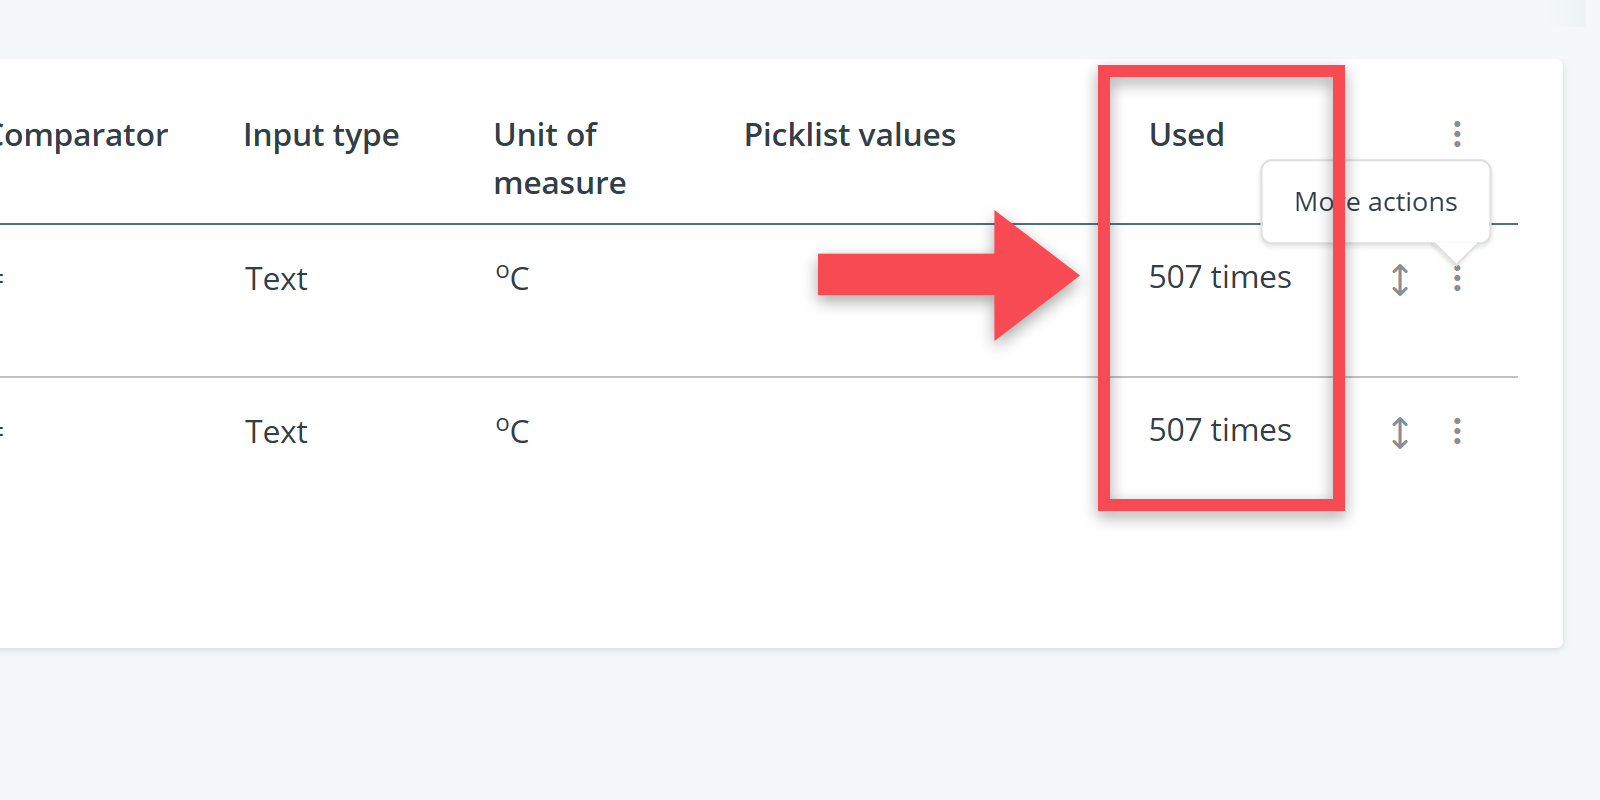
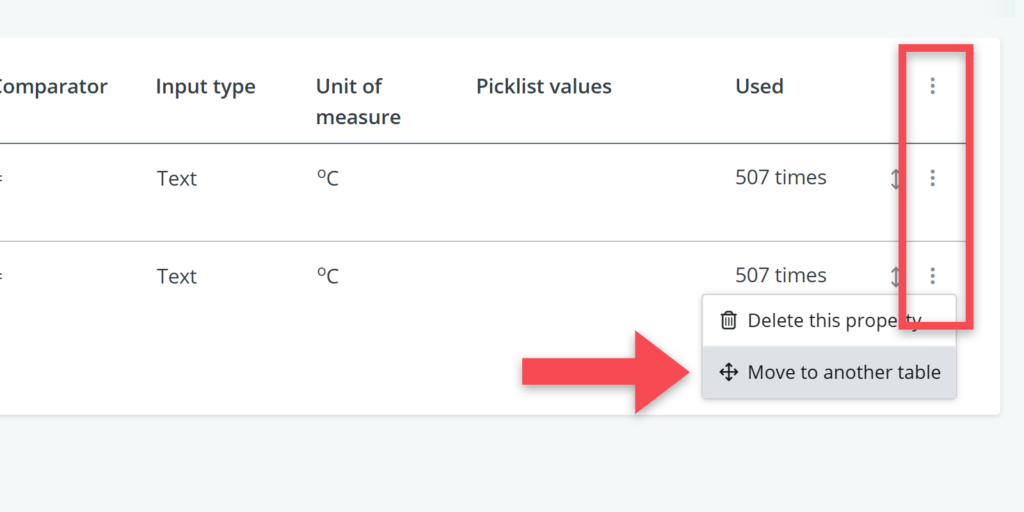
Moving properties to another table
Standard properties can be moved to another table within the same block. To do this, click on the icon next to the property, select Move to another table, and choose the target table from the dropdown list in the pop-up.
Importing standard property blocks
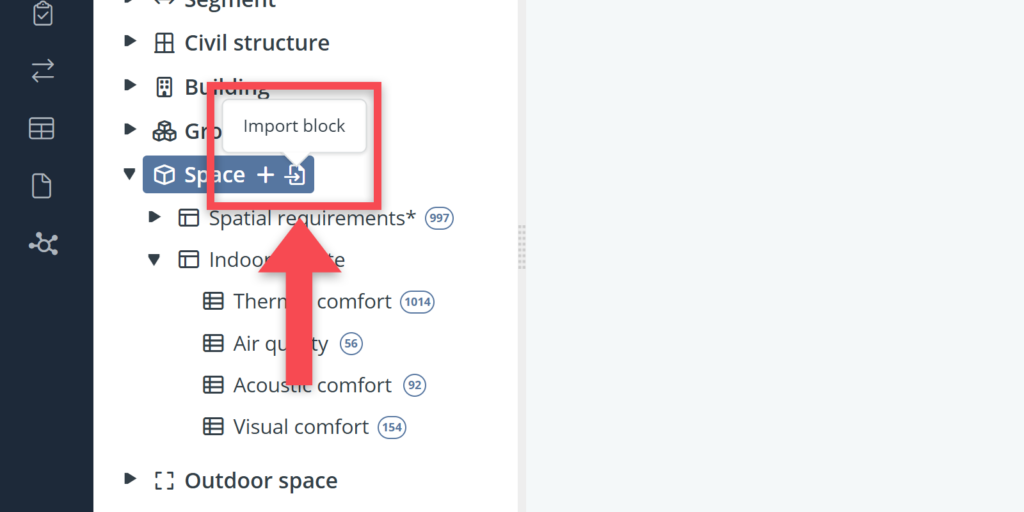
If you have a good set of standard properties in another project or in a library model, you can easily import these into your own model.
This can be done via the import property block button () in the settings tree next to an object.
When doing the import, the software checks whether there are properties in the source model and the target model that have the same name.
If that is the case—and if these properties are already in use in your model—none of your property attributes (description, input type, …) will be overwritten. The import action will only add data. This is to avoid changes to existing data.
But when properties have not yet been used in your model, you will get all the property attributes from the model from which you are doing the import.
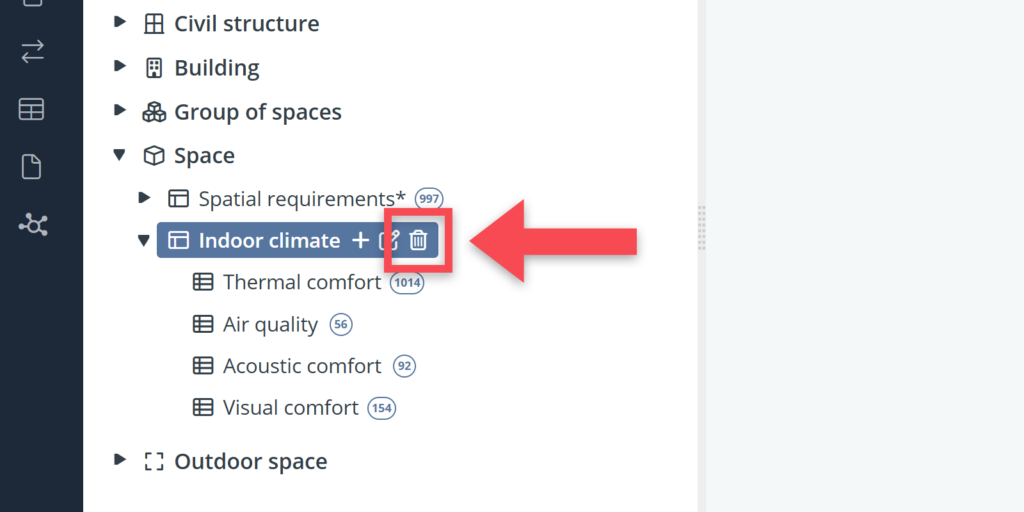
Deleting blocks and tables
To delete an entire block or table, click on the relevant block or table in the settings tree and click on the bin-icon.