Ideally, requirements do not change during a project, but every project manager knows that change cannot be avoided entirely, e.g. due to new insights, budget changes or regulatory changes. This does not have to be a problem, as long as change happens in a controlled way.
BriefBuilder’s RFC (request for change) functionality helps you with this. It allows you to systematically log, assess, and accept or reject change requests in relation to requirements.
This feature is typically used in design and engineering processes, allowing project participants (for example, contractors or architects) to request changes in the project brief.
It is also possible to use the RFC feature for contract management (such as Design & Build contracts), review processes (e.g., by internal stakeholders or external experts) and/or tender procedures (managing the requests of tenderers).
To make different uses possible, the RFC feature is flexible in its set-up. You can define your own RFC statuses (e.g. open, closed, …) and your own RFC properties (e.g. priority, impact, …) via the Settings menu.

Example of an RFC process
Below is an example of how an RFC is typically used in the interaction between a construction client and a design team. But, as said, the set-up is flexible and the feature can thus be used in different ways.
- When the project brief is ready, all edit rights are withdrawn so that nobody can make unauthorized changes.
- Members of the design team get permission to create RFCs.
- Members of the client team get permission to assess RFCs.
- When the design team wants to have a requirement changed, they create an RFC (with the status open).
- The client’s requirements manager looks in the RFC table for RFCs with the status open; these are awaiting an assessment.
- The requirements manager may also assign these RFCs to specific members of the client team, depending on what type of expertise is required for assessment.
- Those assignees get an email notification and then can assess the proposed change’s impact on the project (for example, on its budget and timeline).
- Based on their assessment, they add an assessment outcome (accepted/rejected) for each RFC.
- The design team then checks in the RFC table whether their requests have been responded to, and they review the assessments’ outcome.
- If the client’s assessment is clear, and properly implemented (in case of acceptance), project participants put the RFC’s status on closed.
- If the client’s assessment raises questions, or if an accepted RFC has not been properly implemented, they leave the RFC’s status open. In that case, they can add a comment to the RFC to discuss the RFC with the client, which should ultimately lead to the closing of the RFC.
As said, the above is just an example. Below, we will explain the practicalities of BriefBuilder’s RFC feature in a more generic sense.
You can also watch our tutorial video on the subject. Might be faster and easier than reading this article! 🙂
Creating RFCs
There are two ways in which you can create RFCs:
- In the RFC table: you first create an RFC and then link it to one or more requirements.
- On the detail view of an object: you create an RFC for a specific property.
Both will be explained below.
Creating RFCs in the RFC table
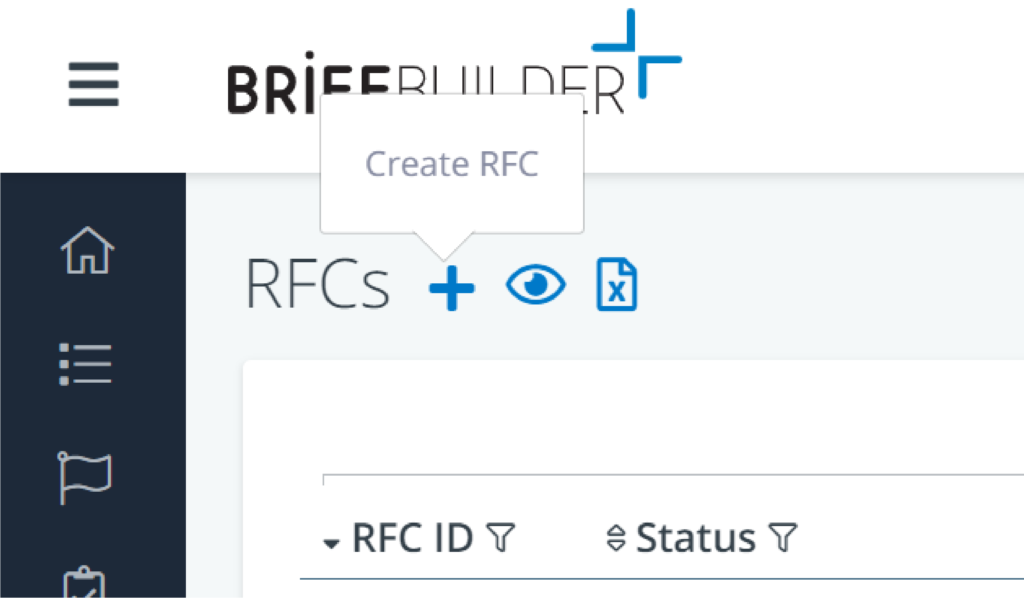
In the RFC table (Navigation menu > RFC > RFC table), you can create an RFC by clicking on the icon that you can find right next to the table’s name.
The newly created RFC then appears at the top of the RFC table. To work with it, you first have to click on it (in the column RFC ID).

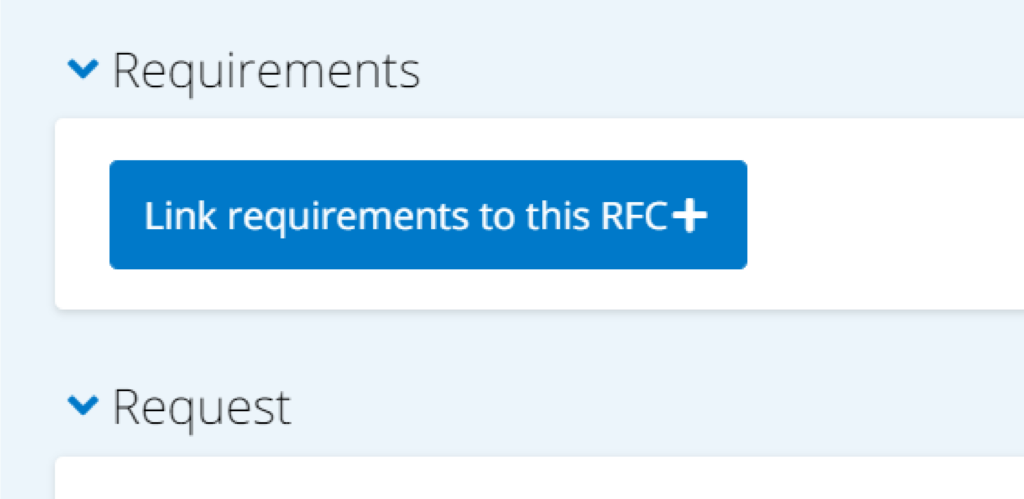
In the RFC’s detail view, you can then you link the RFC to one or more requirements by clicking on the button Link requirements to this RFC (or the icon). When doing so, you will get to a selection menu which you can use to find the relevant requirements.
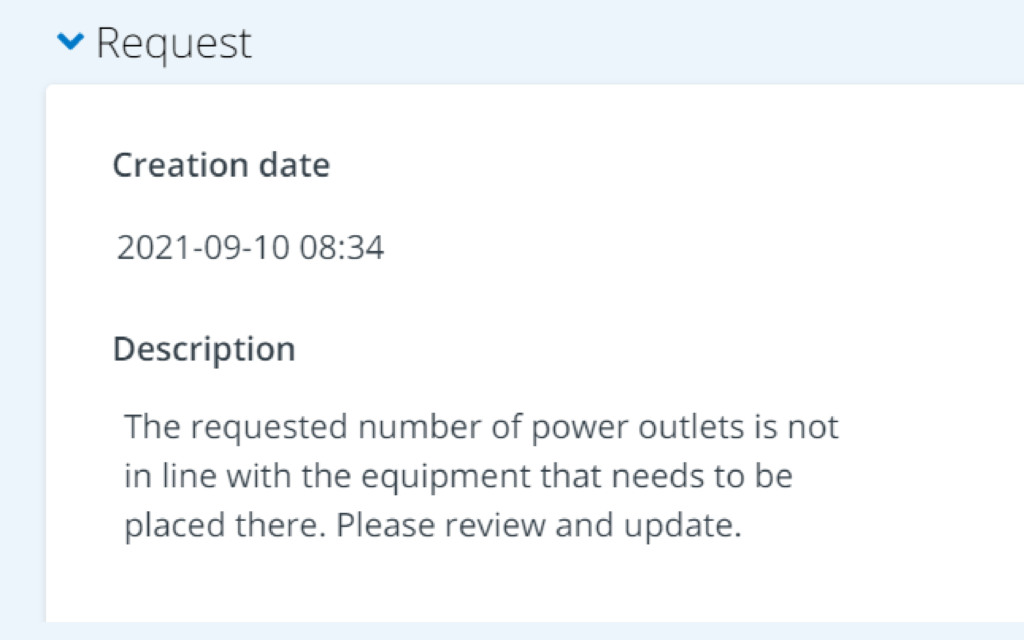
And then there is obviously the request itself: what needs to be changed and for what reason? This can be explained in the description field under request.
Creating RFCs on the detail view
You can create an RFC on the detail view of an object (e.g., a space or a system), behind the specific requirement that you would like to have changed.
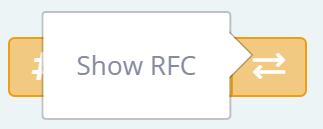
To do so, you first have to make sure that you see the RFC feature on your screen. This can be done by clicking on the fourth button of the view options in the upper right corner of the object’s detail view.
Once you have done that, you will see a small RFC icon () behind each requirement.
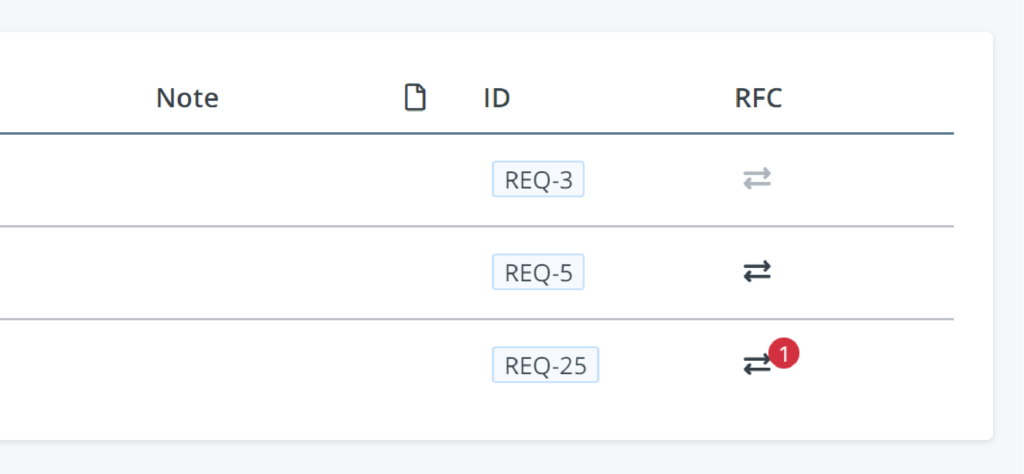
By clicking on the RFC icon, you go to the RFC list for that requirement. There, you can create an RFC by clicking on the Create RFC button. The list also shows earlier RFCs and their status (of which you can view the details by clicking on their ID or by clicking on the icon).
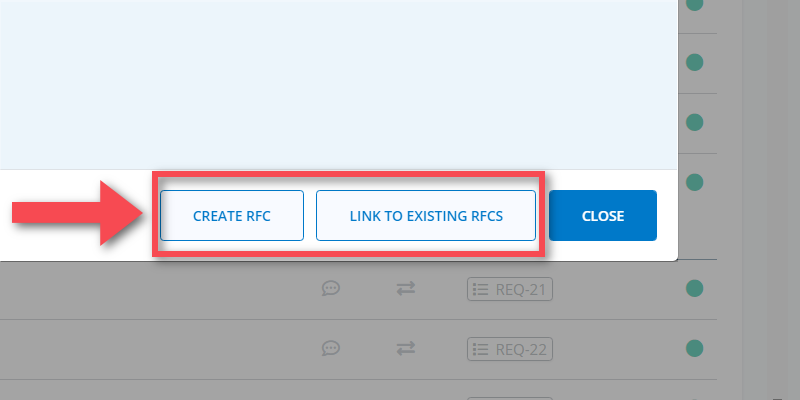
It is also possible to link requirements to existing RFCs on the detail view. Rather than creating a new RFC, you link the requirement you are viewing to an existing RFC in the list. You can do so by clicking on the Link to existing RFCs button.
Writing RFC’s
When you click on the Create RFC button, you get to see a screen in which you can fill in the RFC’s details. Most important is to explain what the desired change is. You can use the description field for this purpose.

If relevant, you can also upload documentation concerning your change request (such as a calculation of drawing that explains why a requirement needs to be changed). Depending on how the RFC feature has been set up, it may also be possible to indicate the RFC’s priority, or to add a link to a CDE/document management system.
All the created RFCs come together in the RFC table, where you can easily check whether your RFC has been responded to or not.
Assessing RFC’s
When you are responsible for assessing RFC’s, you will most often start in the RFC table where you can see if there are any RFCs that are awaiting an assessment. These are the RFC’s that do not yet have an outcome in the column Assessment. You can find these by using the filter “empty” in this column.
If you want to find the RFC’s that are explicitly assigned to you, you can use your own name as a filter in the column Person responsible.
You can also use the column Status to look up RFC’s that have “open” or “ready for assessment” (or something similar) as a status, depending on what kind of statuses have been defined in the settings menu.
When you have identified the RFC that you want to assess, you can click on the RFC ID, or the icon. When doing so, you will get a pop-up that is divided into two parts. The first part contains the details concerning the request, the second part is where you can add the assessment details.

The assessment details can differ per project, but in any case, you will have to fill in an assessment outcome (such as accepted or rejected), and ideally also a Note that explains why you have come to that conclusion.
If you have questions or comments concerning the RFC, you can use the comment function that you can find at the top of the RFC detail view.
Closing RFC’s
An RFC can be closed when there is no further action required. Closed is the ‘end state’ of an RFC.
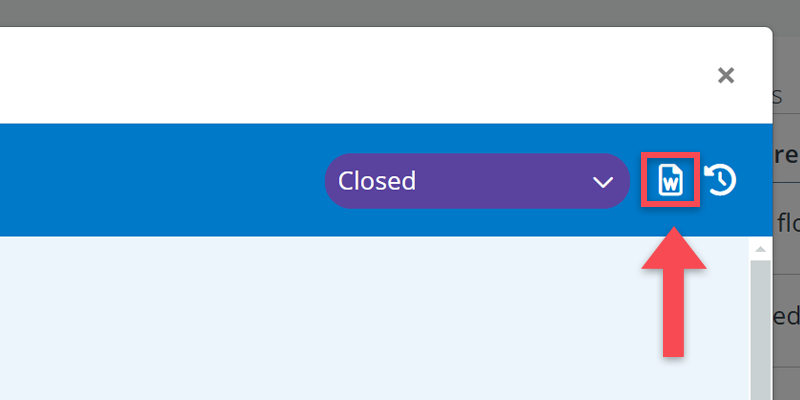
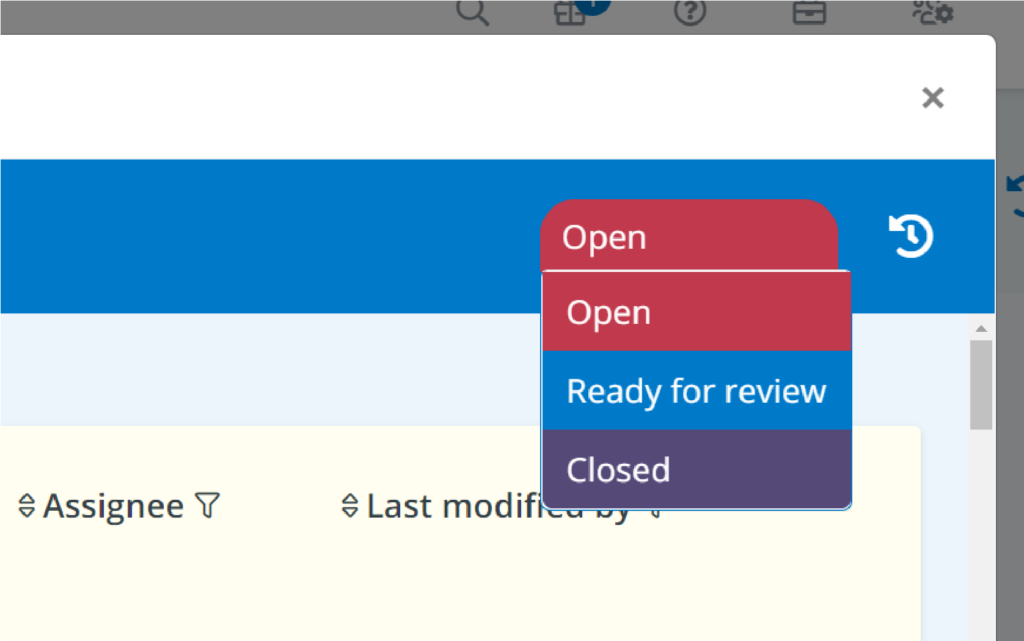
You can change the status of an RFC by clicking on the status button in the upper right corner of an RFC.
There are three possible reasons for closing an RFC:
(1) RFC is rejected
It can be that the RFC is rejected, for example because of its impact on the project’s budget. If this assessment is not leading to further questions, the RFC can be closed. If there are questions, it is best not to close the RFC yet and to use the comment feature to contact the person that has assessed the RFC.
(2) RFC is accepted (and properly implemented)
The second possible reason for closing an RFC is that it has been accepted. In that case, however, the recommendation is to first check whether the requested change has been properly implemented.
You can check this by clicking on the RFC, looking in the Requirement field whether there have been any changes. If a change has been implemented, you will see two requirements:
- the current requirement, and, underneath it,
- the earlier requirement (the requirement as it was when the RFC was created).

You can compare these two to ensure whether the proposed change has been properly implemented. Please note there may be multiple RFCs for a single requirement, so it can also be that a requirement has changed in relation to another, perhaps more recently created RFC. This can easily be checked. To do so, filter on that requirement in the RFC table, or go find the requirement in question in the model via the search function.
(3) RFC is no longer relevant
It can also be that an RFC is no longer relevant, which is an obvious reason for closing it, or even deleting the entire RFC.
An RFC may no longer be relevant because
- the requirement has changed after the RFC was created;
- the requirement or the object no longer exist;
- there are newer RFCs that are more relevant.
To check the relevance of an RFC, you can compare the current requirement with the requirement as it was when the RFC was created (as mentioned earlier).
Commenting on RFC’s
Just like elsewhere in BriefBuilder, it is possible to create comments for RFCs, to assign these to particular users, and to answer comments.
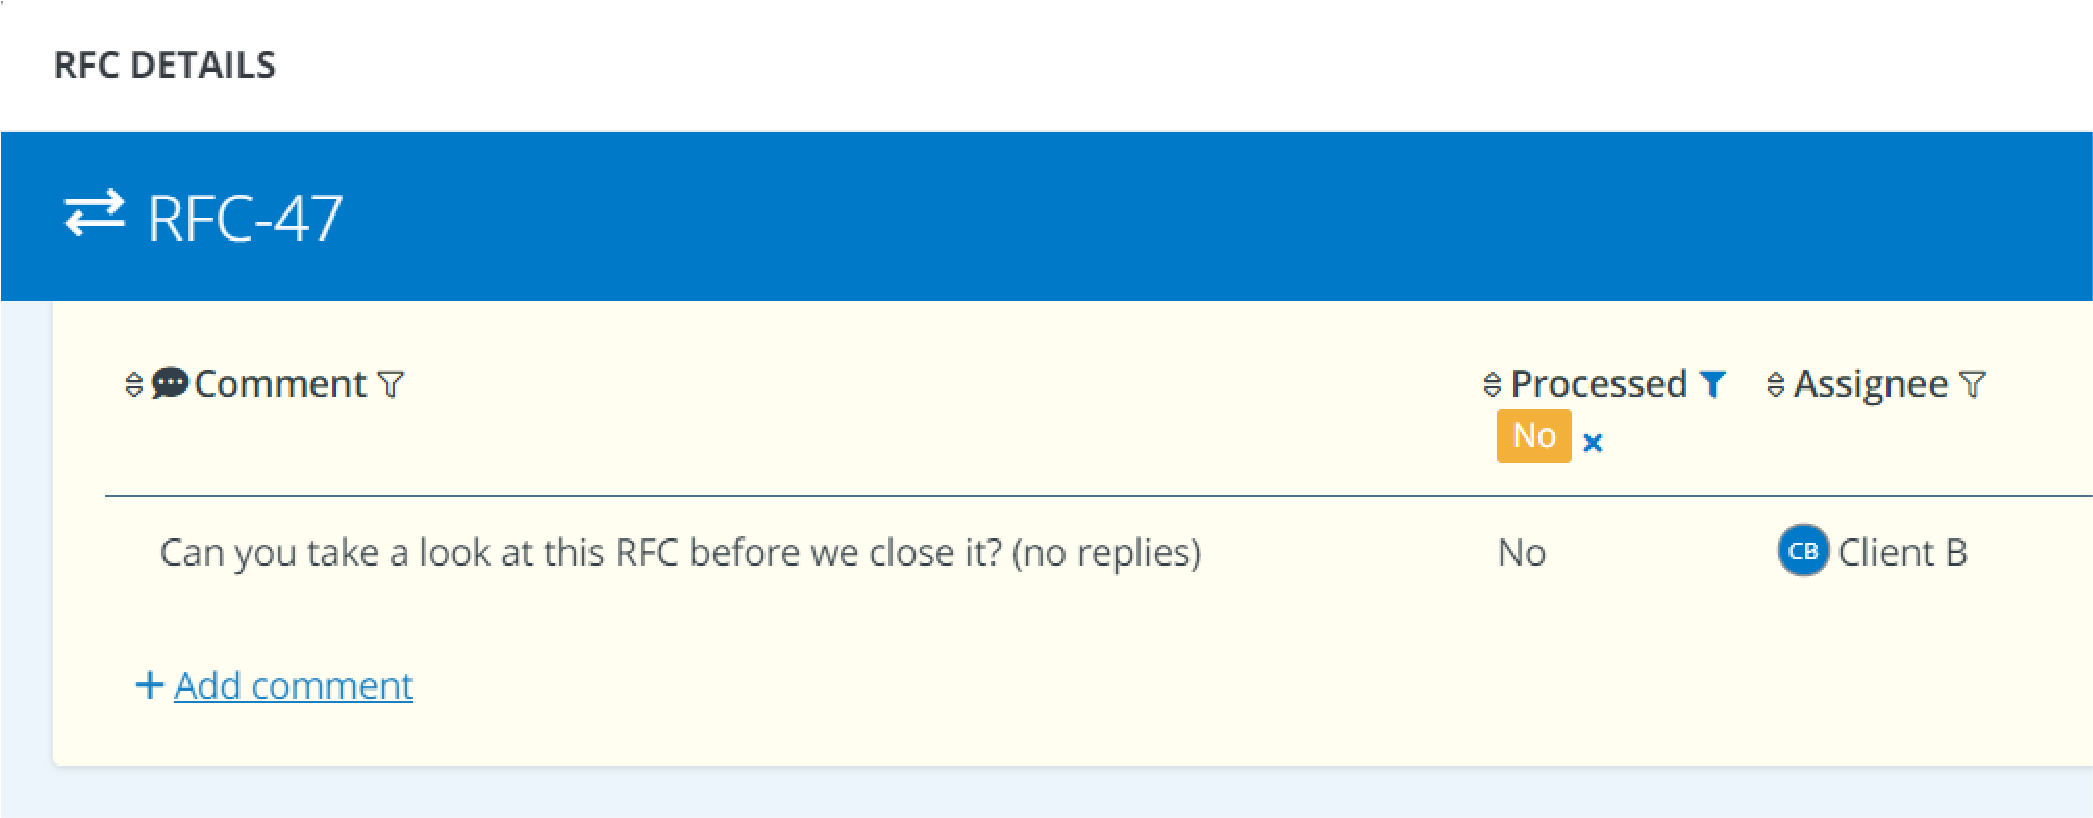
This functionality will typically be used for the more informal communication around an RFC. Think of comments like, “Can you add some more detail to your RFC?” or “We have changed the wording, please take another look” or “Can we close this issue?”
For a general explanation about how to work with comments, see here.
RFC history
To see how an RFC has evolved over time, you can click on the button (‘show object history’) in the upper right corner.
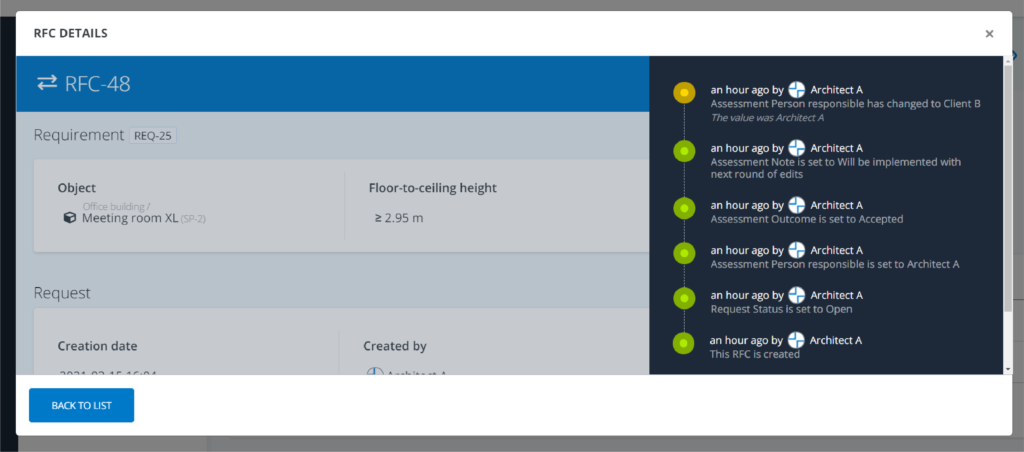
When doing so, you’ll see the RFC’s history data concerning its creation, status and the different property values, indicating who has done what and when.
The RFC table
All RFCs concerning a project can be found in the RFC table (which can be accessed by clicking on RFC Table in the navigation bar).

The table features several filtering and sorting options that you can use to find the RFCs that you are looking for. See below for some examples.
When your role is to assess RFCs, and you want to find the RFCs that you still need to assess, you should:
- Apply the filter option ‘open’ in the column Status
- Apply the filter option with your own name in the column Person responsible
- And then apply the filter ‘empty’ in the column Assessment
When you have created one or more RFCs and you are curious whether these have already been assessed, you should:
- Apply the filter option ‘open’ in the column Status
- Apply the filter option with your own name in the column Created by
- And then apply the filter option ‘not empty’ in the column Assessment
All of this depends obviously on how the RFC feature has been set up.
If you want to know more about a particular RFC that you see in the table, you have to click on the RFC’s ID or on the icon at the end of a row.
To find RFCs that concern requirements or objects that have changed or have been removed, you can use the filter changed (the icon) in the RFC table.
Those RFCs are in most—but not all—cases no longer relevant, and thus obvious candidates to be put on ‘closed’.
RFC Dashboard
The RFC information is also available on a dedicated dashboard. Each RFC attribute (status, responsible, outcome, etc.) is presented there as a pie chart.

RFC settings
In the Settings menu, you can adjust properties for both the request and the assessment part of the RFC.
You can find the RFC settings menu under Attributes in the main navigation bar (Settings > Attributes > RFC).

In the RFC settings tree you can select request or assessment. Selecting one of the two, or clicking on the small arrow next to the object types, will expand the settings tree. Below each object type you will see one or more property tables.
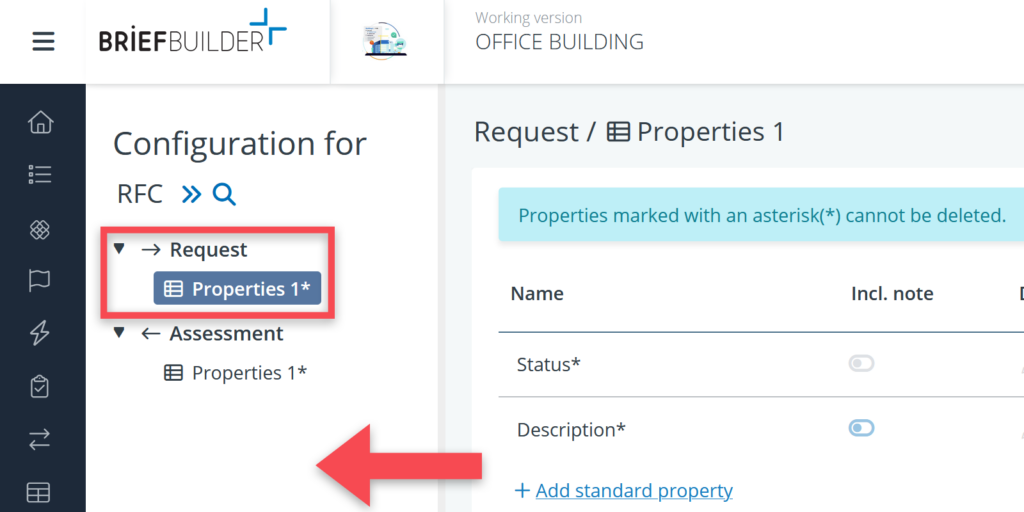
When you select a table you can see the standard properties in the detail view on the right. Here you can easily add and edit properties.

See below for examples and suggestions for properties for both RFC Request and RFC Assessment.
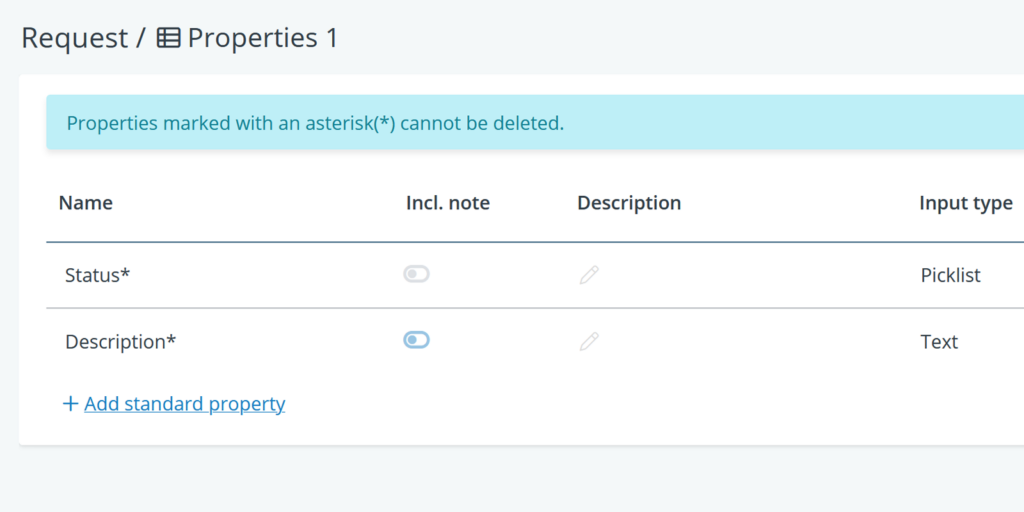
RFC – Request
The standard set-up has two properties that cannot be deleted (although it is possible to rename them):
| Status | This property is used to indicate whether an RFC is open (sometimes also referred to as ‘active’) or closed (the end state of an RFC). You can rename these if you wish, but make sure that their meaning remains more or less the same because they both have particular function in the application. The open status is the default status for a new RFC, and the closed status is used to calculate how many RFCs still require some kind of user action. This number shows up in the little red dot behind a requirement. You can also add more statuses, such as concept or ready for assessment. Remember, however, that it is only users with request permissions who can change an RFC’s status. |
| Description | This property is the text field where RFC creators can describe what needs to be changed about a requirement and why. This property can be renamed, but not deleted. |
Depending on the specific needs and workflow in your project, you can add more properties if you wish to. See below for some examples.
| Link to CDE/DMS | If there is a document management system in use in the project where more general RFI/RFCs are being administered, you may want to create a dedicated field where you add url/links to particular RFC/RFI documents in that CDE. |
| Priority | If there are a lot of RFCs in a project, you may want to have a possibility to prioritize them, with options such as high, medium, and low (to be able to do so, you must choose picklist as input type). |
| Responsible person | It might also be possible that you want a second (or even a third) person to review an RFC request before it is official. In that case you have to add properties that have user as input type. Please note that it is not possible to enforce a particular workflow in BriefBuilder. For example, the application cannot dictate that an RFC needs to have an approval before it can be assessed. |
| Type | Perhaps you want to differentiate between different types of requests. You can, for example, create picklist values such suggestion for improvement and correction of error. |
RFC – Assessment
The standard set-up for assessment consists of three properties:
| Person responsible | This property can be used to assign an RFC to a particular person. It is an optional property, however, that can be deleted if not needed. You can also add extra properties with user as input type, if you want more persons to be involved in the assessment. |
| Outcome | This property can be used to summarize the answer to the request with two default values: Rejected (the requested change will not be implemented) Accepted (the requested change is accepted) You can change the names of these statuses and you can add more outcome categories if you need to. |
| Note | This is a text field that can be used for explaining the reasons for the assessment. |
Depending on your needs, you may want to add more properties. For example:
| Impact | You may want to add this property as a kind of assessment categorization, with picklist values like high, medium, and low. You are also able to add a description for every individual picklist option, as well. Some projects even feature three different properties: – Impact on budget – Impact on timeline – Impact on functionality, each with their kinds of values (e.g., high, medium, low) |
RFC permissions
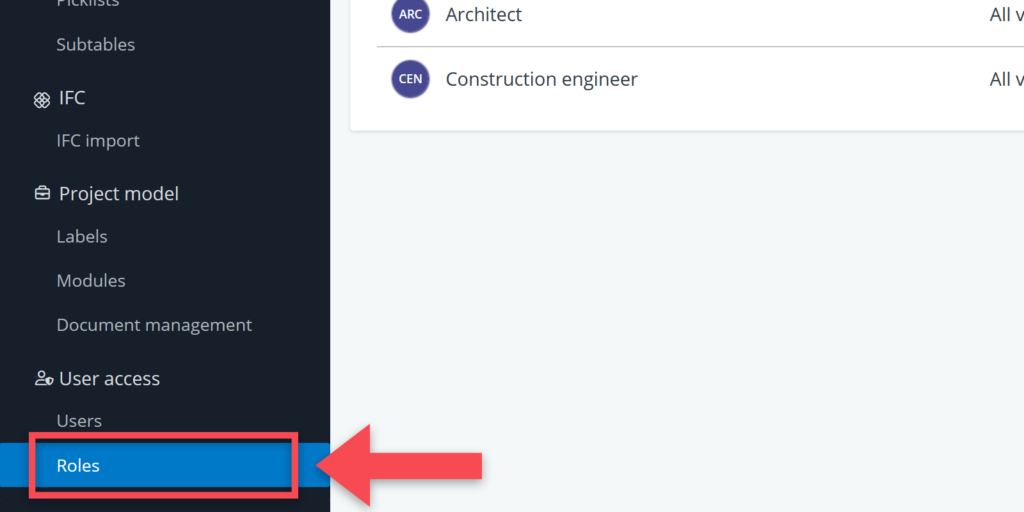
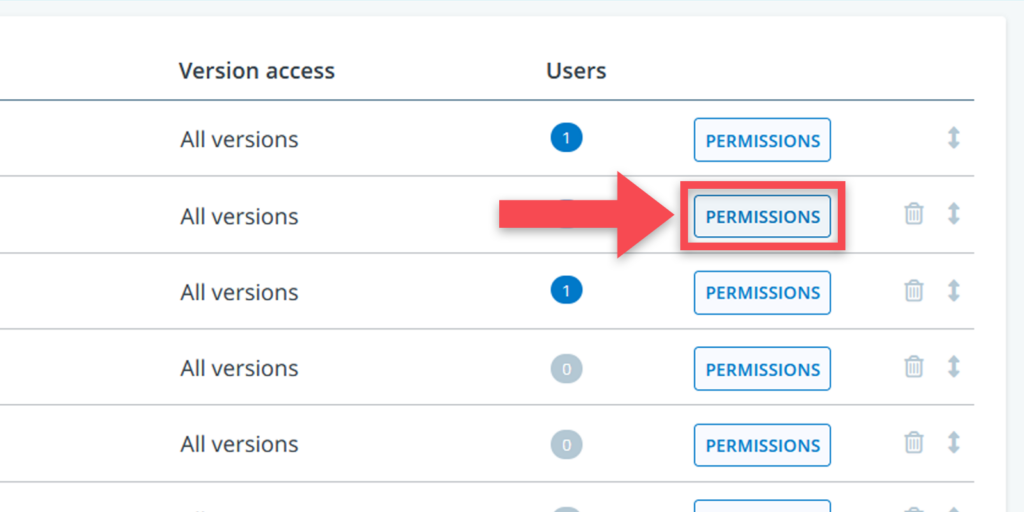
BriefBuilder has a simple set-up for permissions concerning RFCs, which can be managed via the roles Settings menu in your project model, via the button permissions.
In the permissions overview, you can see two rows dedicated to RFC’s: RFC request and RFC assessment.
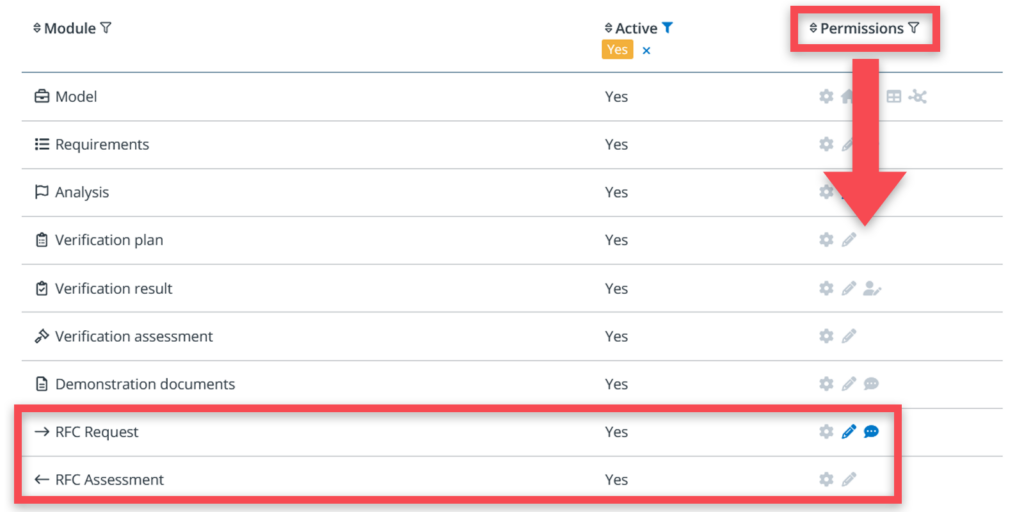
In these rows, you can define, for each role in your project, what the relevant RFC permissions are. You have the following possibilities:
RFC Request
| Configure | allows users to configure the RFC request set-up via the Settings menu, including the possible statuses |
| Edit | allows users to create and edit RFC requests |
| Comment | allows users to make comments to RFCs |
RFC Assessment
| Configure | allows users to configure the RFC assessment set-up via the Settings menu, including the possible outcomes |
| Edit | allows users to create and edit RFC assessments |
Requirements manager
Furthermore, it is important to mention the role of the requirements manager in relation to RFCs.
It is the requirements manager that typically sets up the RFC structure. Furthermore, they are often the one that manages the entire list of RFCs, such as deleting or closing RFCs that are longer relevant.
With the requirements management role, you can:
- Define the RFC settings
- Create RFC’s
- Edit both the request and the assessment part of RFC’s
- Create and answer comments concerning RFC’s
- Delete RFC’s (including RFCs from others)
Please note that all the project participants’ actions concerning an RFC can be traced via the history button of an RFC.
Email notifications
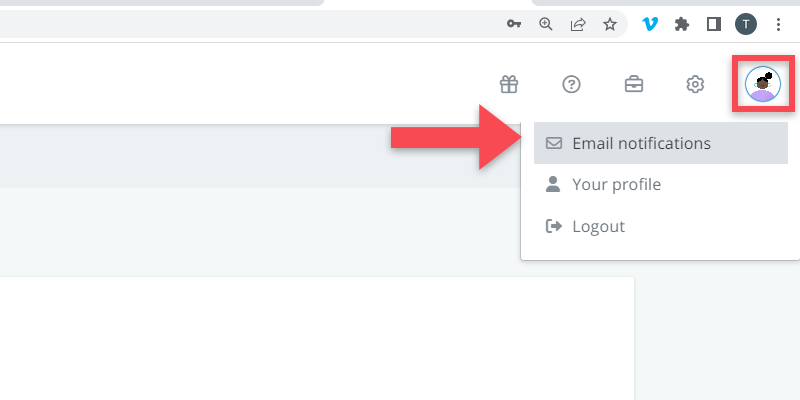
As user, you can choose whether you want to be notified by email when someone refers to you, or your role, or your organisation, in an RFC, or when that RFC changes status.
You can do so under your own profile (upper right corner of the application), where you will find a button email notifications.
More info about this can be found here.
RFC reports
There three options for exporting RFC information from BriefBuilder to Word and Excel.
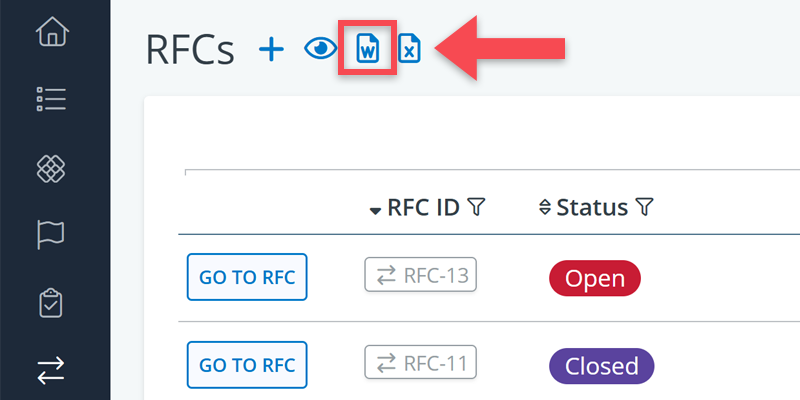
(1) Word report of all RFCs
If you want all your RFCs together in one Word report, you have to do the following:
- In the navigation menu, go to RFC > RFC table.
- In the table, find the Word icon next to the table’s header (see screenshot below).
- If necessary, adjust the report settings (e.g. choosing landscape instead of portrait).
- Click on Generate.
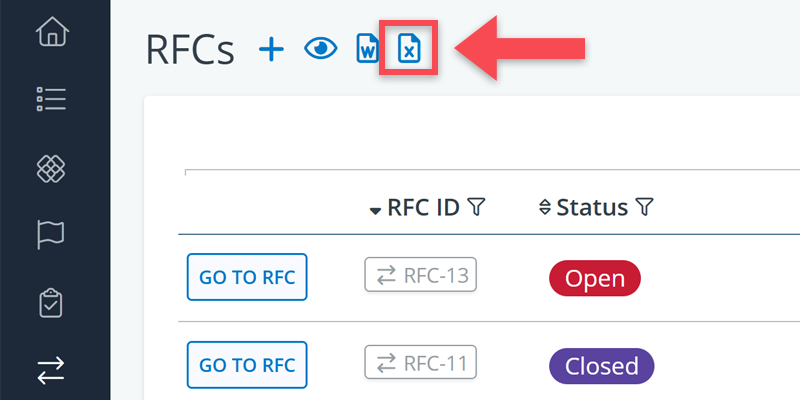
(2) Excel report of all RFCs
The same process as above. Just select the Excel icon this time (see screenshot below). You will get an Excel version of the table that you are looking at in BriefBuilder. Click here for a detailed explanation.
(3) Word report of an individual RFC
Want a Word report of a specific RFC?
- Find the relevant RFC (either in the RFC-table or on the detail view of the object it concerns)
- Open the RFC and click on the Word icon in the upper right corner (see screenshot below)
- If necessary, adjust the report settings (e.g. choosing landscape instead of portrait).
- Click on Generate.