
Introduction
Classifications and numberings can be used to identify and categorize objects in models. BriefBuilder provides a dedicated table for this purpose. This table allows you to add one or more classifications or numbers to an object (e.g. Uniclass, OmniClass, SfB, CCI, and so on).
In his article, we will explain how it works.
Defining classifications/numberings
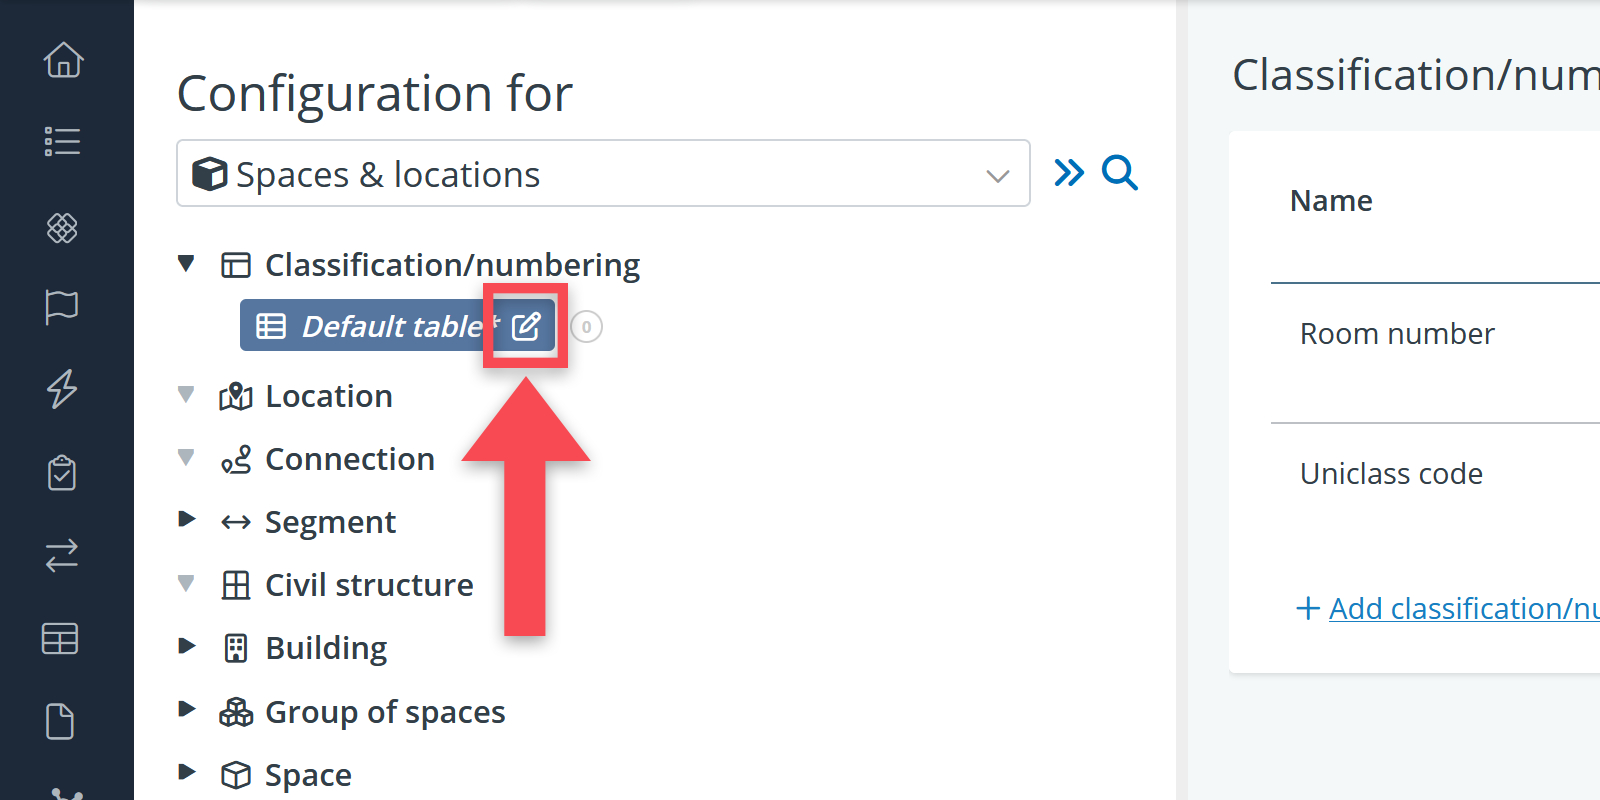
The definition of classification/numbering properties goes in pretty much the same way as you do with standard properties. In this case, you have to go to classification/numbering in the settings menu:
!) Go to Settings > Attributes > Requirements
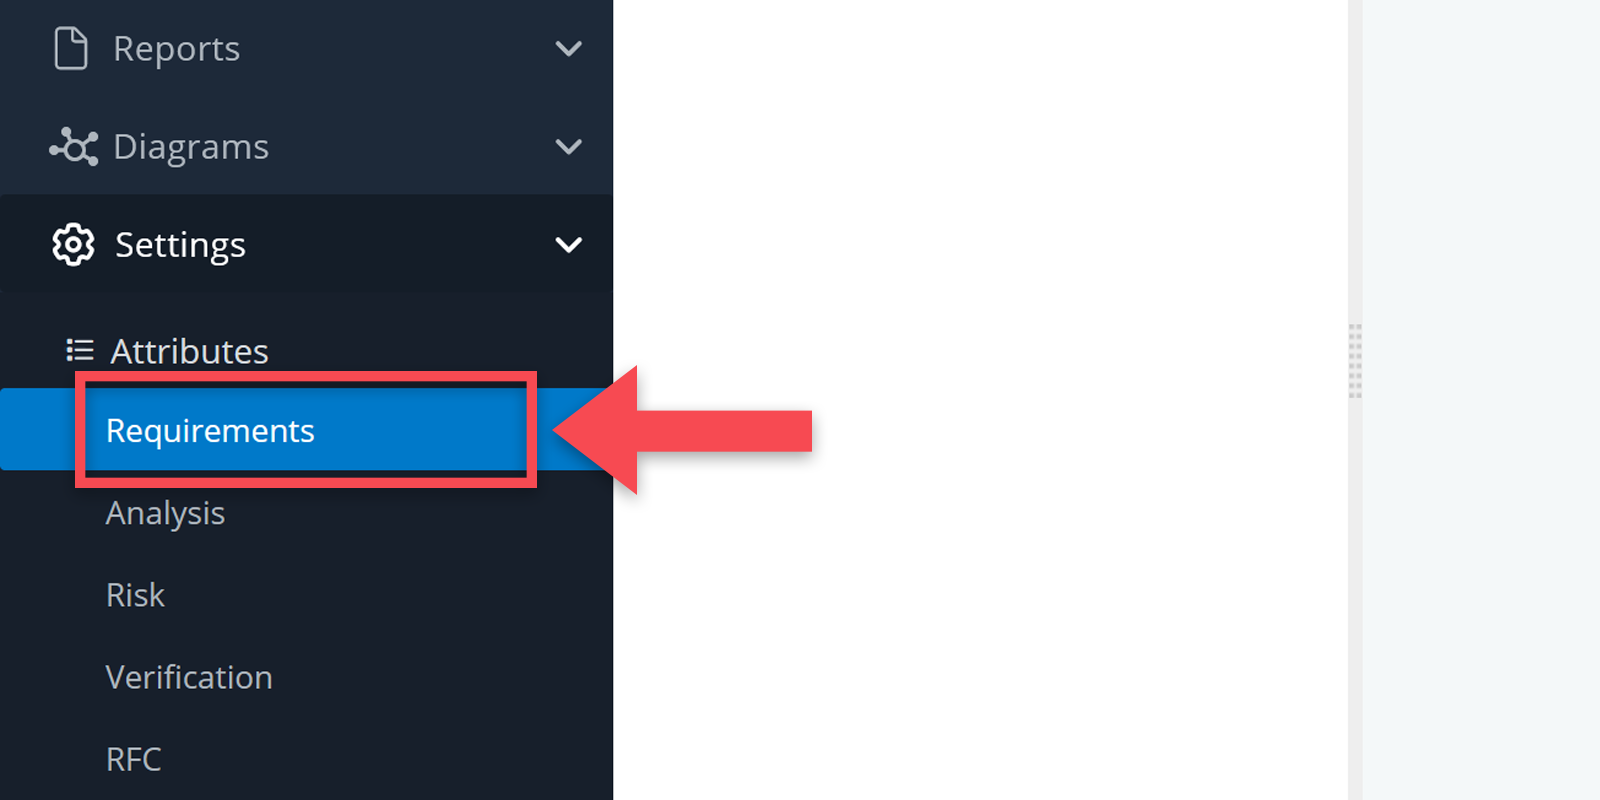
2) When there, you have the select the tree for which you want to add a classification or numbering.
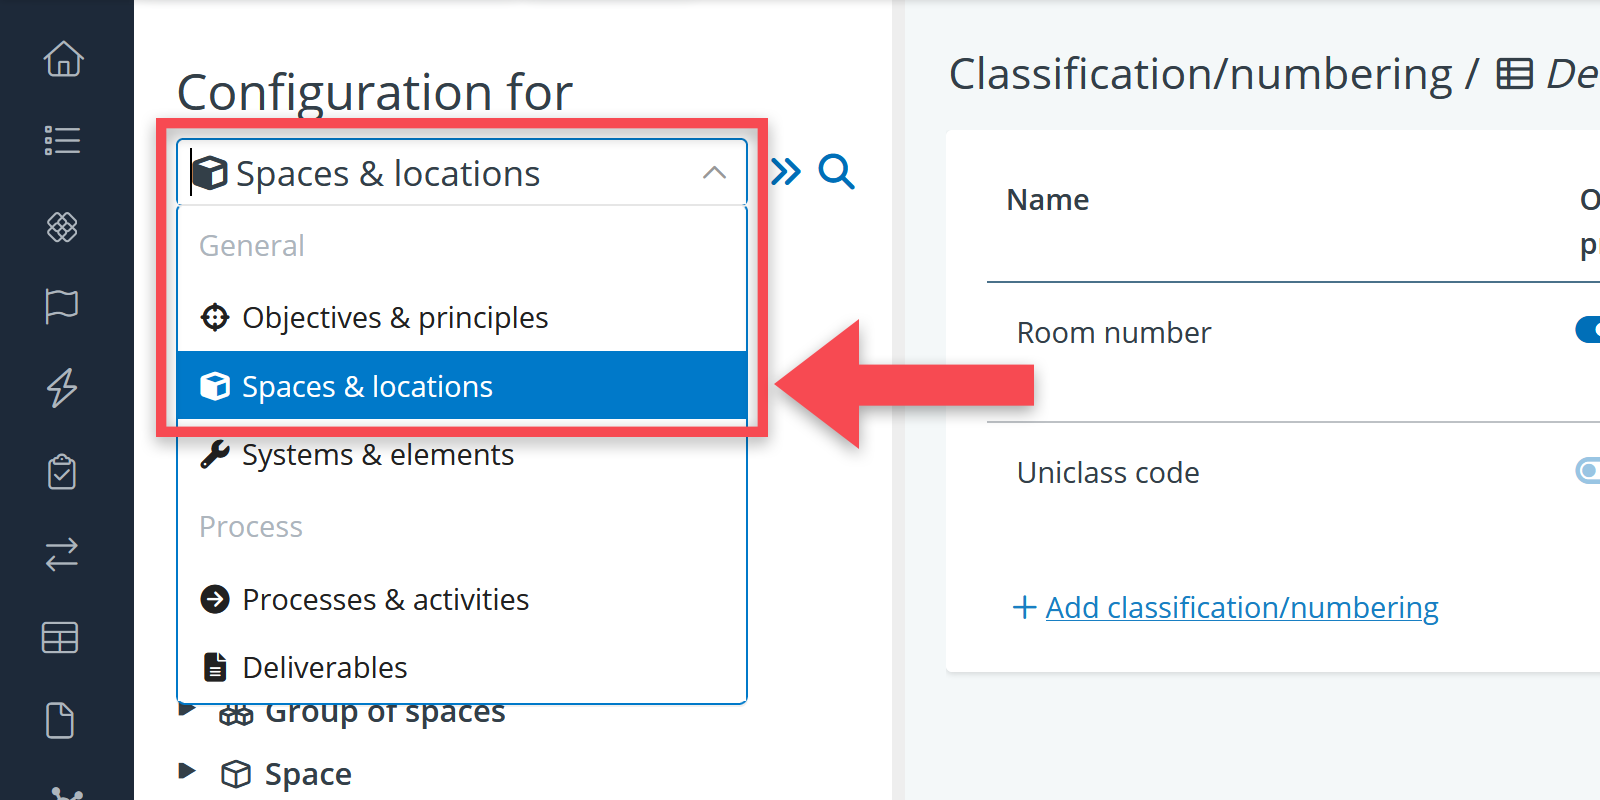
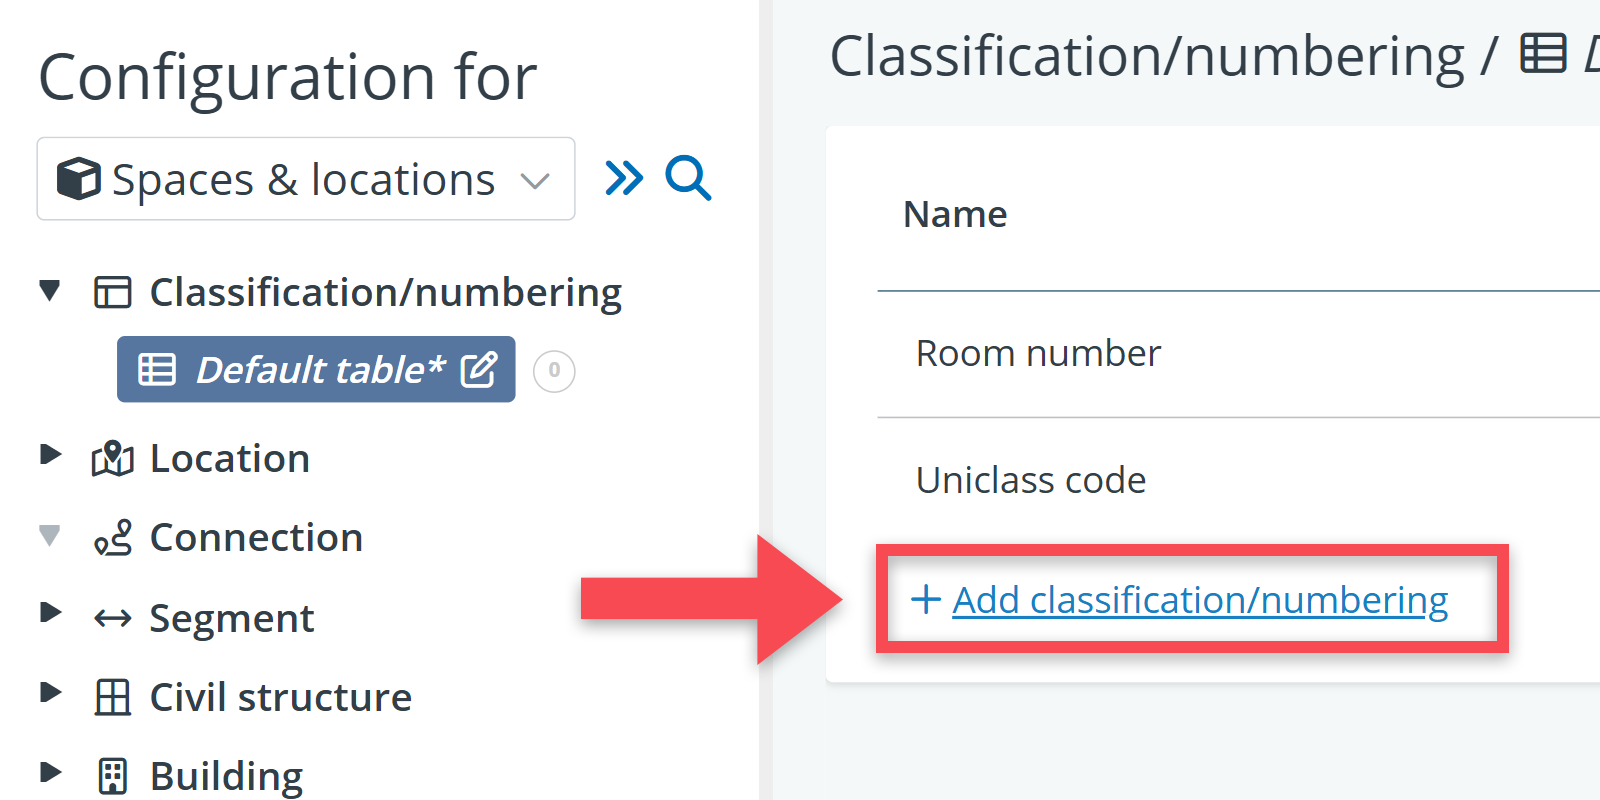
3) In the settings tree, select the Classification/numbering settings object and then the property table (called Default table if not renamed).
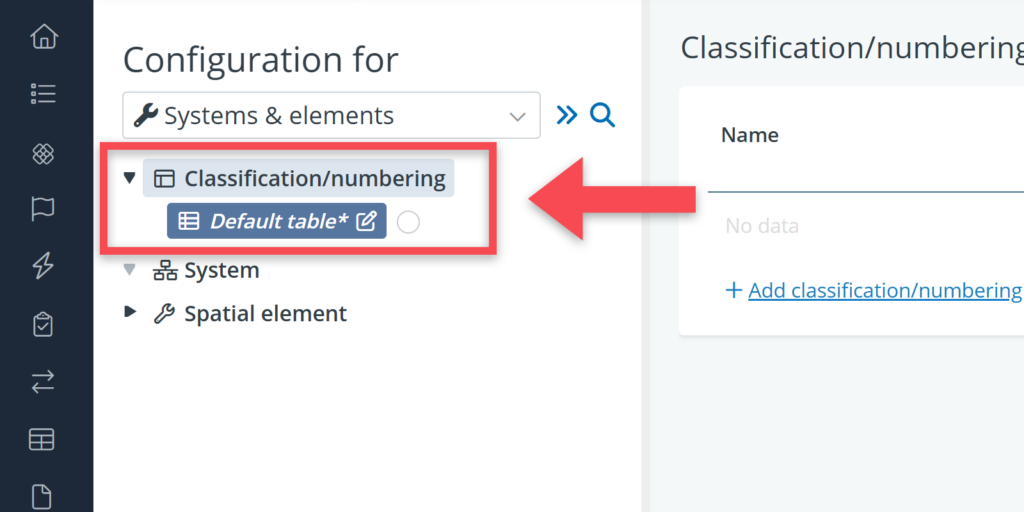
4) Once you have done that, you can easily add classifications or numberings by clicking on + Add classification/numbering on the pane on the right hand side.
5) For each classification or number that you add, you can add an explanatory text about its purpose or background. This can be done in the description field.
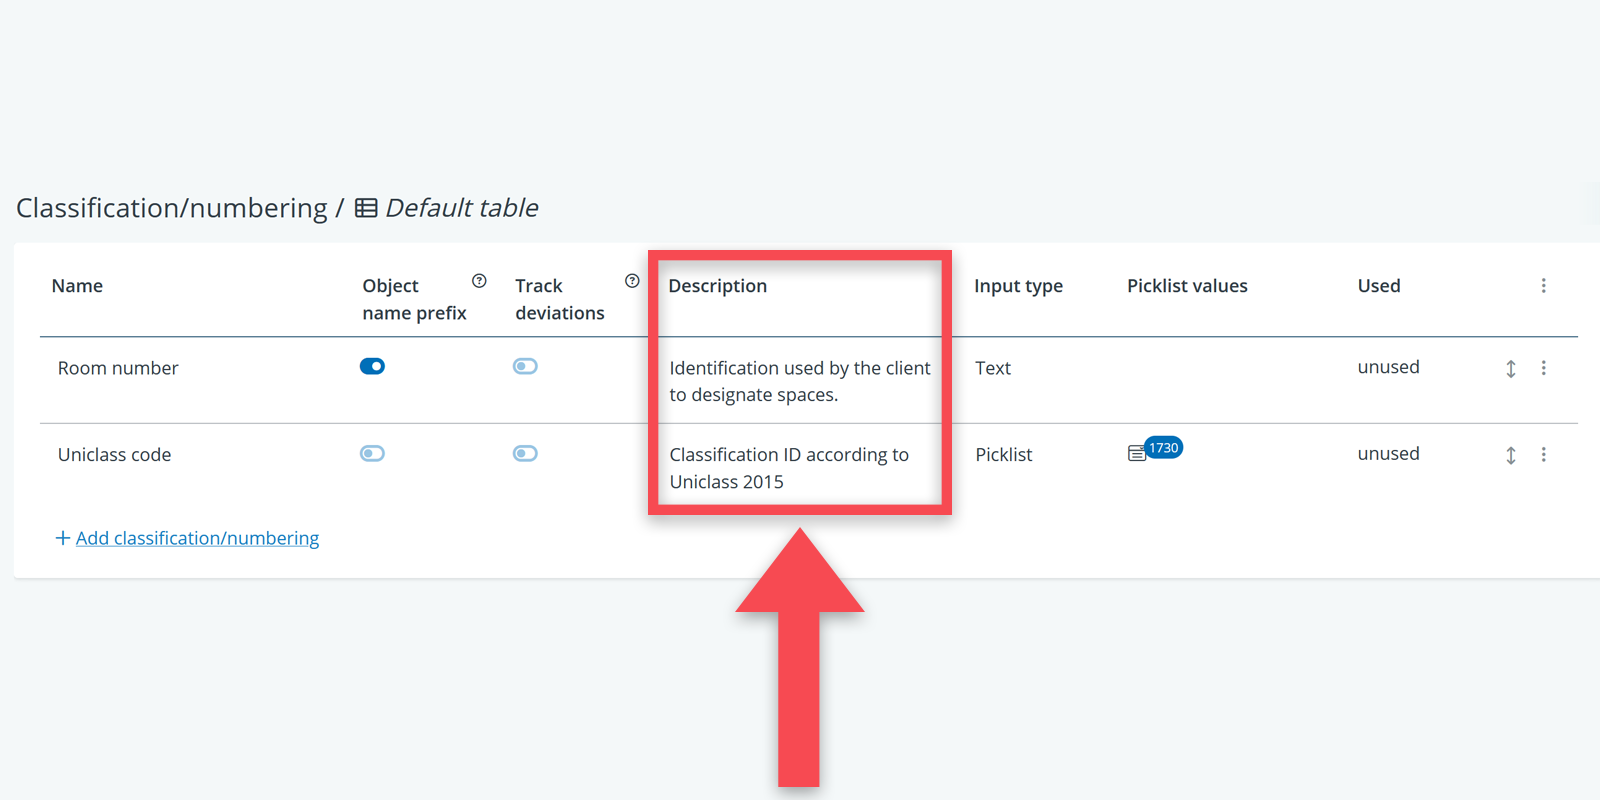
6) Optionally: you can also change the table header.
The default name is Classification / numbering, but for the spaces & locations tree, you may for example want to change it into Space/location number. Or for the systems & elements tree, you may just want to call it Classifications. You can do so by clicking on the edit button for the property block (see screenshot below).
Using classifications/numberings as prefixes
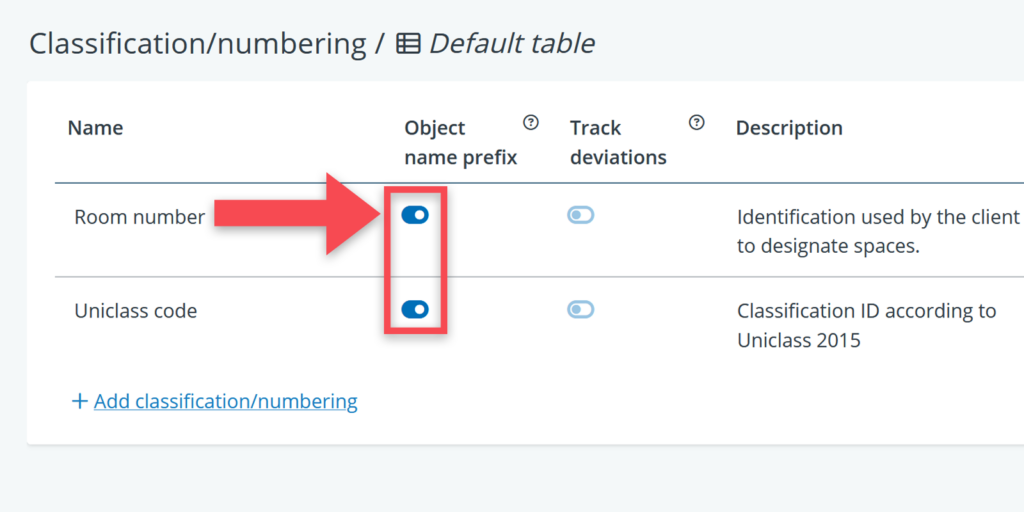
It can be practical to show the used classifications/numbers in the objects’ names in your model.
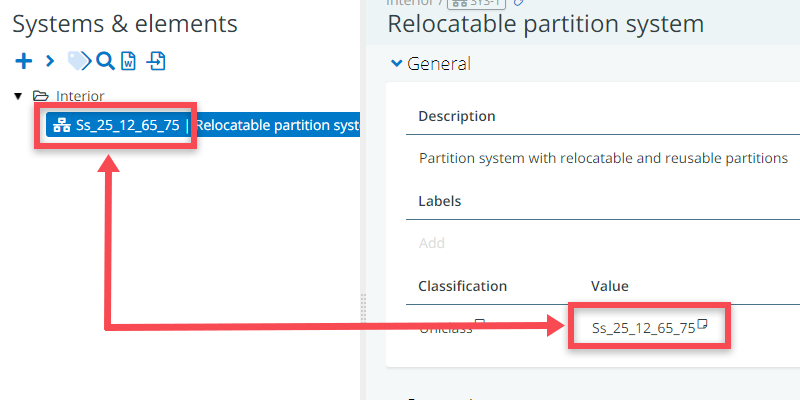
For example: if you have an object called Relocatable partition systems, and it is classified as Ss_25_12_65_75, you may want to show this as Ss_25_12_65_75 │ Relocatable partition systems in your model.
This can easily be done by adjusting the toggle Prefix object name for the relevant classification/numbering property.
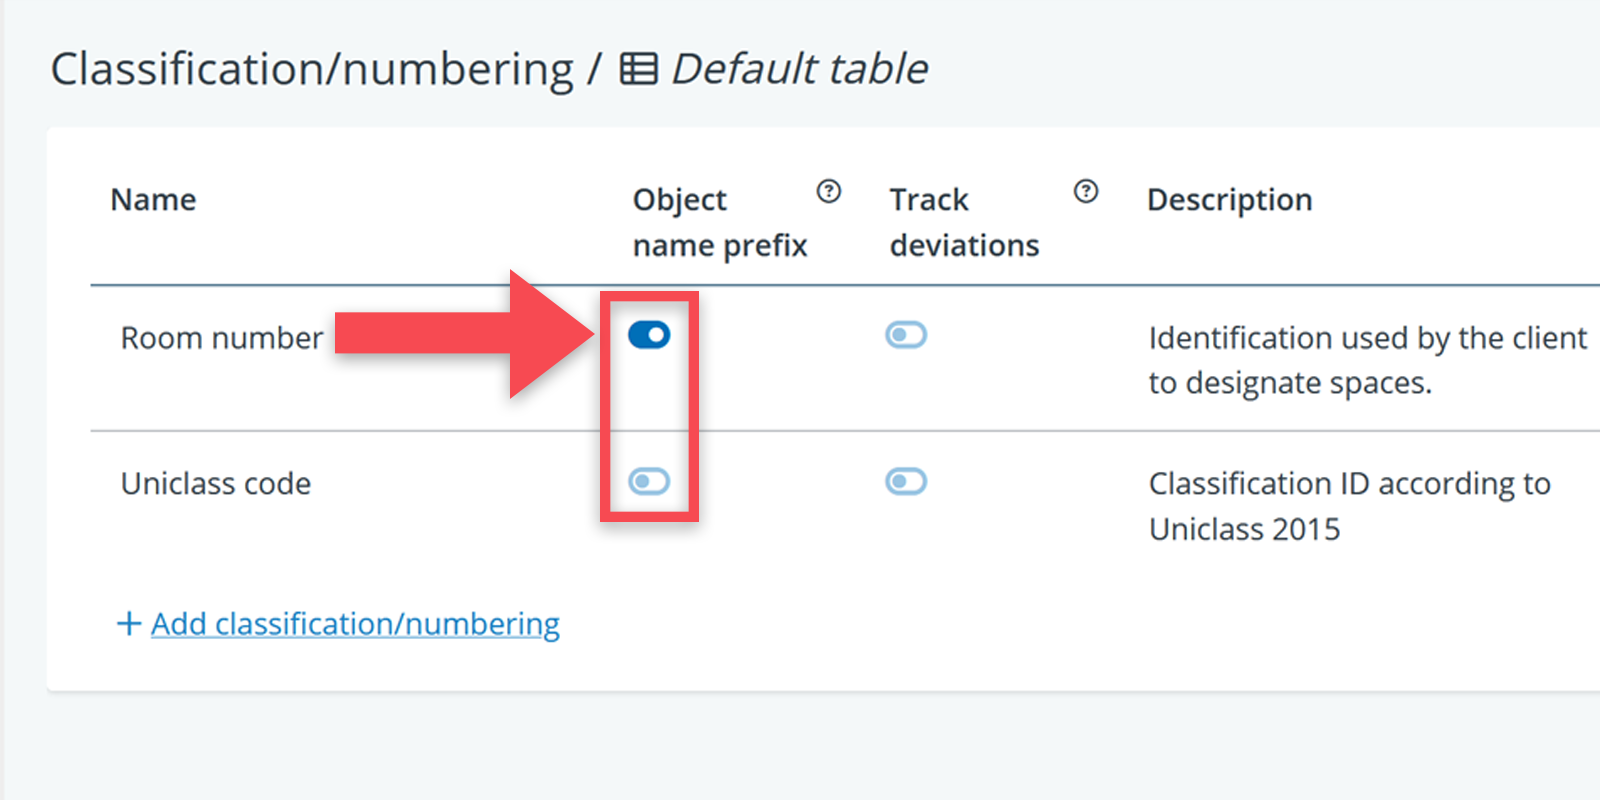
As soon as you have checked the box, the classification is shown as a prefix for object names in trees and tables. See example below.
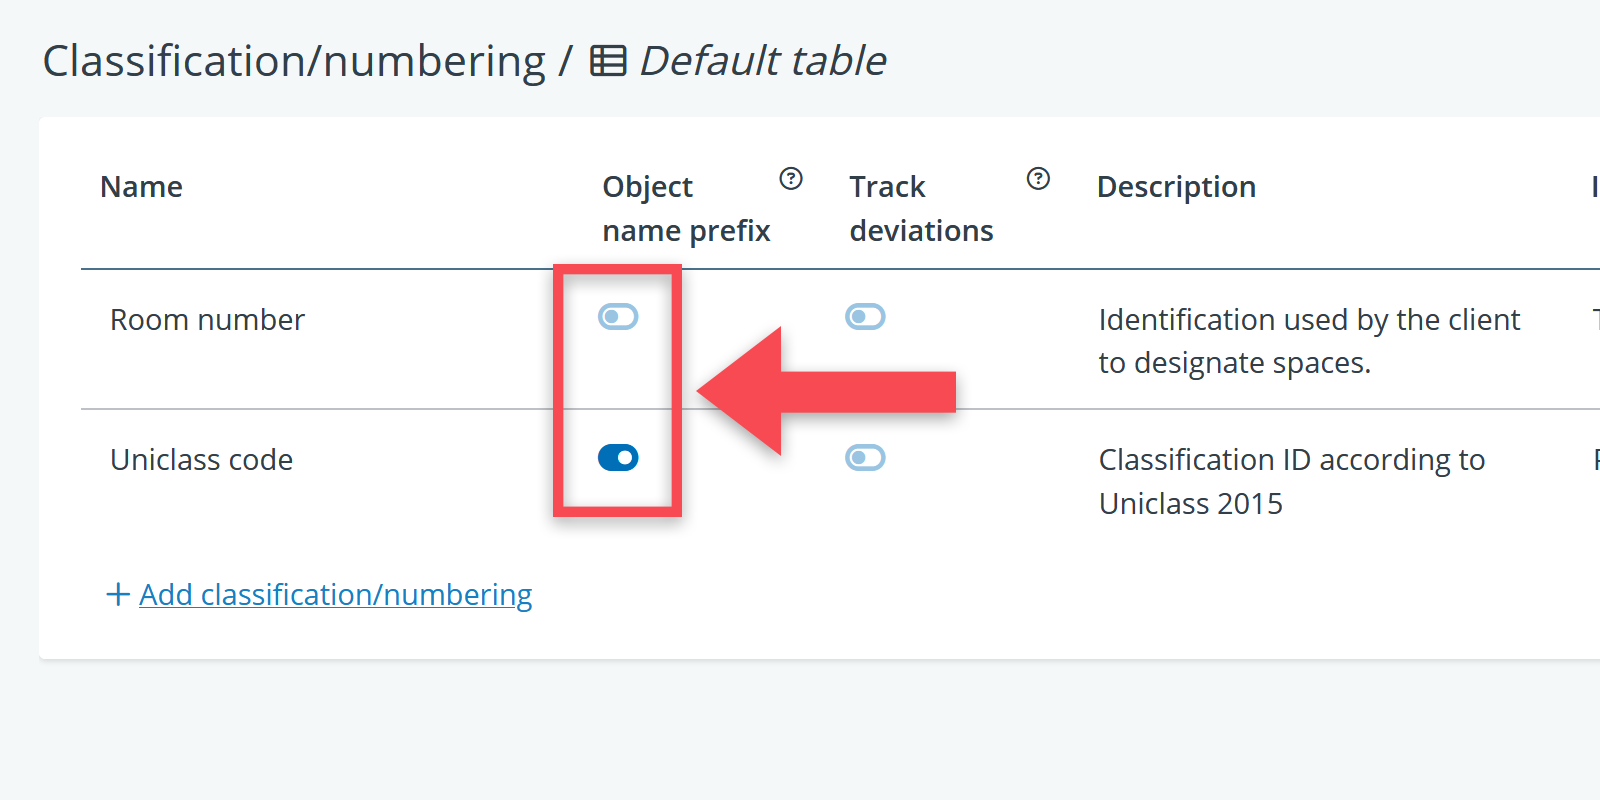
Combining multiple classifications/numberings in one prefix
You can also decide to combine multiple classifications or numbers as prefixes in an object’s name. In that case, you just activate the prefix option for all the relevant classification/numbering properties.
In the example above, the prefix will combine a building number and a room number. This means:
- If the building number is 1
- And the room number is 16
- And the room’s name is Conference room
- This will in BriefBuilder be shown as 1.16 | Conference room.
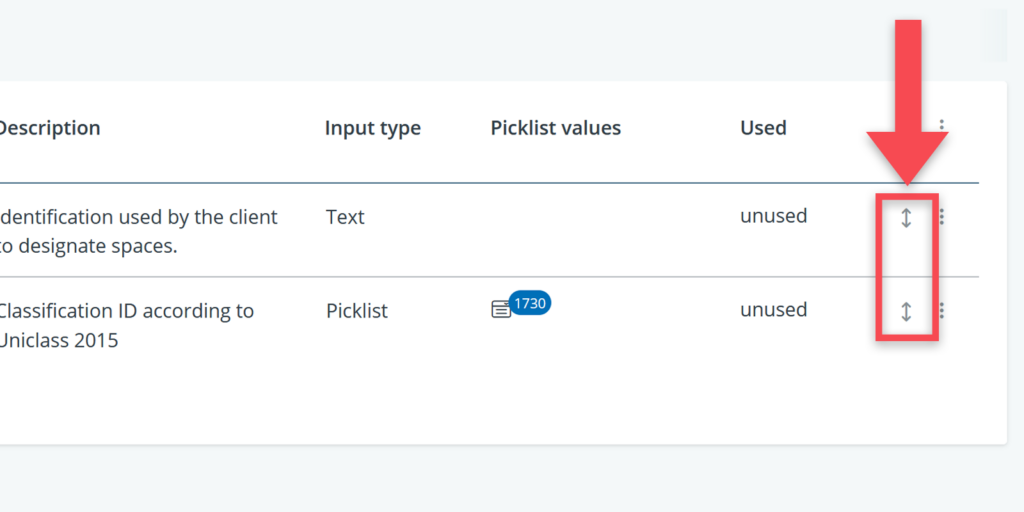
The sequence of the prefixes is determined by their position in the settings menu: the top property comes first. You can change the order of the classifications/numberings by using the small arrow icon on the right hand site of the settings menu. See below.
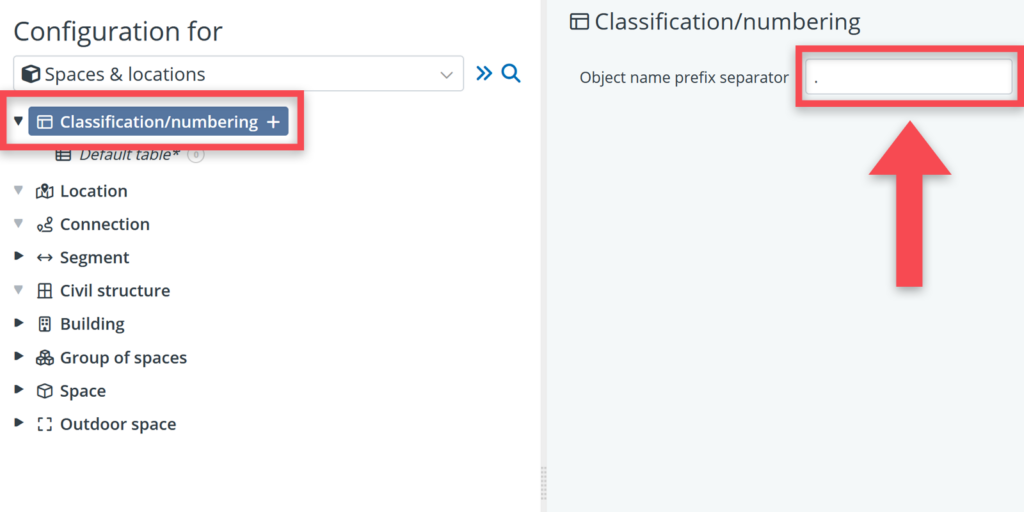
Combined prefixes will by default be separated by a dot, but you can also choose another symbol.
To define this symbol, you have to click on the main object Classification/numbering in the settings tree. See screenshot below.
Switching prefixes during the project
It can also be that you want to switch to a different prefix at some point in your project. For example: in the case of room numberings, you may start with a functional room number during the project’s briefing stages, and switch to a location or geographical number during the design stages. This is just a matter of changing the prefix toggle in the settings menu.
Importing classification/numbering picklist
If you want to make use of a pre-existing classification or numbering system, it is possible to import a classification or numbering list as a pick-list by means of Excel.
For this, it is crucial that your Excel has the right format. You can find the import template (for different languages) here. The template is pretty simple. There are two columns:
- Value: this is where you have the classifications or numbers (e.g. “42”)
- Description: this is the name or description of the classification category (e.g. “Internal wall finishes”).
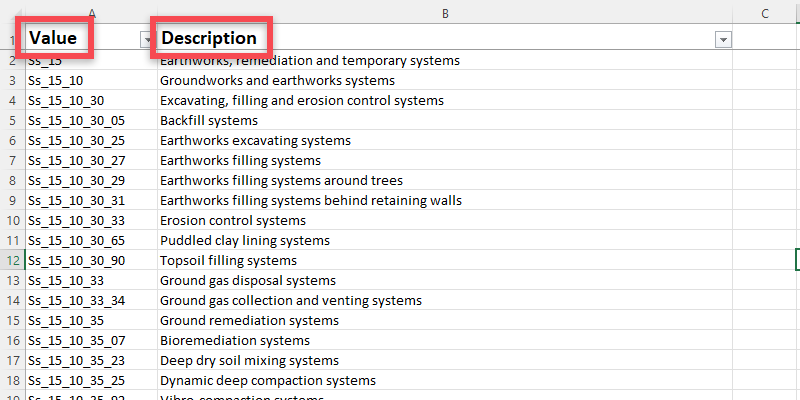
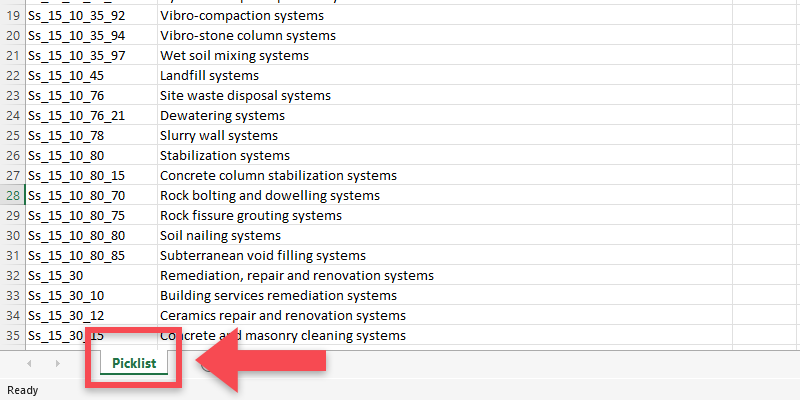
Critical detail: you have to ensure that your Excel worksheet is named Picklist.
Once your Excel list has the right format, you can do the following:
- Add the relevant classification/number property in BriefBuilder in the settings menu.
- Choose picklist as a input type.
- Click on the picklist value field
- In the pop-up, click on the import button
- Import the Excel sheet.
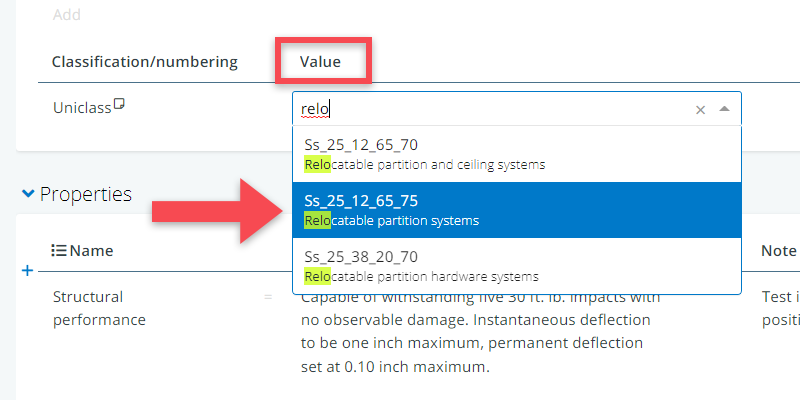
Once you have done this, all the classifications will be available as a searchable picklist. When adding a classification to an object, you only have to start typing in the value field and you will get to see matching possibilities in the pop-up. See example below.
Classifications ready for import
To help you on your way, we have created a couple of classification lists that you can import in your model (as described in the previous paragraph).
Uniclass 2015
Uniclass is a classification system for the UK construction industry. This classification system encompasses almost everything that is relevant for a construction project.
Within the context of BriefBuilder, most relevant are:
Classifications for elements/functions (EF), systems (Ss) and products (Pr).
These classifications are relevant for the systems & elements tree in BriefBuilder.
Classifications for entities (En) and the spaces and locations (SL).
These classifications are relevant for the spaces & locations tree in BriefBuilder.
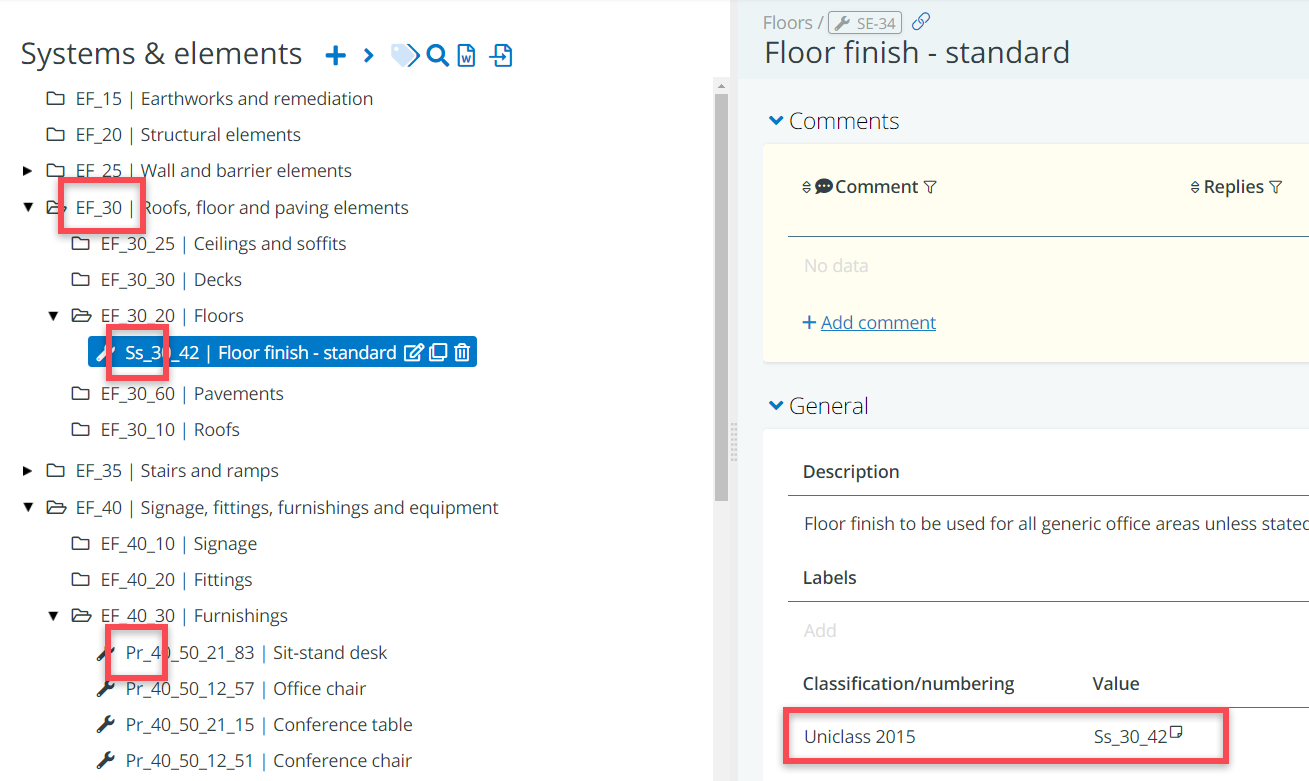
See the example below for how Uniclass may be applied in your systems and elements tree.
NL-SfB
NL- SfB is classification systems that is widely used in the Dutch construction sector (it is based on the Swedish SfB system, with SfB standing for Samarbetskommitten for Byggnadsfragor). As Uniclass, it consists of different kinds of tables.
When defining requirements, the most relevant classifications are those that can be applied to the systems and elements in your model. For that, you can use NL-SfB’s table 1, which describes a building’s functional elements.
BIM7AA
BIM7AA is a voluntary collaboration between seven major architectural firms in Denmark. The purpose of BIM7AA is to develop and continuously optimise commonly developed BIM-tools, -methods and -processes with focus on interdisciplinary cooperation.
One of their products is a coding list for the systems and elements in building projects. See the download link below for a readily importable list of codes and names.
Other classification systems
We’ll soon add more importable classification systems here. If you have any special requests – or if you have any relevant classifications available in Excel format – do not hesitate to contact us so we can extend this section.