
This article explains how to add users and organisations to a BriefBuilder environment, how to give them the correct environment roles and how to link them to project models.
Adding users
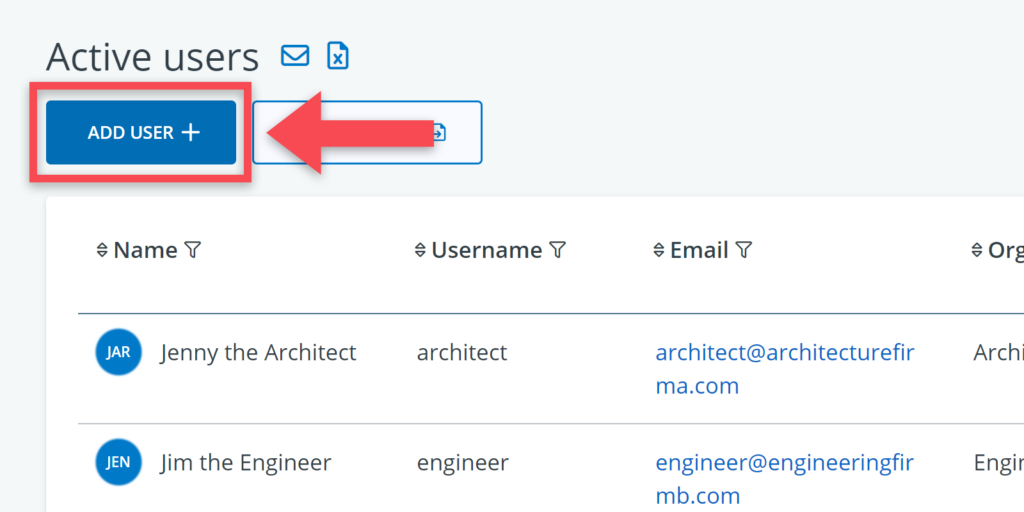
As environment administrator, you can add users via the user management menu that can be found in the upper right corner of your browser.
- Click on Environment settings
- Click on Users


There, you have to go through the following steps.
Step 1: Create a user account
Create a new user account by clicking on the + symbol

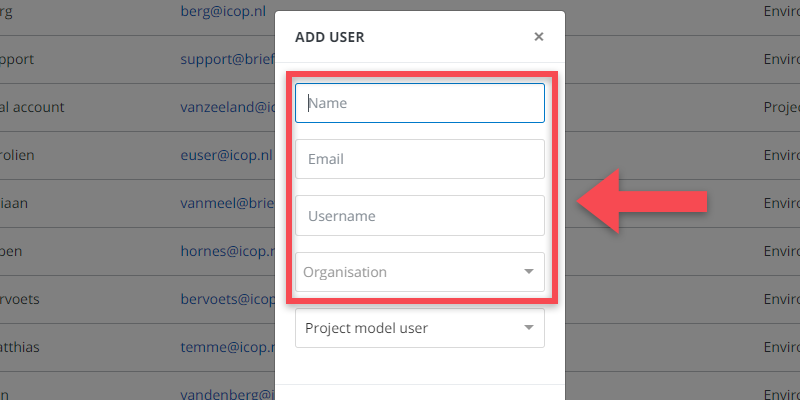
Step 2: Fill in the user’s details
Add details for the account that you want to create:
- Name: the person’s name (this name will, for example, be used in Comment section)
- Email: the person’s email address.
- User name: the name that has to be used for logging into the application.
- Organisation (optionally): the organisation the person works for. Note: you first have to add the organisation to the list. See here for how to do that.
Step 3: Select environment role
In this step, you can select what environment role a user should have.
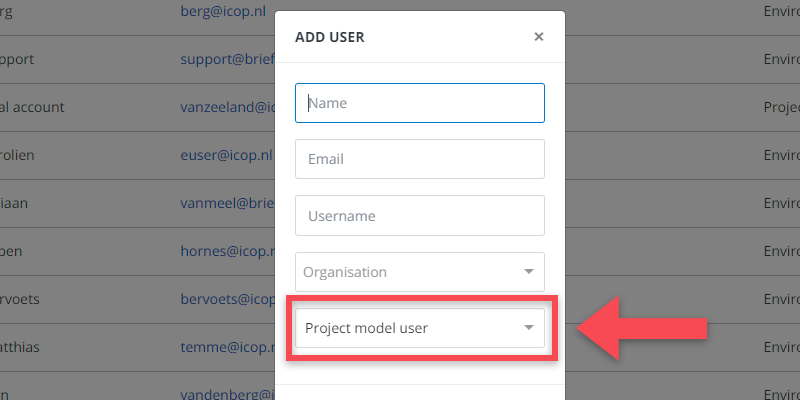
There are the following four possibilities:
- Project model user (the default): can edit or view data in project models that have been linked to this account.
- Project model creator: can create new project models and see project models that have been linked to this account.
- Environment editor: can create new project models and see all other project models.
- Environment administrator: same as above, but can also do user management.
When done, click on Add.
Step 4: Select project role
After adding a user to the environment, link them to the relevant project model(s) before they can gain access.
To link a user to a project, navigate to the Project Model column and click the icon next to the user.
Note the following indicators:
- An orange + icon next to the briefcase means the user has not yet been linked to any projects.
- A blue circle with a number indicates the user is already linked to one or more project models, with the number reflecting how many.

Click the icon to open the role allocation pop-up window. Select the appropriate project role for the user in each relevant project.

Please note that the names and permissions for these roles are defined on a project model level. More explanation about how that works can be found here.
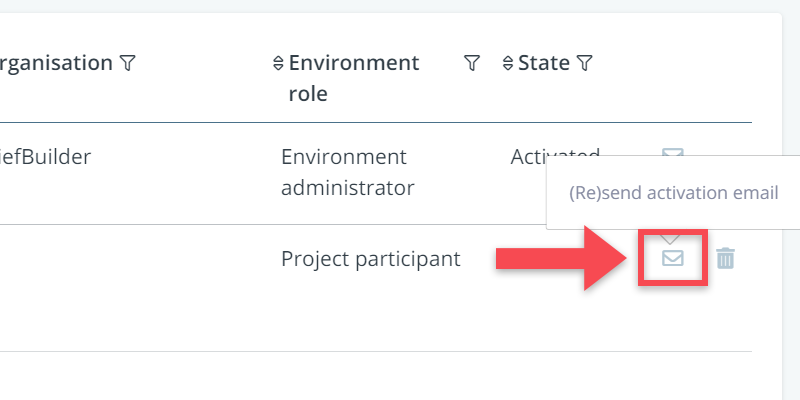
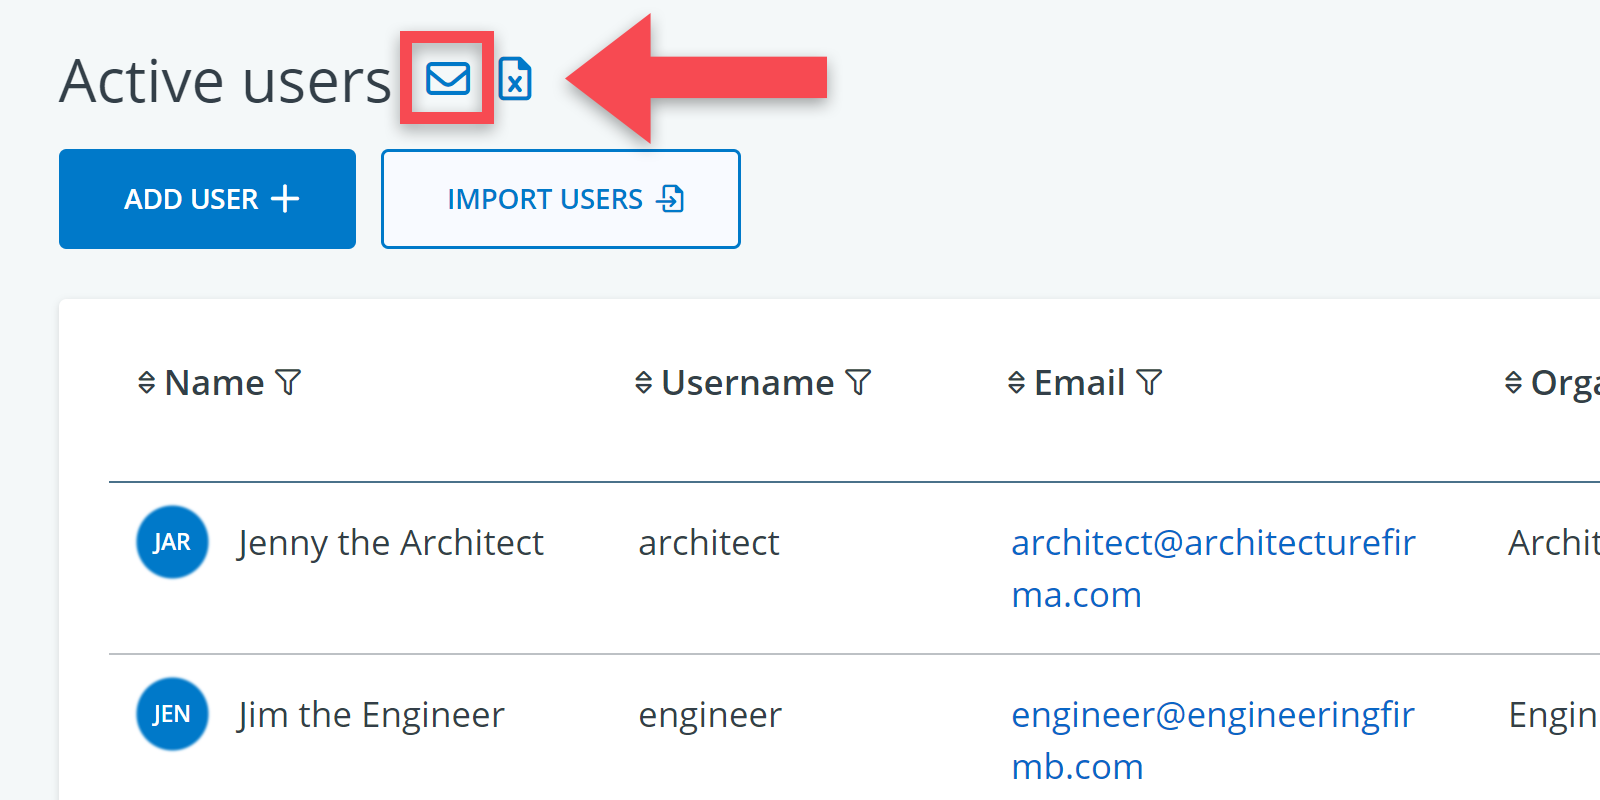
Step 5: Send invitation
Send the invite to the user by clicking on the mail icon. The e-mail contains the user name, a link for (re)setting a password, and a link to the application.
Adding organisations
As mentioned above, you can link user accounts to organisations.
The advantage of linking user accounts to organisations is that this allows project model users to address comments and assign verifications not only to persons, but also to organisations (e.g. Architecture firm A, Contractor B etc.)
Adding organisations can be done in the following way:
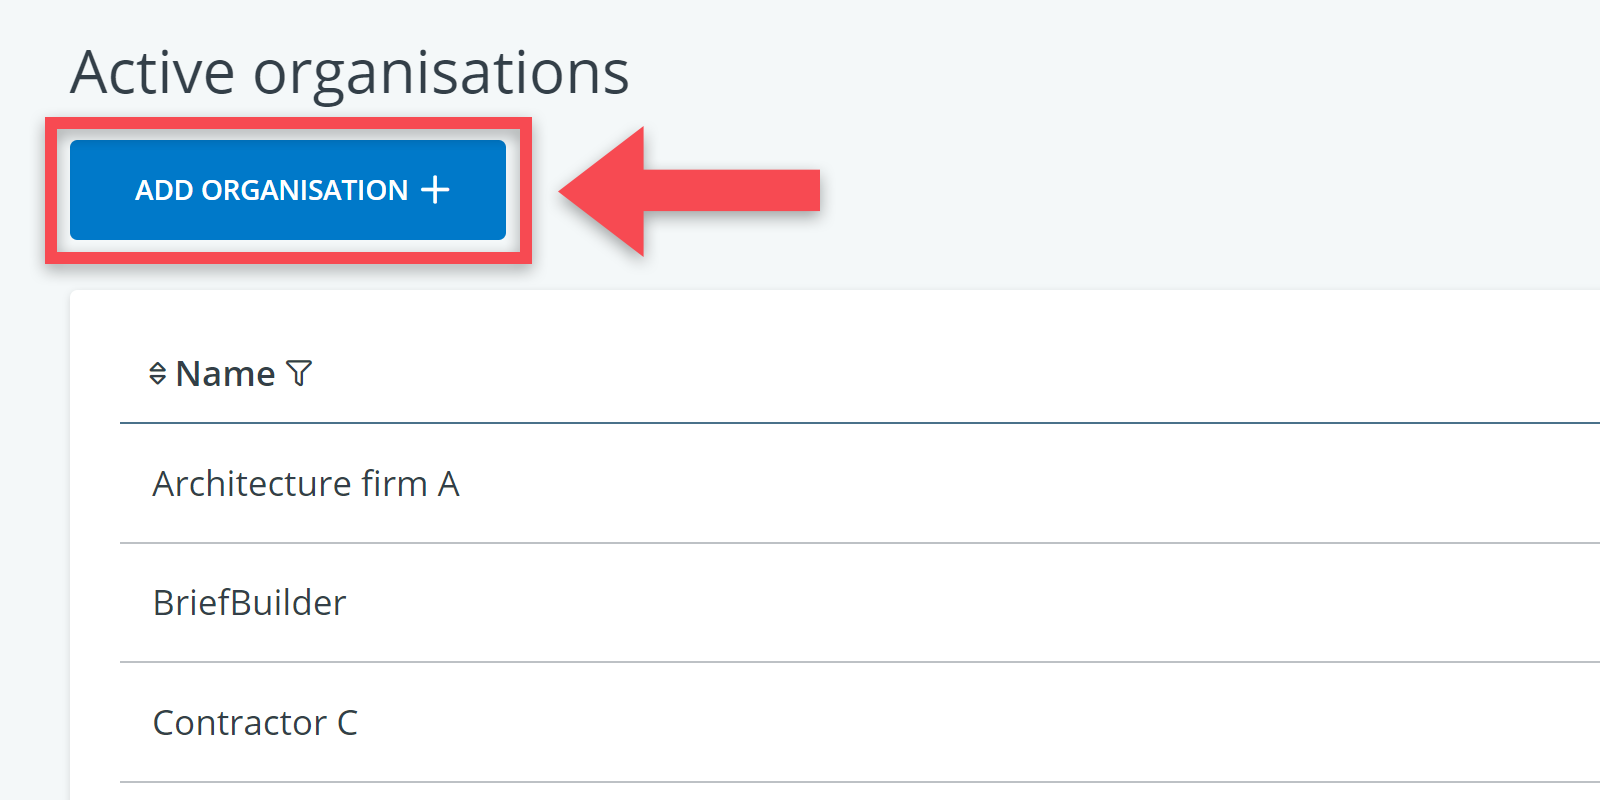
Step 1: Go to Organisations in the user management menu
If you have administrator rights, you’ll see a menu item called Organisations in the upper right corner of your screen, under User management. Click on it.

Step 2: Add a new organisation
Click on the button next to the header’s name to add a new organisation. Write the name and click on Add.
Note that you can also add an abbreviation and/or a favicon/logo for each organisation. In the application, these will be used in various kinds of overviews.

Step 3: Link users accounts to the organisation you have added
To link any of the existing user accounts to the newly created organisation, you return to the overview of user accounts.
In that overview, go to the column Organisation and select, per user, to which organisation they belong.
