When you have imported an IFC file into your requirements model, it is likely that you will want to compare the design specifications in the IFC file with the requirements in BriefBuilder.
For example: does the design model contain all the spaces that have been asked for? Are the room sizes right? The ceiling heights? The security zoning?
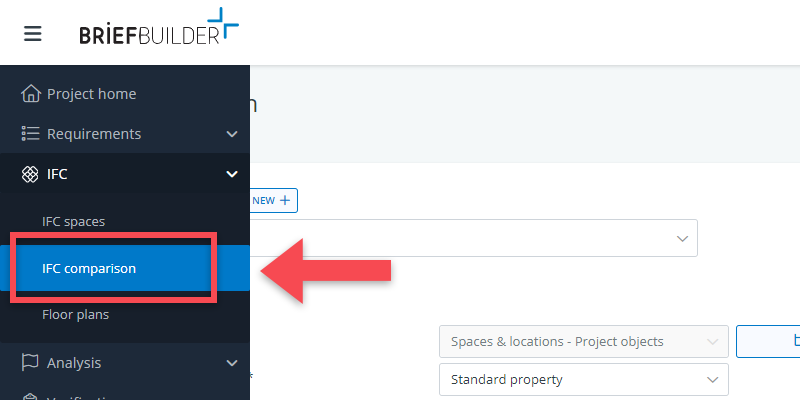
You can check such matters by using the IFC comparison table. This table can be found in the main menu, under the header IFC.
In this article we’ll explain the practicalities of this table.
Selections
When clicking on IFC comparison in the menu, the first thing you get to see is a selection page.
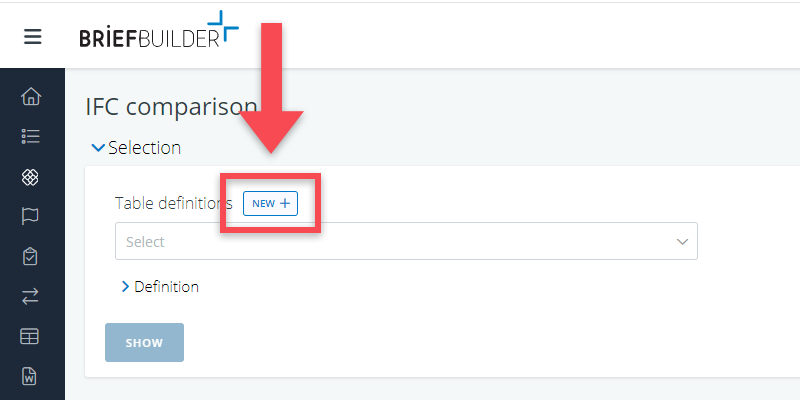
Here, you can select a predefined comparison table (a table that has been made earlier by you or by another project participant) or you can create a new comparison table.

In this article, we’ll focus on how to create a new comparison table.
Creating a table definition
To create a table definition, you must click on the button New.
You then get to see three selection blocks:
- Requirements (to select BriefBuilder data)
- Compare with (to select IFC data)
- Acceptance criteria (to define the criteria that you want to apply to the comparison results)
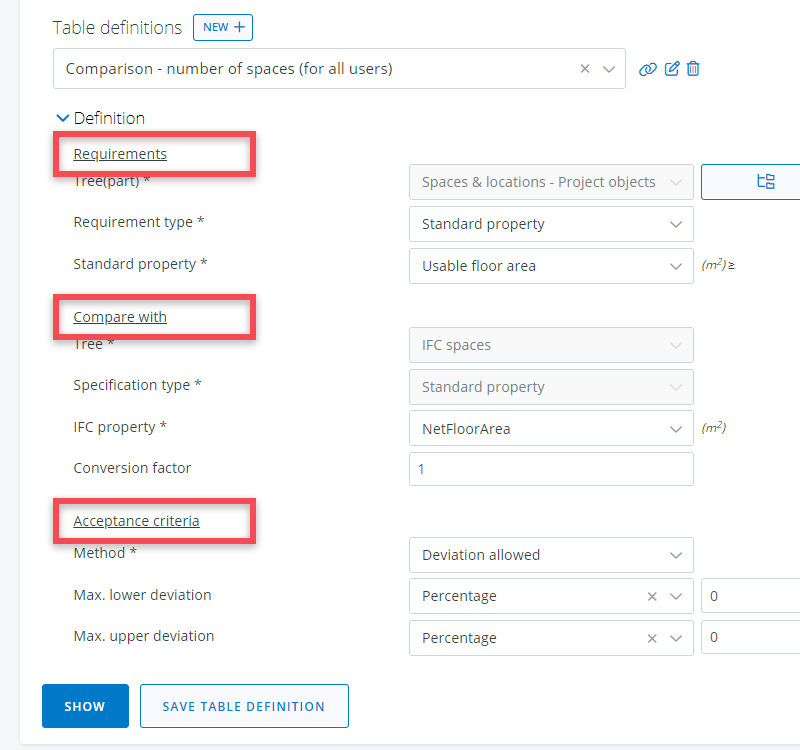
Requirements
In this block, you can select the spaces and requirements that you want to use as the basis for your comparison.
First you have to select the spaces that you want to include in your comparison. The tree selection is by default set on the spaces & locations tree, which can be further narrowed down by selecting
Next, you have to choose the requirement type you want to compare. You can choose between
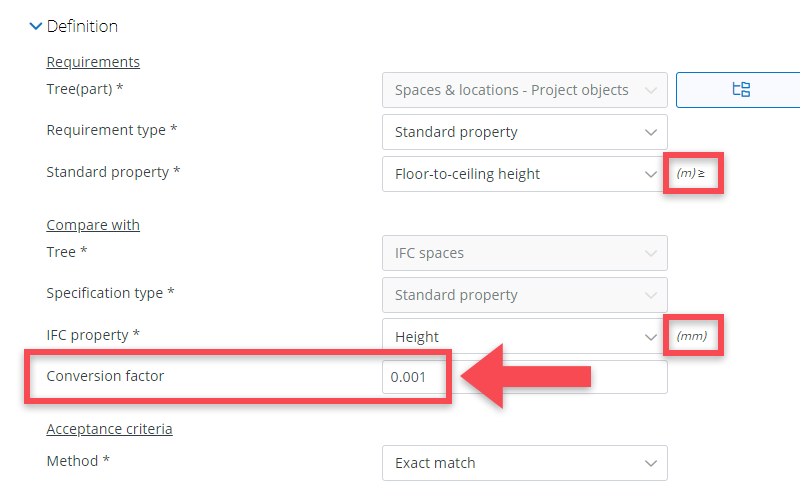
- a standard property (e.g. usable floor area or floor-to-ceiling height)
- a related object (e.g. power socket or gas outlet).
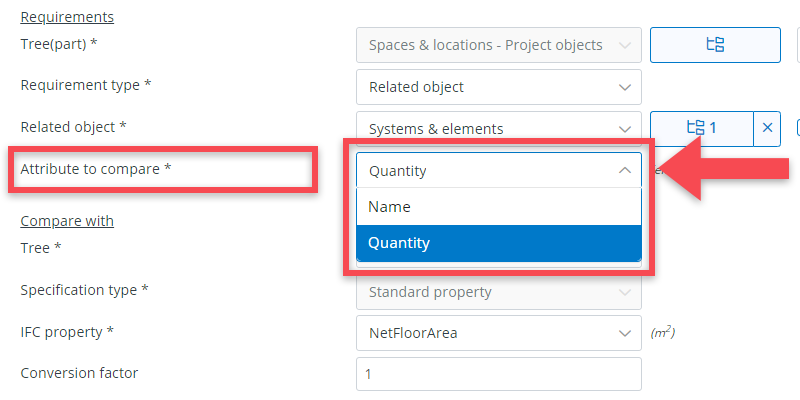
When selecting related object you must select the specific object that should be part of your comparison. For this, you have to select:
- the relevant tree (e.g. systems & elements or user equipment)
- the object that you want to compare (e.g. a particular type of outlet)

Moreover, you must choose what kind of attribute of the related object you would like to compare:
- Quantity (relevant when you want to compare countable matters, such as the number of power sockets)
- Name (relevant when you want to compare ‘non-countable’ matters, such as the floor finishes).
Compare with
In this block, you can select the IFC data that you want to use for your comparison.
Selection options:
- Tree: the relevant tree, which is (for now) by default the IFC spaces tree.
- Specification type: the type of data that you want to compare – by default set to IFC property.
- IFC property: the specific IFC property that you want to use for your comparison.
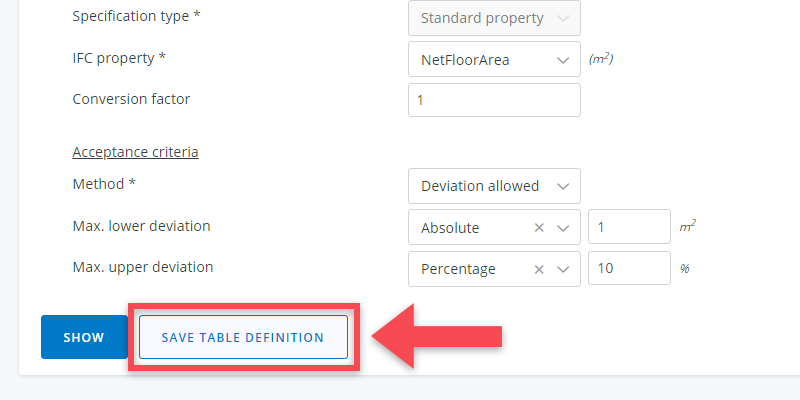
Acceptance criteria
In this block you can define the acceptance criteria concerning the comparison outcomes. These are:
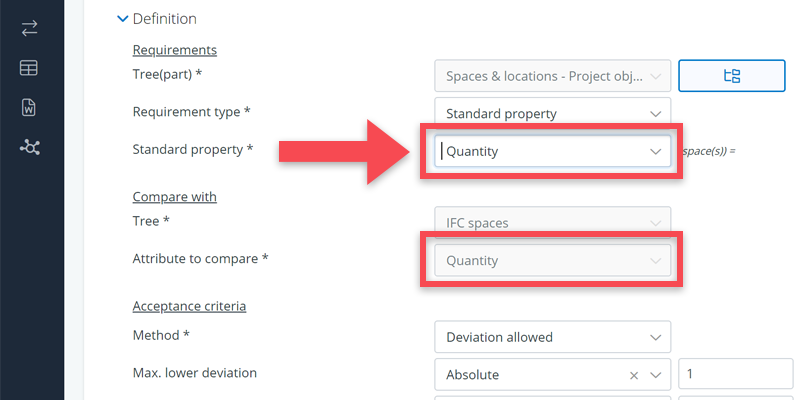
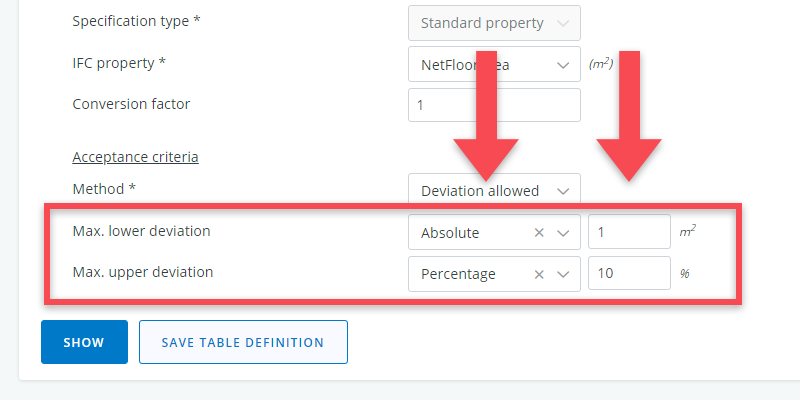
- Method: should there be an exact match between the IFC value and the requirement value, or are deviations allowed?
- Max. lower deviation (in case of ‘deviations allowed’): to what extent is an IFC value allowed to be lower than the requirement value?
- Max. upper deviation (in case of ‘deviations allowed’): to what extent is an IFC value allowed to be higher than the requirement value?
Both lower and upper deviations can be expressed as either percentages or absolute numbers.
The comparison table
When ready with your selections, you can click on Show to see the comparison table.
Below, we’ll explain how to read and use this table.
Table set up
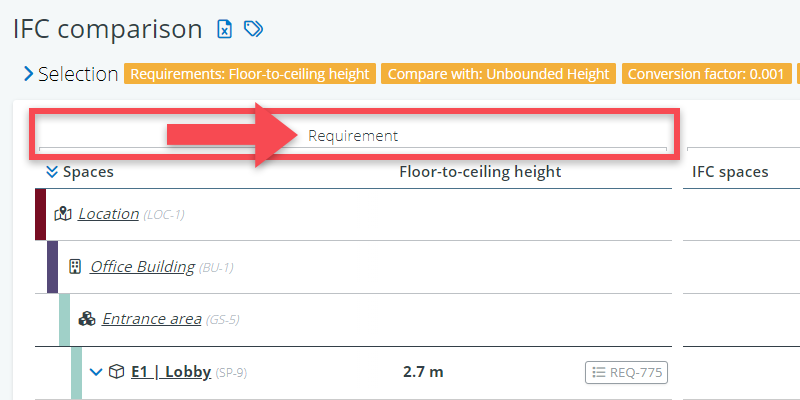
The table is divided into three sets of columns (which correspond with earlier mentioned selection blocks):
(1) Requirements: in this part of the table you will find spaces and requirements (the BriefBuilder data) against which you are comparing the IFC data.
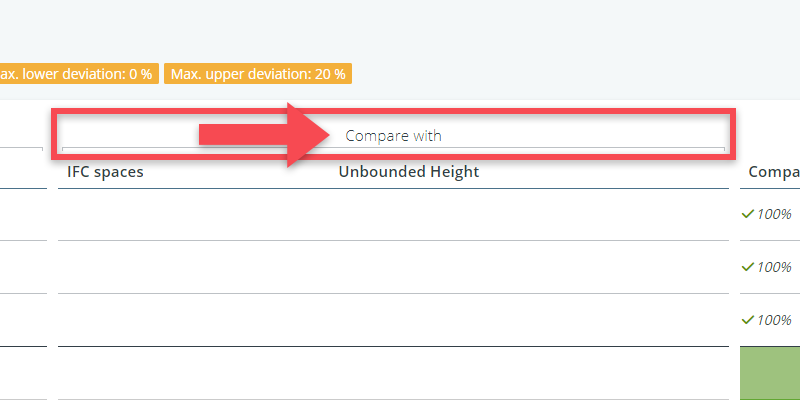
(2) Compare with: in this part of the table are the IFC spaces and attributes that you have selected to compare against the requirements.
(3) Comparison: this last part of the table shows the difference between the requirement value in BriefBuilder and the IFC value in the design model.
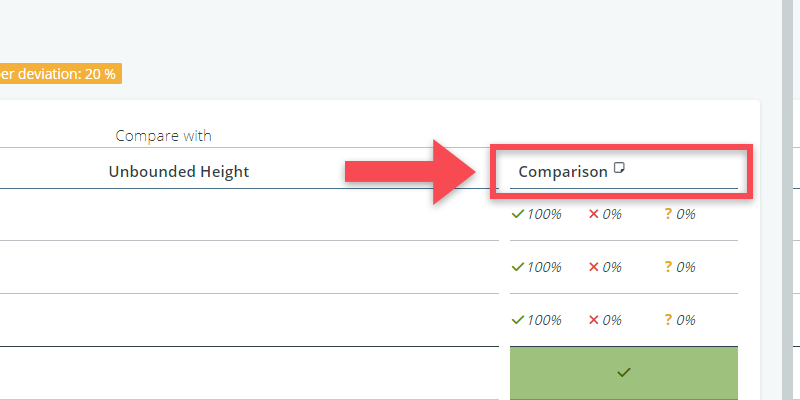
Legenda for deviations
The color coding of the deviation column indicates whether the deviation lies within the acceptable value range and, and thereby whether a design specification can be seen as compliant or non-compliant given the formulated acceptance criteria.
- Green stands for compliant
- Red stands for non-compliant
- Yellow indicates that the comparison is not possible.
Concerning the last category: there can be various reasons for why it isn’t possible to get a comparison outcome. One obvious reason is a lack of data on either the requirements side or the IFC side.
Another possibility is that an IFC space is linked to multiple spaces in BriefBuilder. This happens when several BriefBuilder spaces have been combined into one design solution. In that case, the IFC space has to comply with multiple, potentially conflicting requirements, which means that an automatic comparison is not possible.

Comparison results for multiple IFC spaces
The IFC model often features more spaces than the BriefBuilder model does. This is because the BriefBuilder usually asks for space types, while the IFC model is an ‘instance’ model in which each space is an individual object.
For example: the BriefBuilder model may ask for a large meeting room with a quantity of 3. In BriefBuilder, this is one space object. In the IFC model, however, there will will be 3 individual meeting rooms (if designed according to the requirements), each with their own properties.
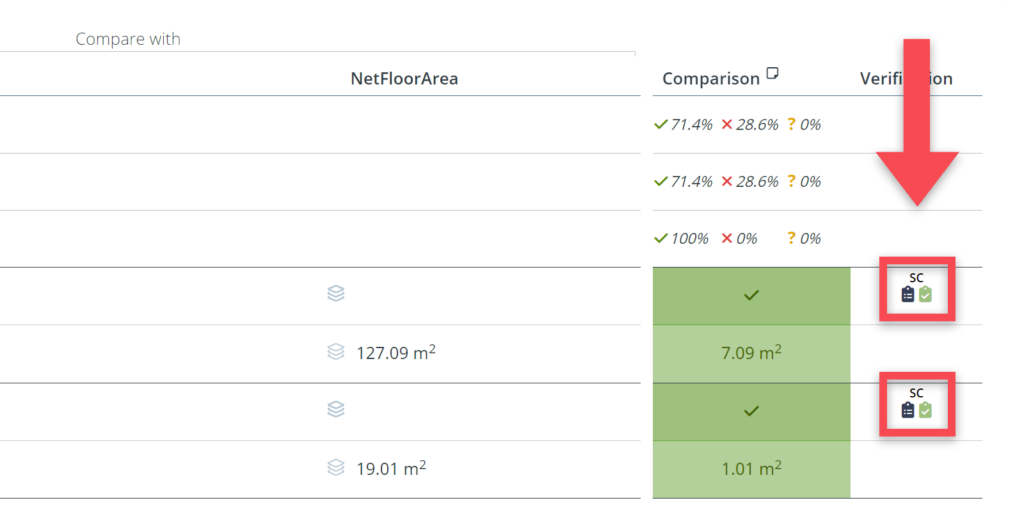
In the comparison table, these IFC spaces are shown individual rows. See image below.
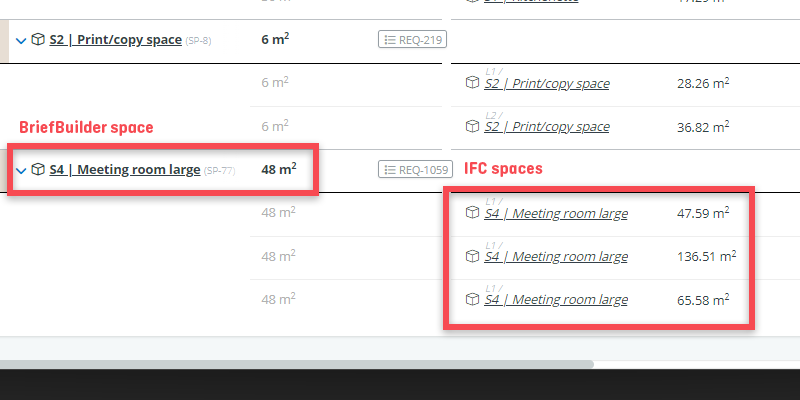
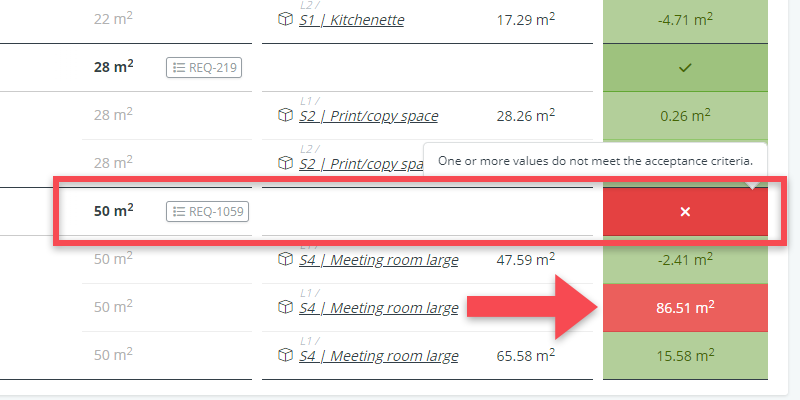
For determining the comparison outcome in such a case, the rule is that if one or more of the IFC spaces does not comply with the defined requirement, the overall comparison result will be ‘non compliant’.
See the example below in which one of the three IFC spaces do not meet the set acceptance criteria, and therefore the overall result for the comparison for this space is ‘non-compliant’.
Comparison summaries
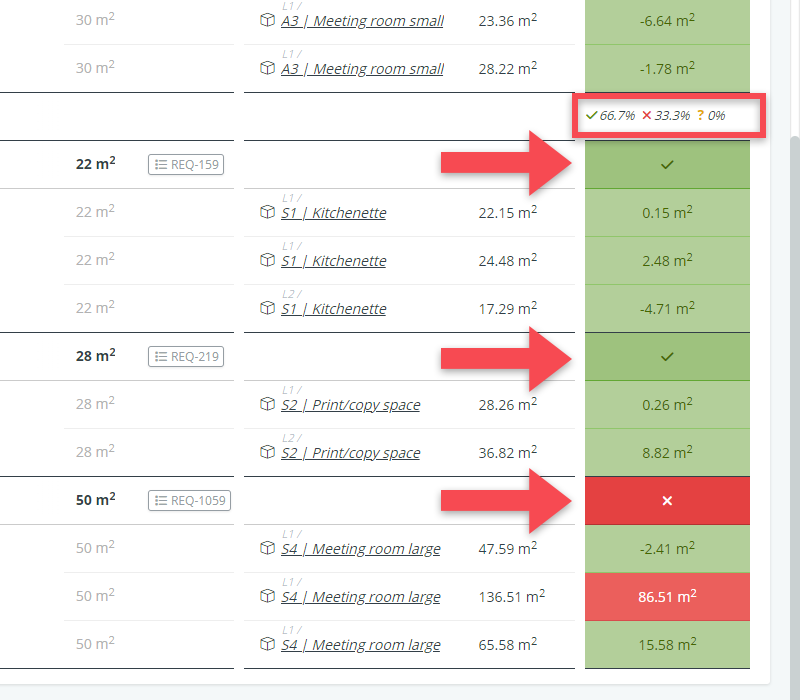
In the comparison column, you can also see result summaries on the levels of spaces groups and the overall building.
These summaries indicate how many of the requirements that are part of that group or building have been met. It shows the percentages of the requirements that the IFC model is compliant with.
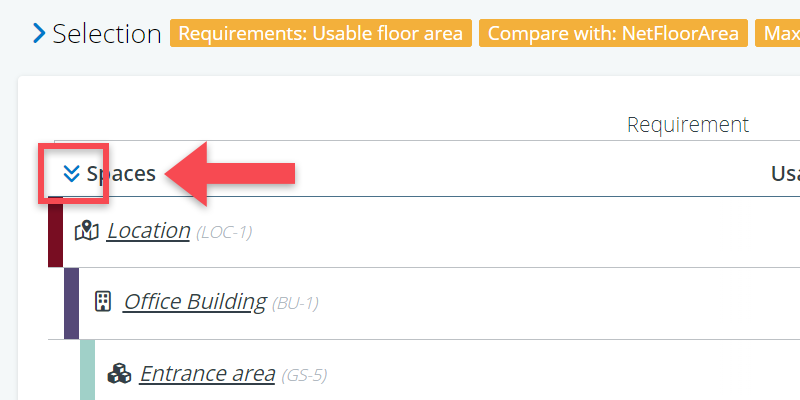
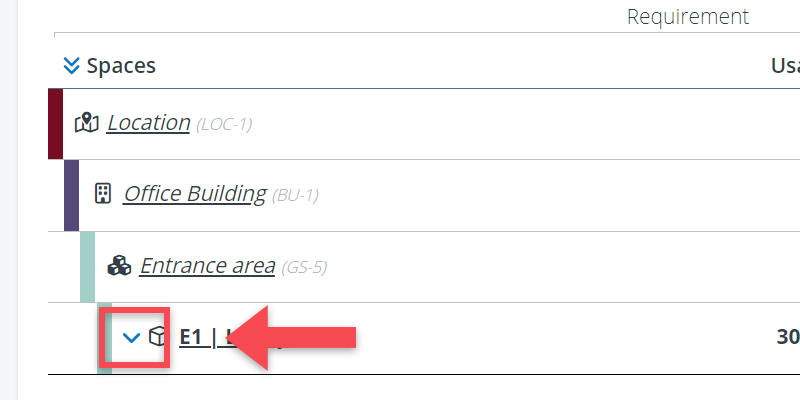
Expand/collapse rows
When there are many IFC spaces, you may prefer to collapse those rows and look at the ‘aggregated’ results only. This can be done by clicking on the icon in the table header ‘spaces’.
The same can be done on the level of an individual BriefBuilder space by clicking the icon there.
Export to Excel
It is possible to export the comparison table to Excel via the export button that can be found next to the table’s name. The Excel export will go to your downloads folder.

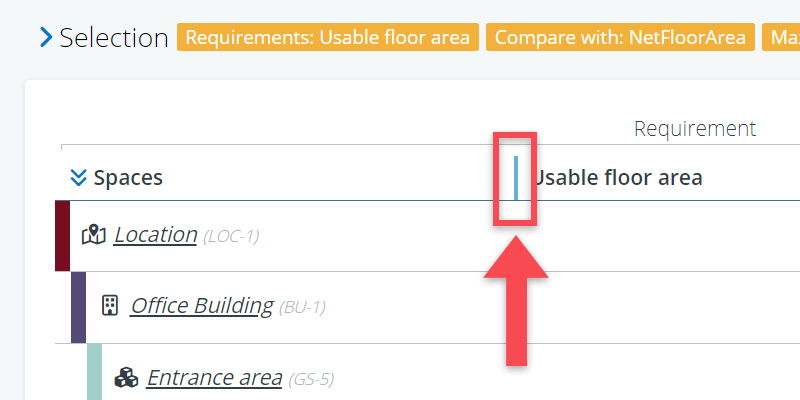
Adjusting column sizes
Just like with the other overviews in BriefBuilder, you can adjust column widths by grabbing and moving the column header’s border.
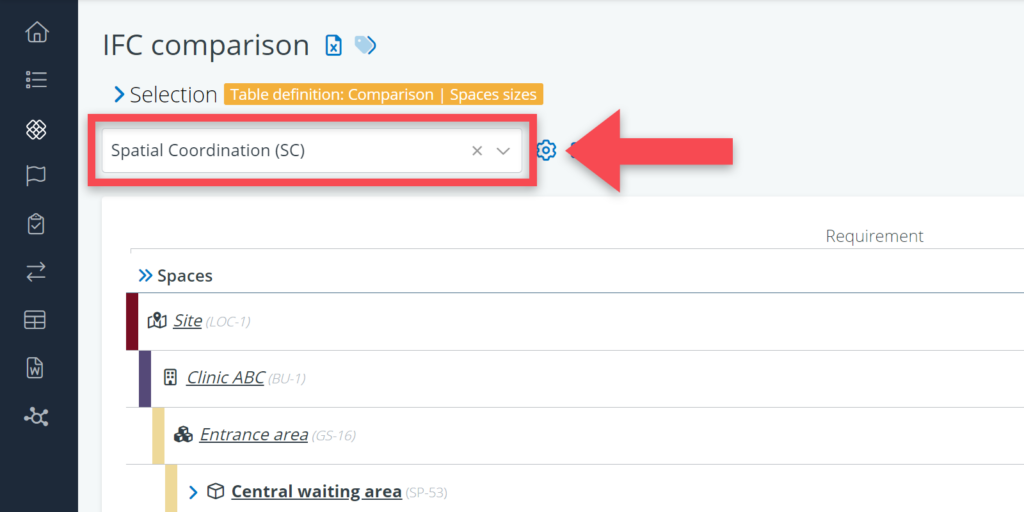
Verification
If you are using BriefBuilder’s verification module, you may want to use the outcomes of your comparison as verification results.
For this, you have to do the following:
(1) Select the relevant verification phase at the top of the comparison table.
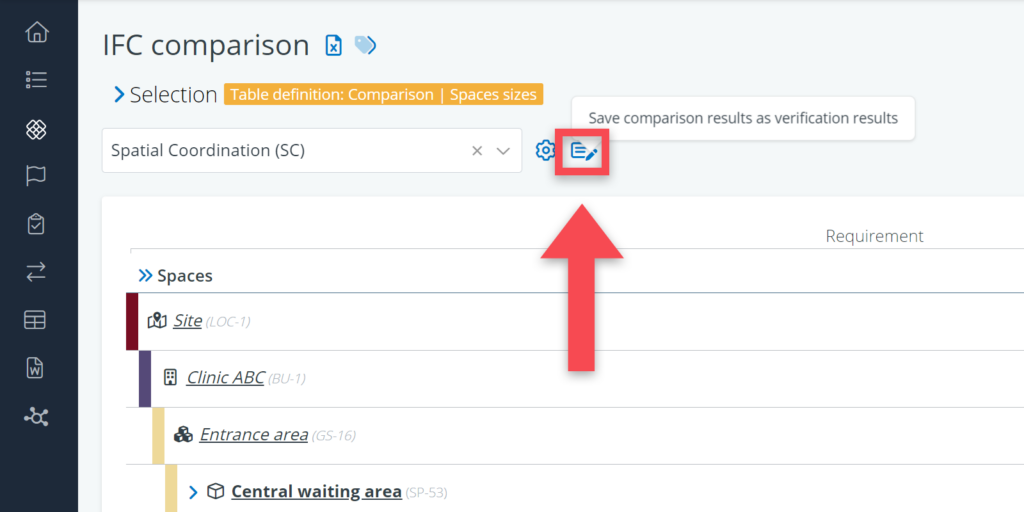
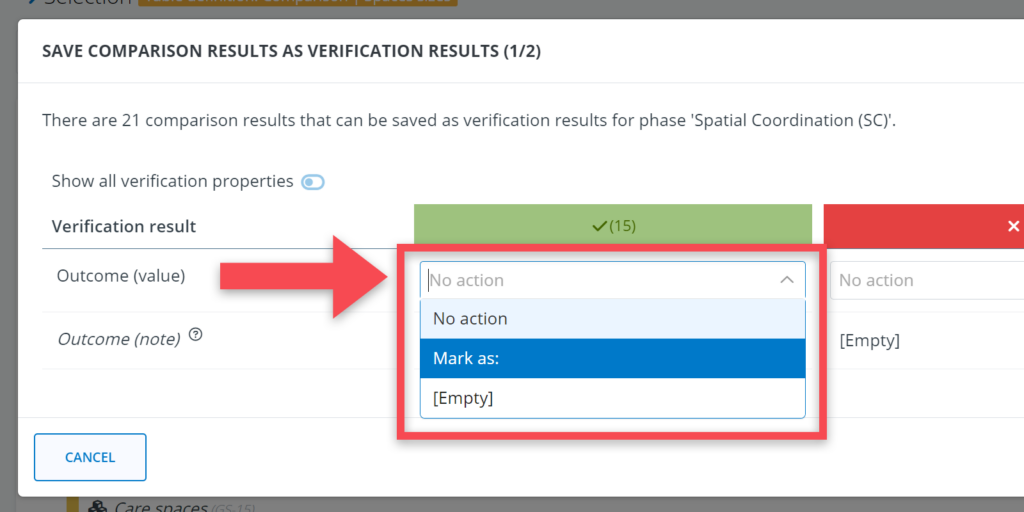
(2) Click on the Save comparison results as verification results icon ().
(3) Select for each comparison result whether it should be saved as a verification outcome. If so, select Mark as in the field Outcome.
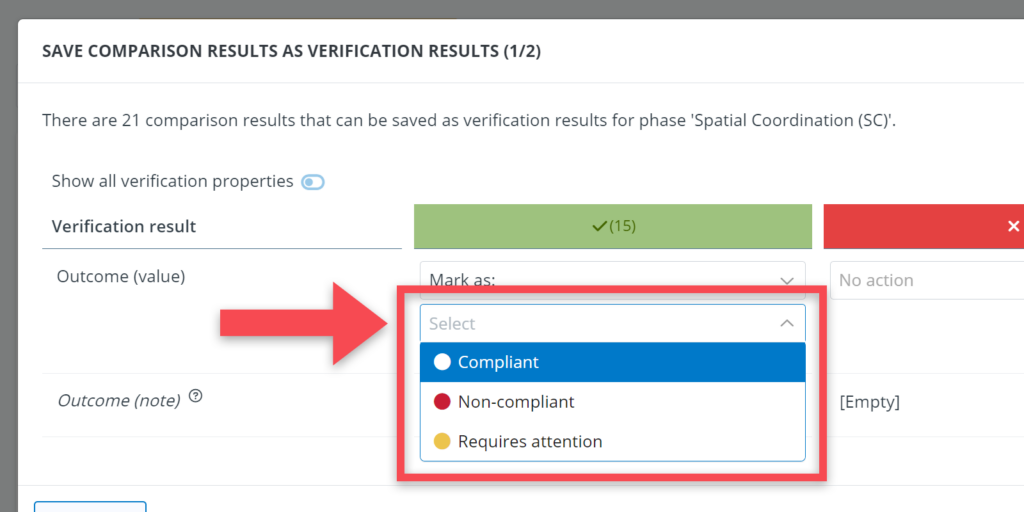
(4) When having selected Mark as, select the relevant verification outcome category.
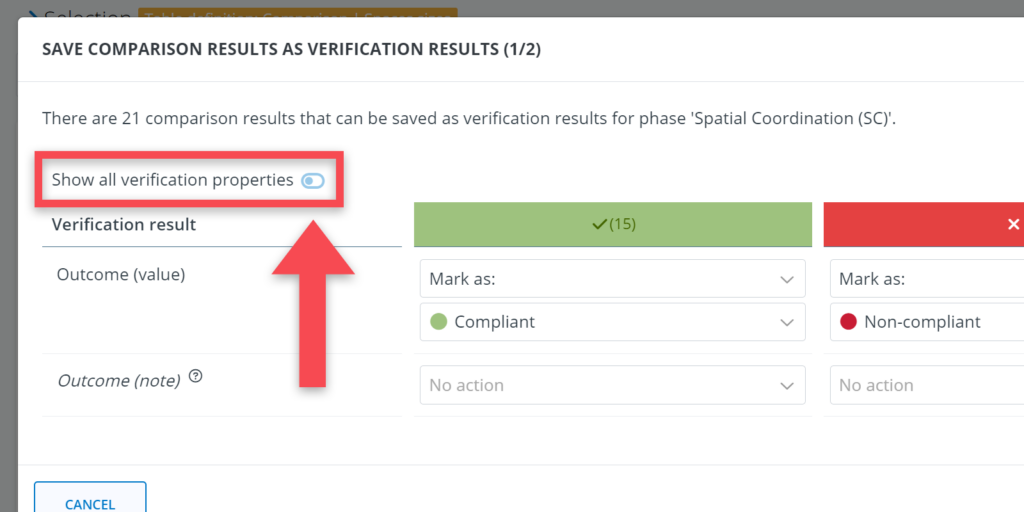
(4) Optionally: click on Show all verification properties if there is more you wish to edit in your verification results (e.g. method).
(5) Click on Next to preview your actions, and then on Save if the you are happy with your action.
When you click on Save, the comparison results will be ‘pushed’ to the verification part of the model. The results can be viewed in the verification table and the verification dashboard.