
Introduction
In some projects, project teams work with textual requirements instead of model-based requirements, as we normally do in BriefBuilder.
In particular in the civil engineering and energy sector, the use of requirement texts is still widespread and it is not always possible to transform these texts into model-based requirements – for either legal or practical reasons.
Therefore, we have created a dedicated requirement text module in BriefBuilder.
This module allows you to capture requirement texts in a breakdown structure and link these texts to the project parts to which they apply (e.g. particular systems, spaces, processes). This enables project teams to work systematically with requirements even though these are captured in a traditional text format.
The central idea: document parts are captured as “requirement text objects” in BriefBuilder, where they can be linked to verification plans, verification outcomes, RFCs, and to the specific systems to which they apply.
In this article, we will explain how this module works.
Capturing requirement texts
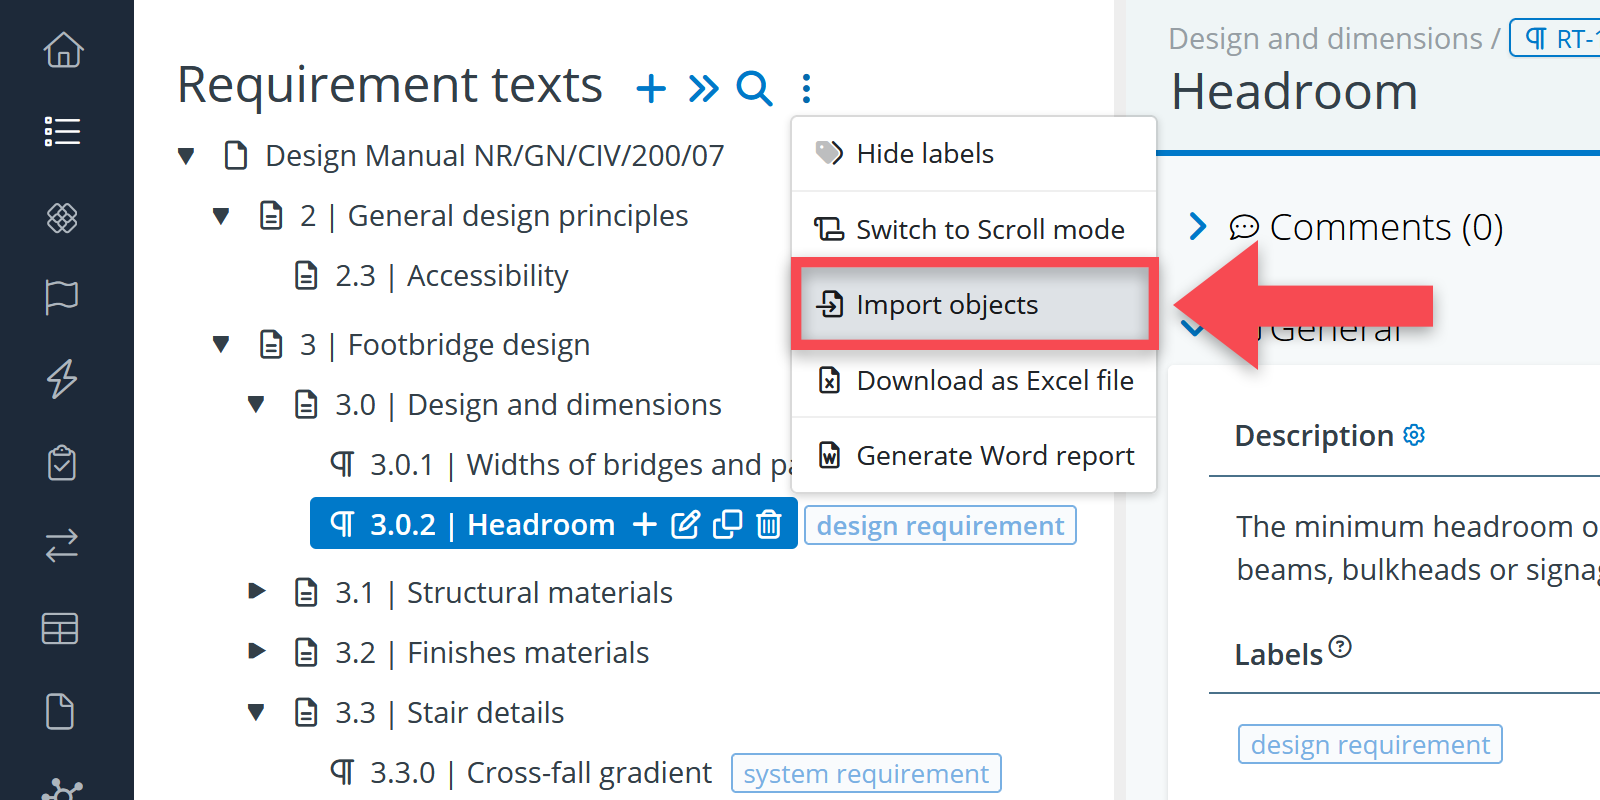
In BriefBuilder, requirement texts can be captured in a dedicated requirement text tree, which is essentially a hierarchical list of all individual requirements. In systems engineering literature, this tree structure is often referred to as a requirements breakdown structure, or RBS.
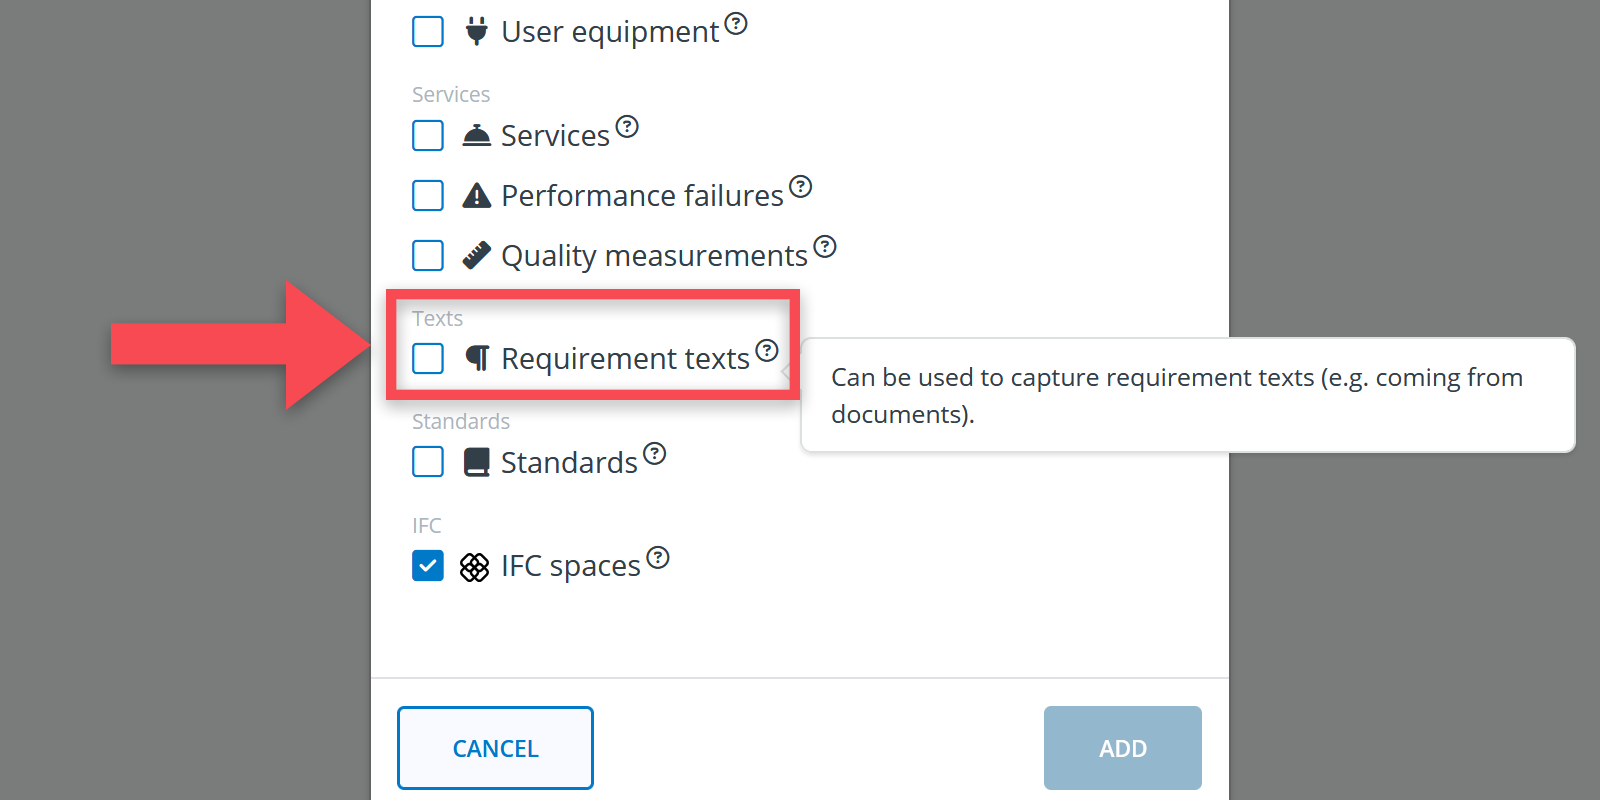
In the tree, you can create four kinds of objects:
- Folders: this object can be used to structure the tree at a high level, grouping multiple documents (e.g. “Specification documents phase A”).
- Document: as the name implies, this object can be used to represent a document (e.g. “Design guideline for HVAC installations”), under which you can then place requirement texts and sections.
- Section: this object can be used to further structure your tree, under document, with e.g. chapters, paragraphs, appendices and so on.
- Requirement text: this object is represents a requirement, consisting of a short name/title and a description field for the requirement text.
To create these objects, do the following:
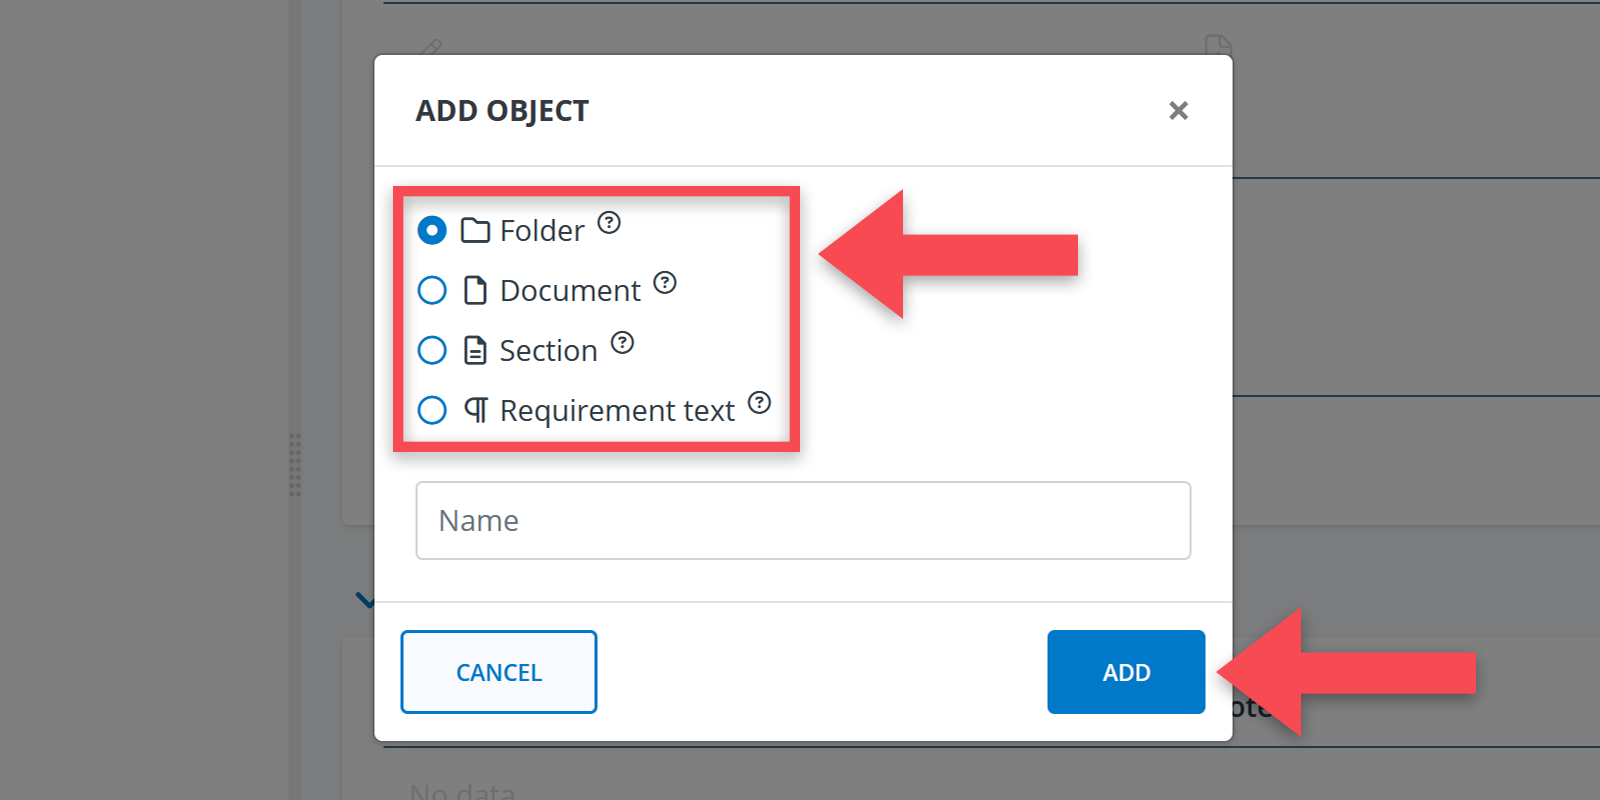
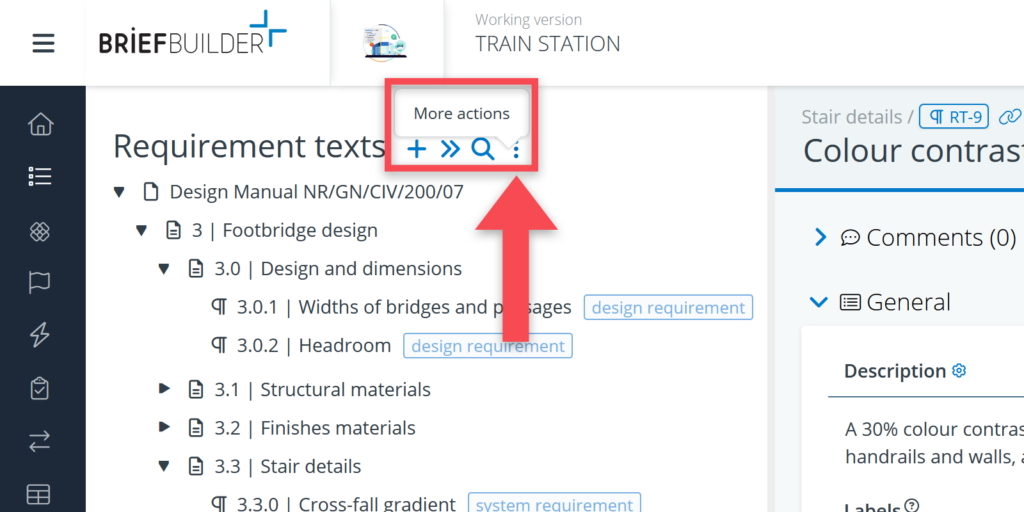
1) Click on the + button at the tree header or in the action menu behind an object’s name.
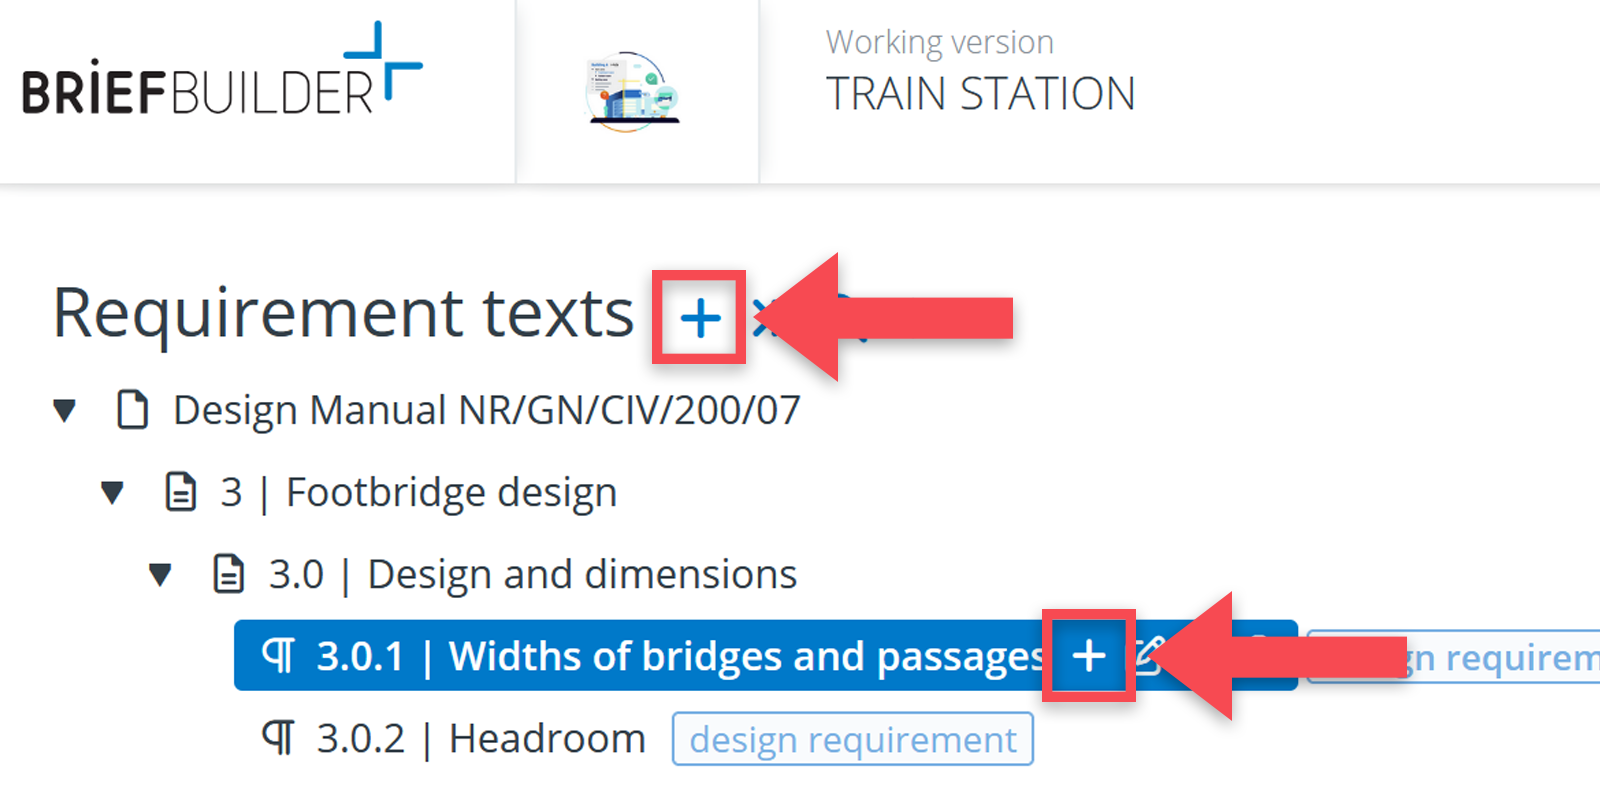
2) Select what kind of object it should be: a folder, document, section or a requirement text.
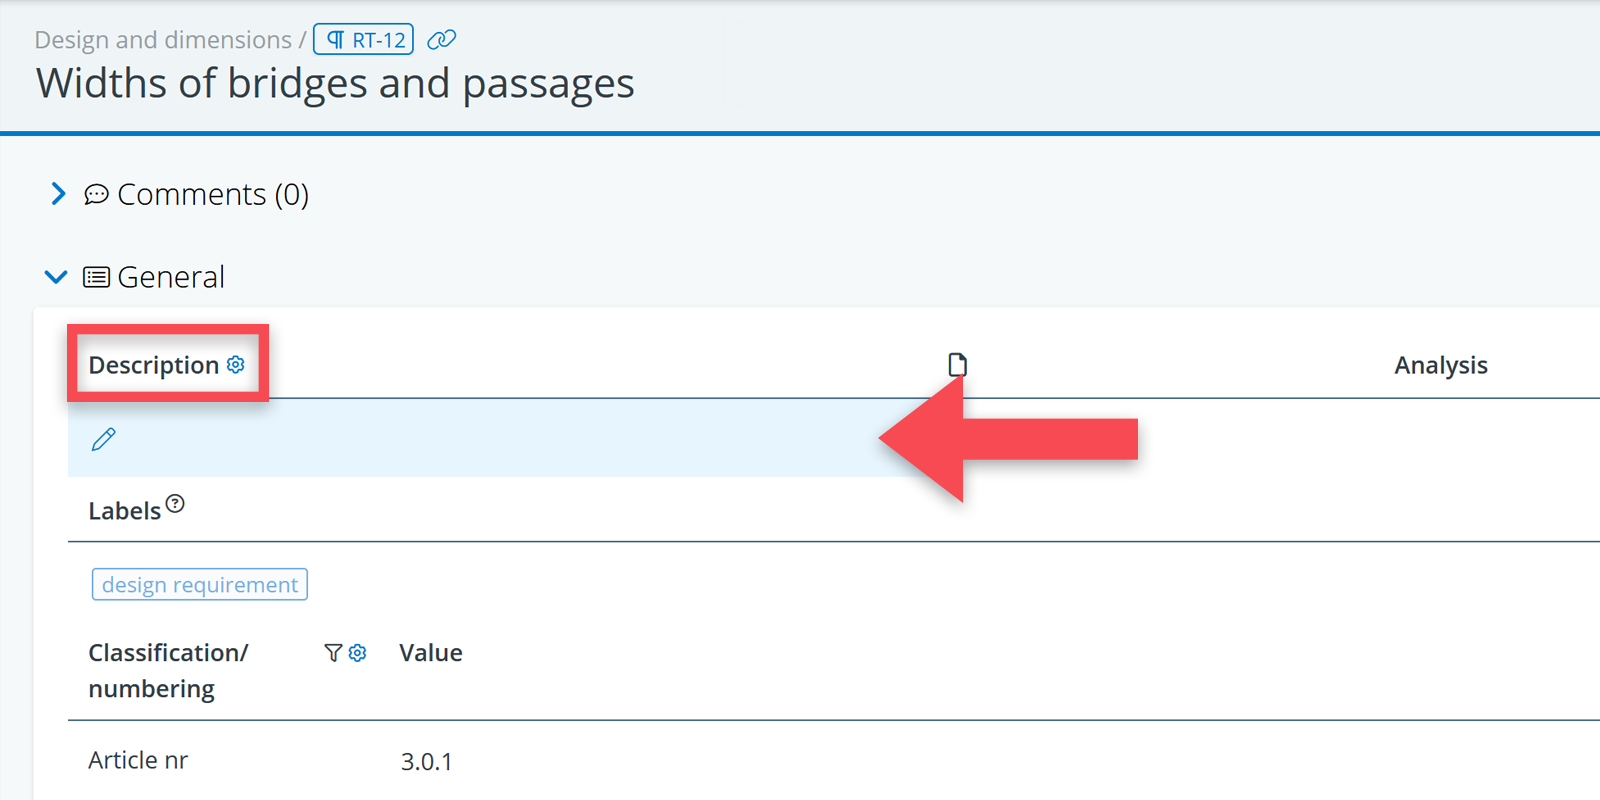
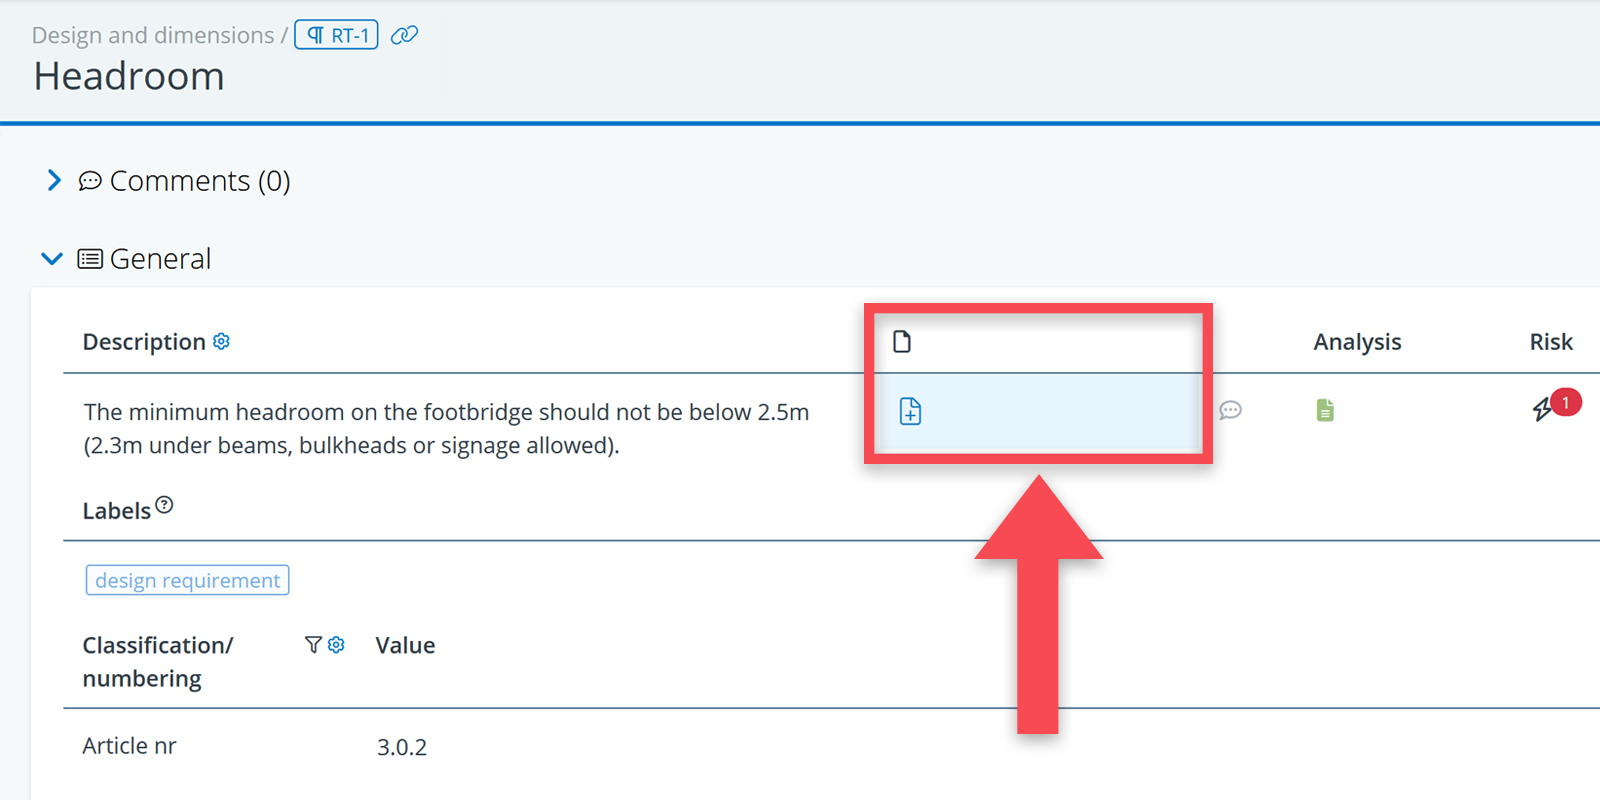
3) If you have created a requirement text object, you will see the detail view on the right hand side of your screen, with an entry field called Description. That is where you can enter the actual text, when you click in the field.
Capturing images or files
Requirement texts may be accompanied by images. These can be added using the supporting files field, located next to the description field.
Tree structure
The structure of the tree depends on where the texts come from.
If your starting point is another requirements tool (e.g. IBM DOORS, Relatics, Polarion), there probably already is a tree structure, which you can import to BriefBuilder.
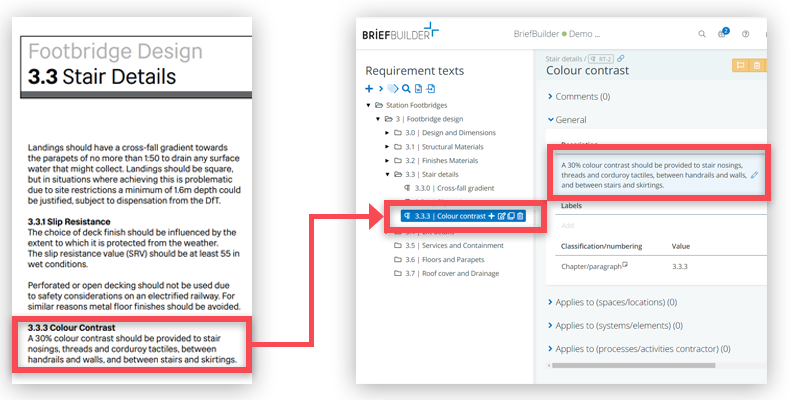
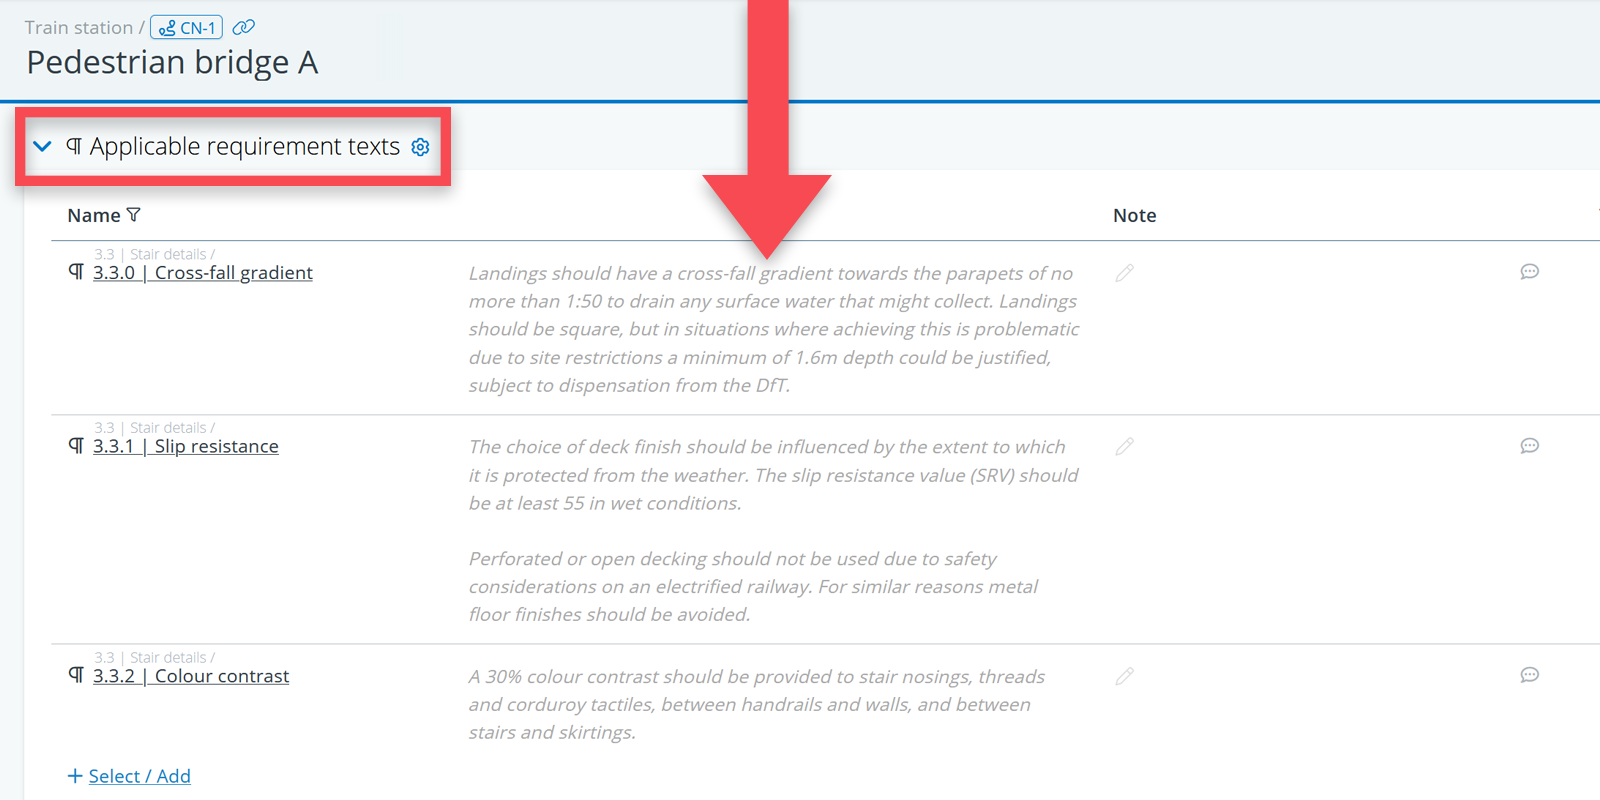
If your starting point is a classic PDF or Word document, the tree typically follows the document’s structure. Chapters and paragraph headers become sections. Texts (alineas, sentences) become requirement text objects. See the example below.

Adding attributes
In some cases, it is necessary to capture not only the requirement itself, but also additional attributes such as:
- External requirement ID (note: all requirements automatically get a BriefBuilder ID as well)
- Status (e.g. required vs desired)
Such attributes can be added via BriefBuilder’s classifications/numbering settings. For this, you have to do the following:
1) In the navigation menu, go to: Settings >Attributes > Requirements
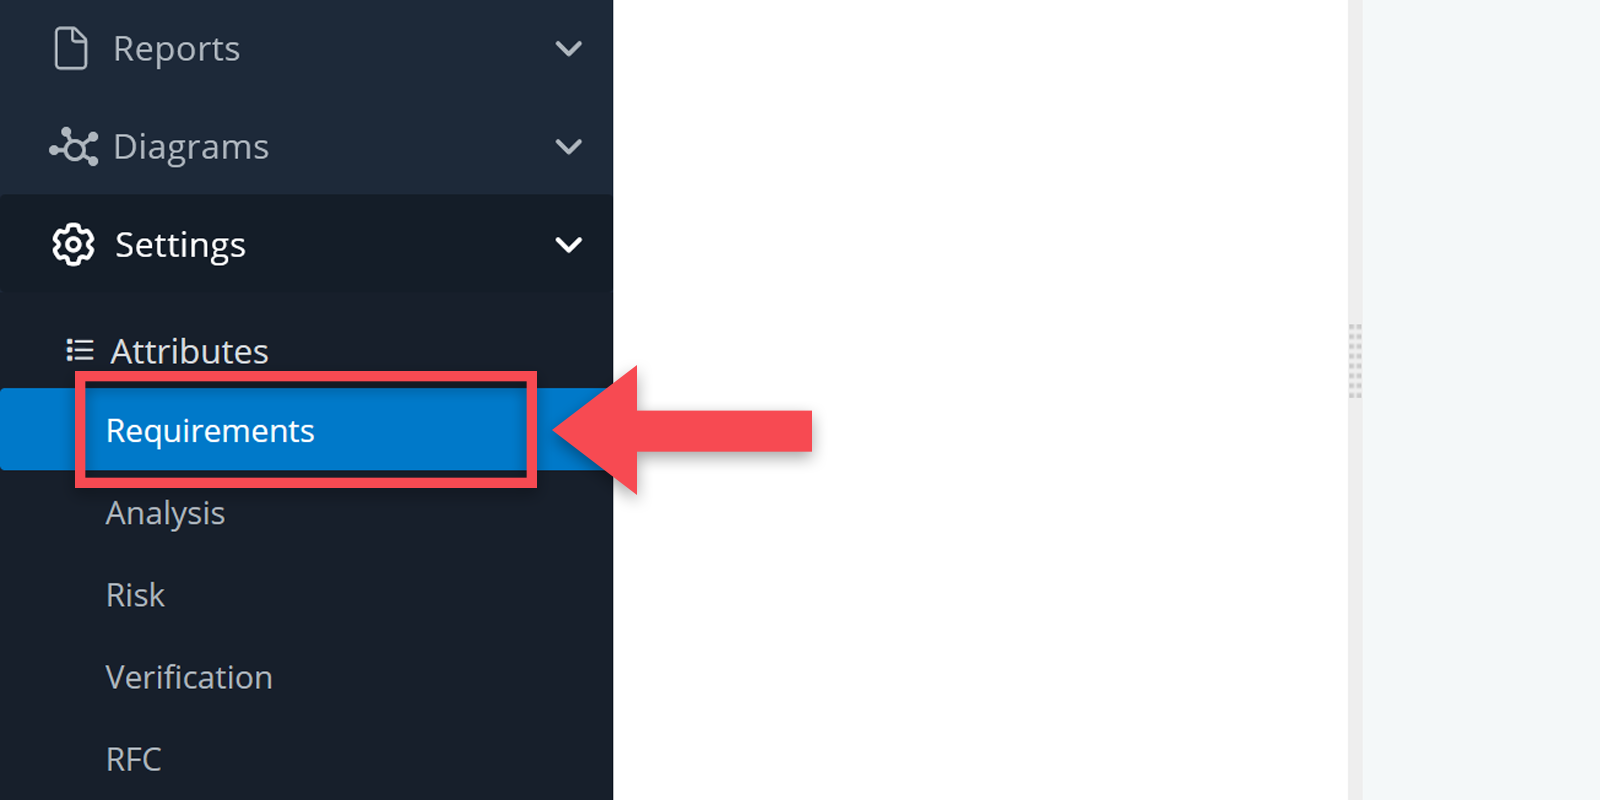
2) In the settings tree, select Requirement texts as the requirement tree that you want to configure settings for.
3) Under Classification/numbering, go to its property table (named Default table).
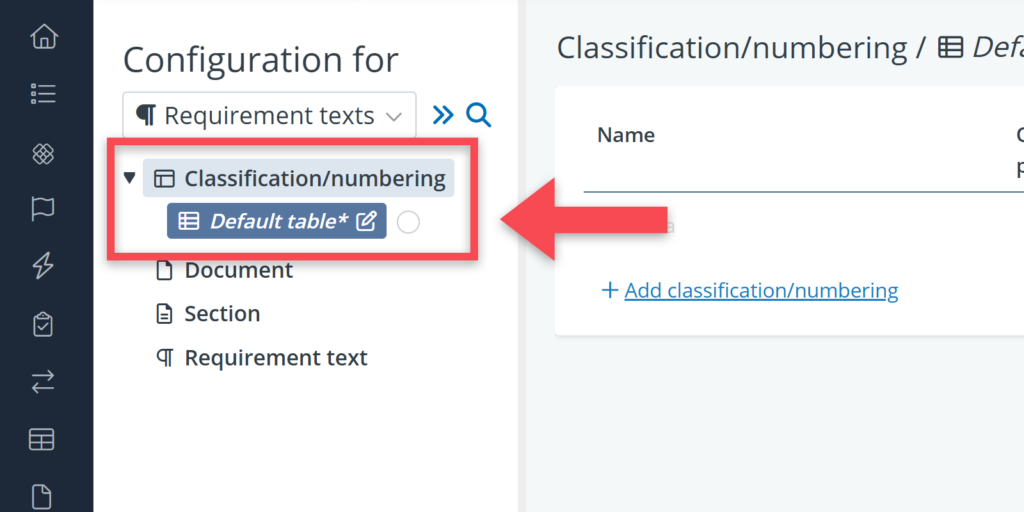
4) Add the relevant attributes by using the + Add classification/numbering button, in the detail view of the settings page.
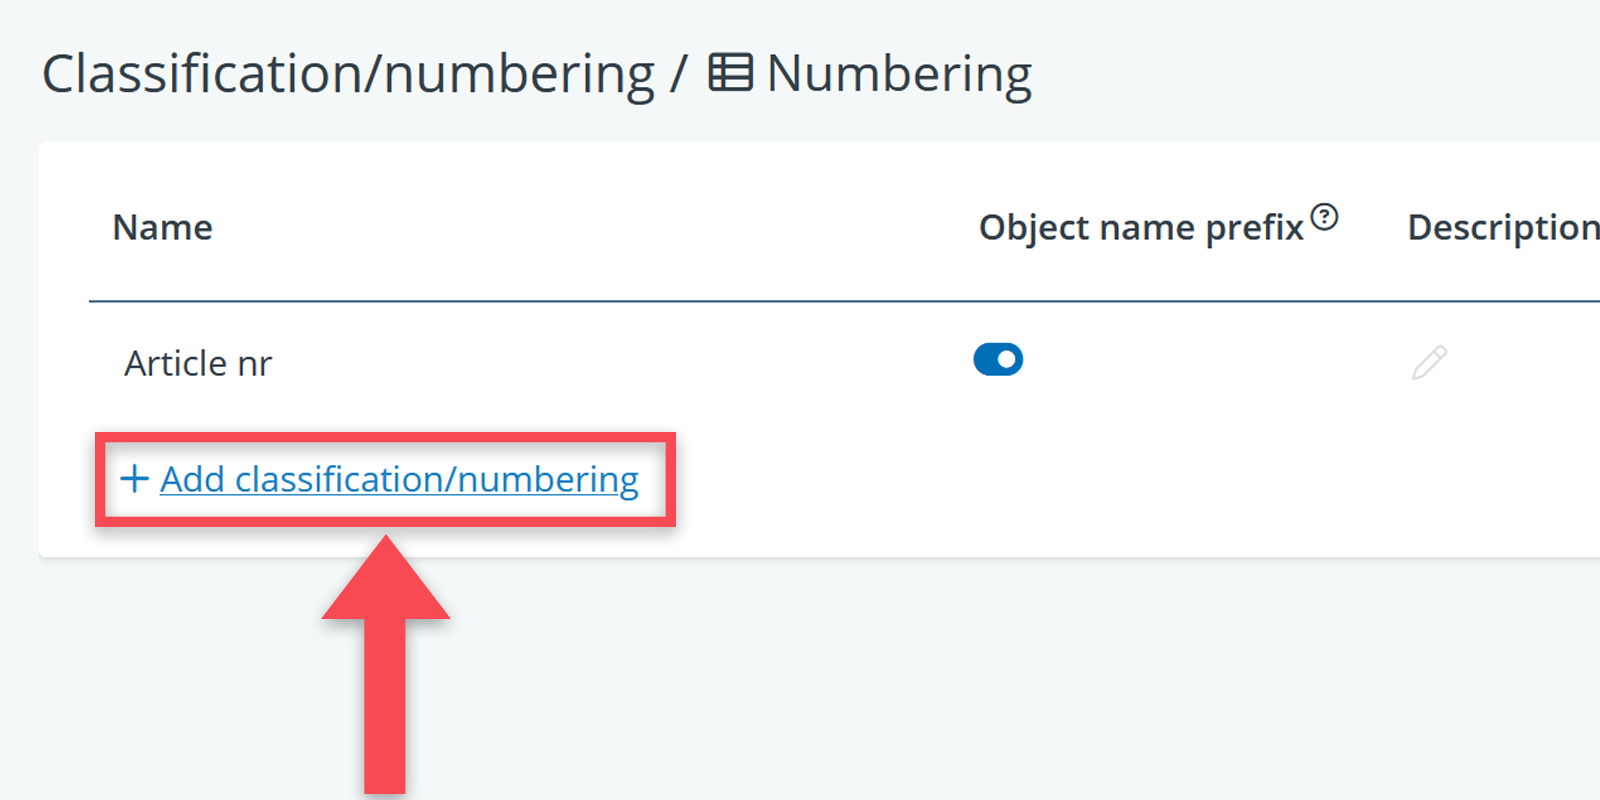
Choose picklist as input type for your classification/numbering property if you wish to add a drop-down picklist. You will also be able to add a description for every individual picklist option
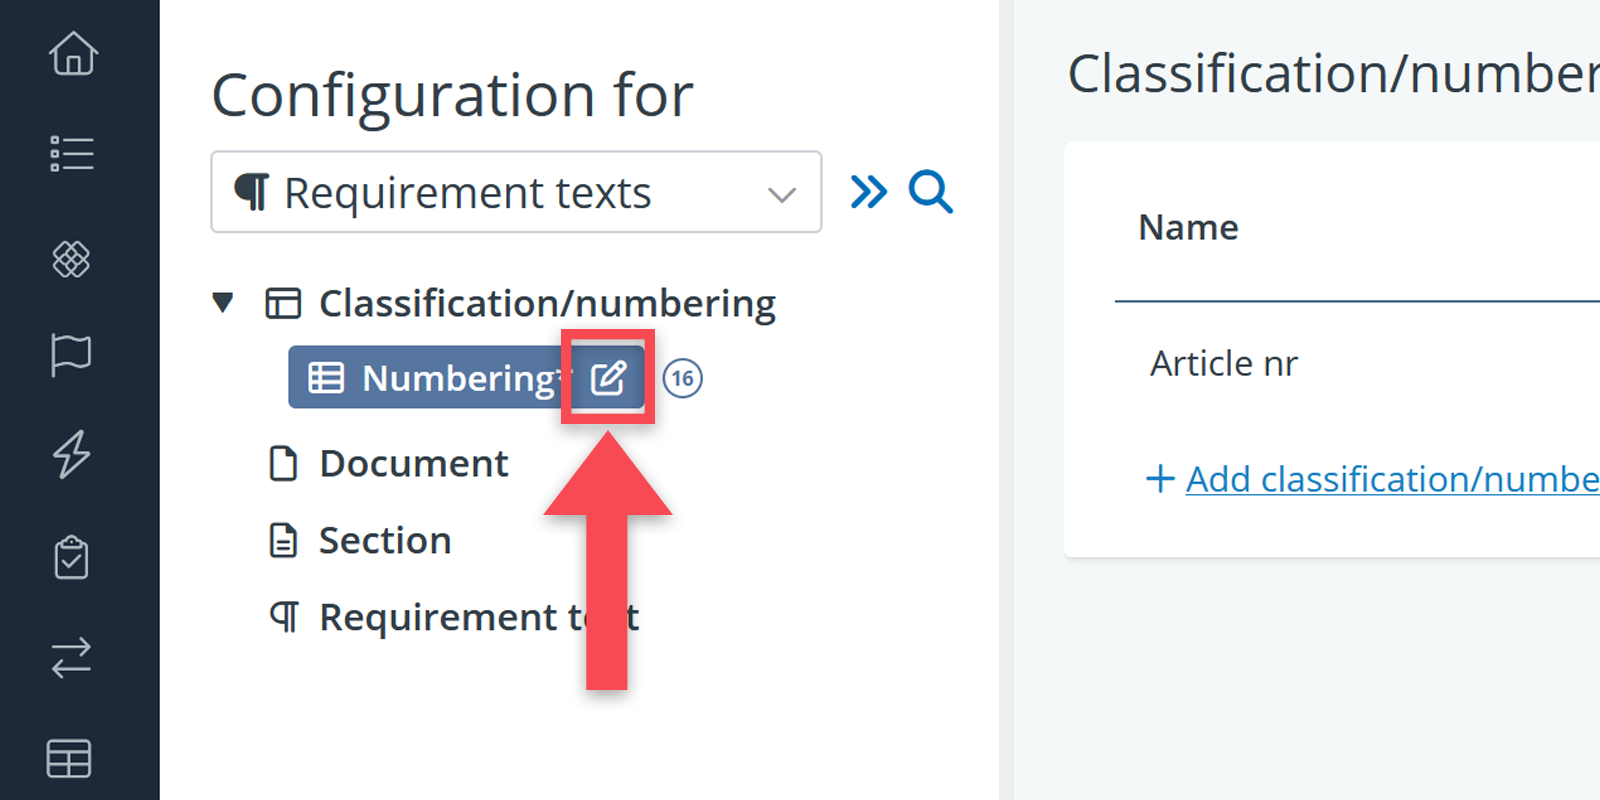
If relevant, you can change the table header (Classifications/numberings) into something else by clicking on the edit button next to the header name.
Adding labels
In case you want to add requirement categories (e.g. stakeholder requirement, system requirement, design requirement, …), you may want to use BriefBuilder’s label feature.
Labels are flexible categorizations that can be added to any kind of object in BriefBuilder. You can create them on the detail view of a requirement text in the table General.
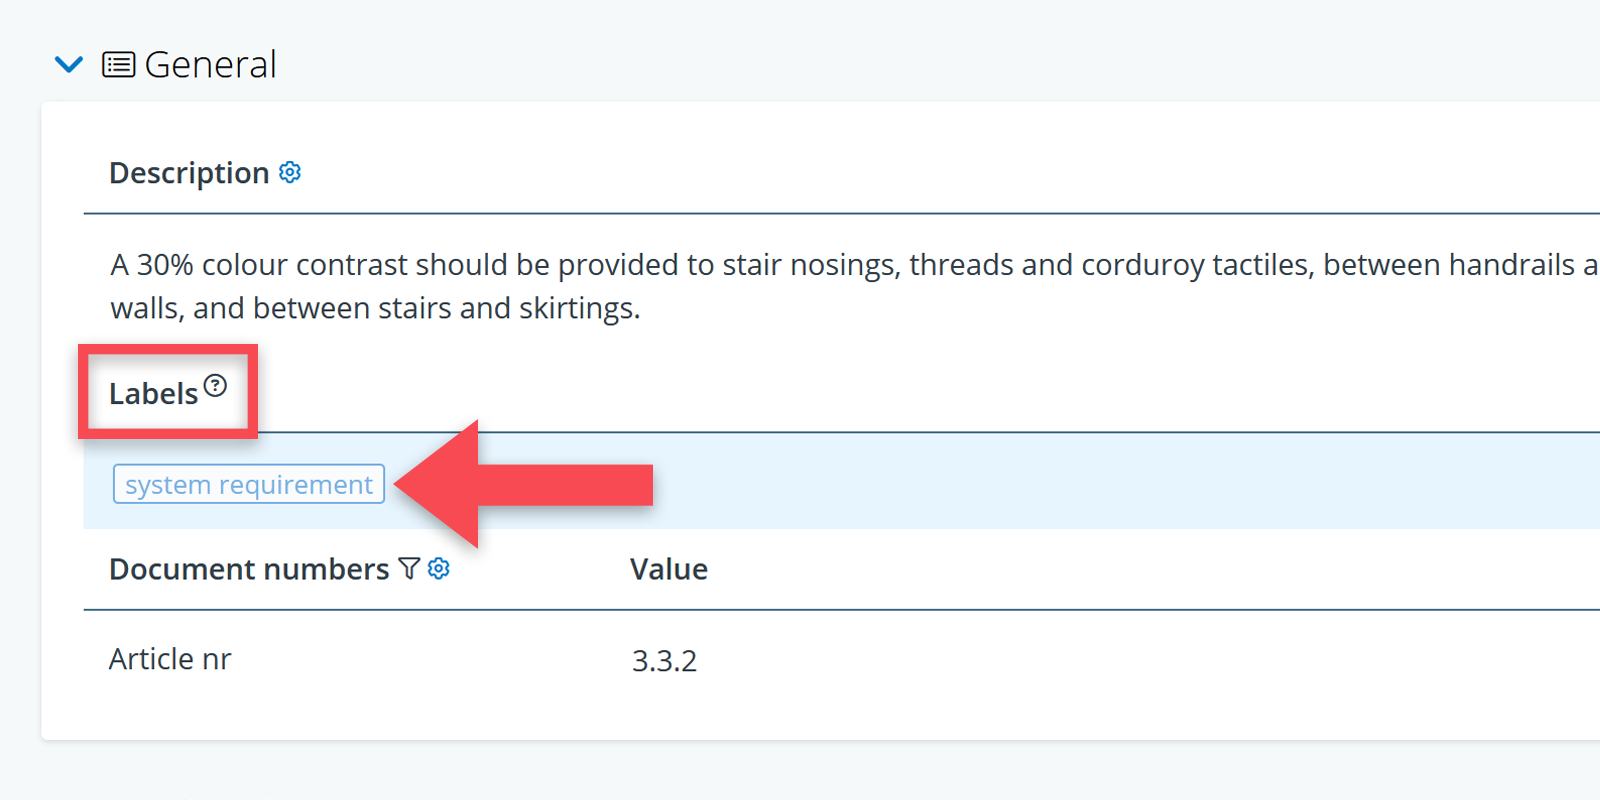
To create a label, you can just start typing in the Label field. If there are already labels in use, these will pop up as suggestions.
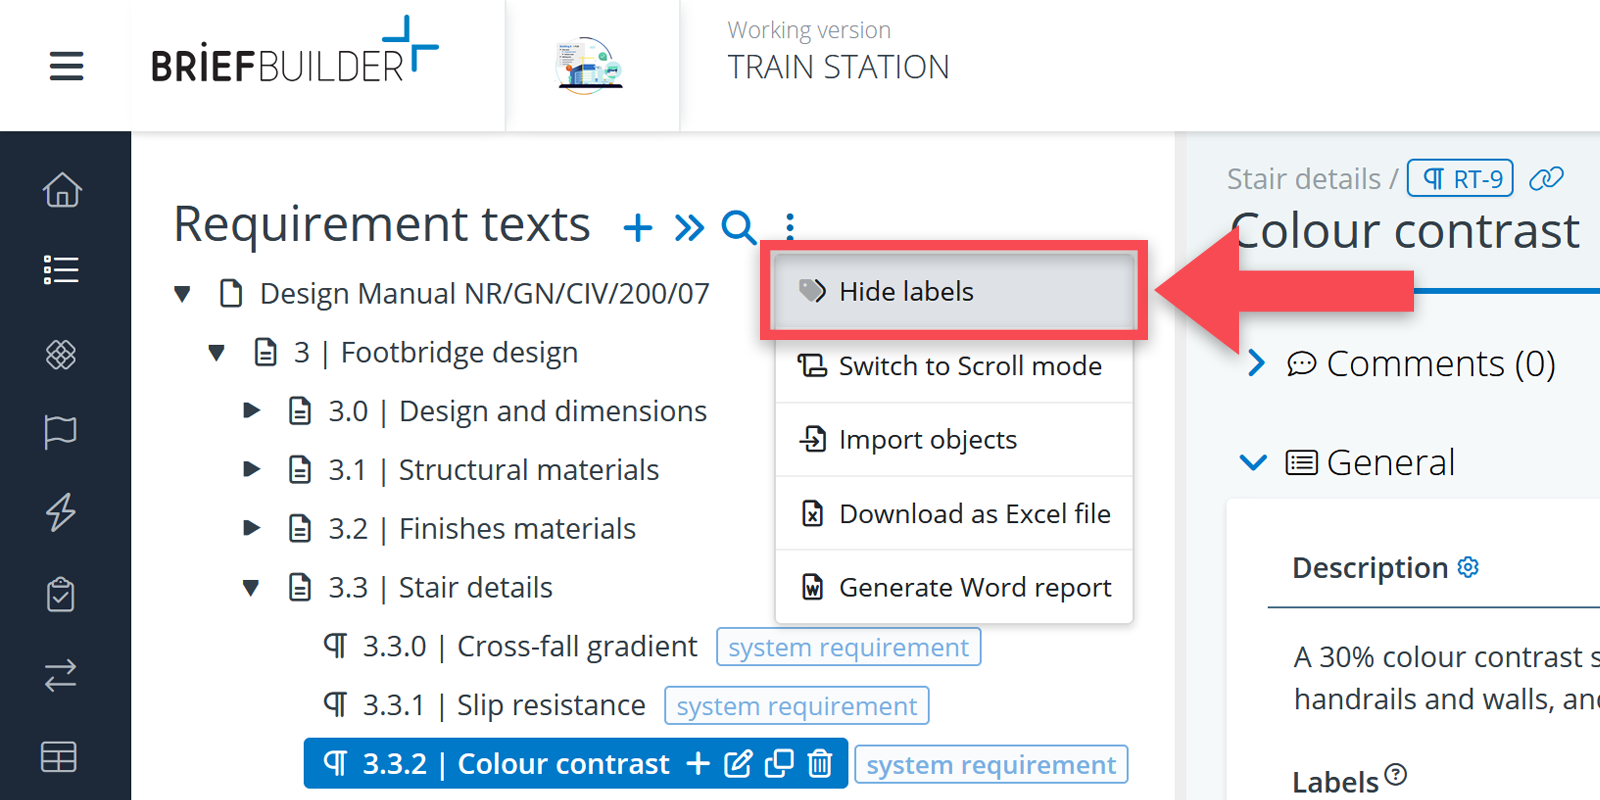
The advantage of labels is that you can use them for filtering and (pre)selections in various tables. Another advantage is that labels are visible in the tree structure. See below.
Note that labels are by default shown in the tree structure. If you prefer not to see them there, you must click on the icon in the tree’s header.
Linking requirement texts to objects
Once you have captured the requirement texts in a tree structure, you may want to link these to the specific project parts to which they apply.
In BriefBuilder you can link documents, sections or specific requirement texts to the following kinds of decompositions:
- Systems and elements: this is a decomposition of all the ‘technical’ parts of your project (e.g. climate systems, distribution systems, foundations, walls etc.).
- Spaces and locations: this a geometric or geographical decomposition of your project (e.g. locations, connections, spaces).
- Processes and activities: this is a decomposition of the processes and activities that the contractor or design team has execute in the project.
To relate a requirement text to an object, you have to do the following:
- Click on +Select in the relevant Applies to table.
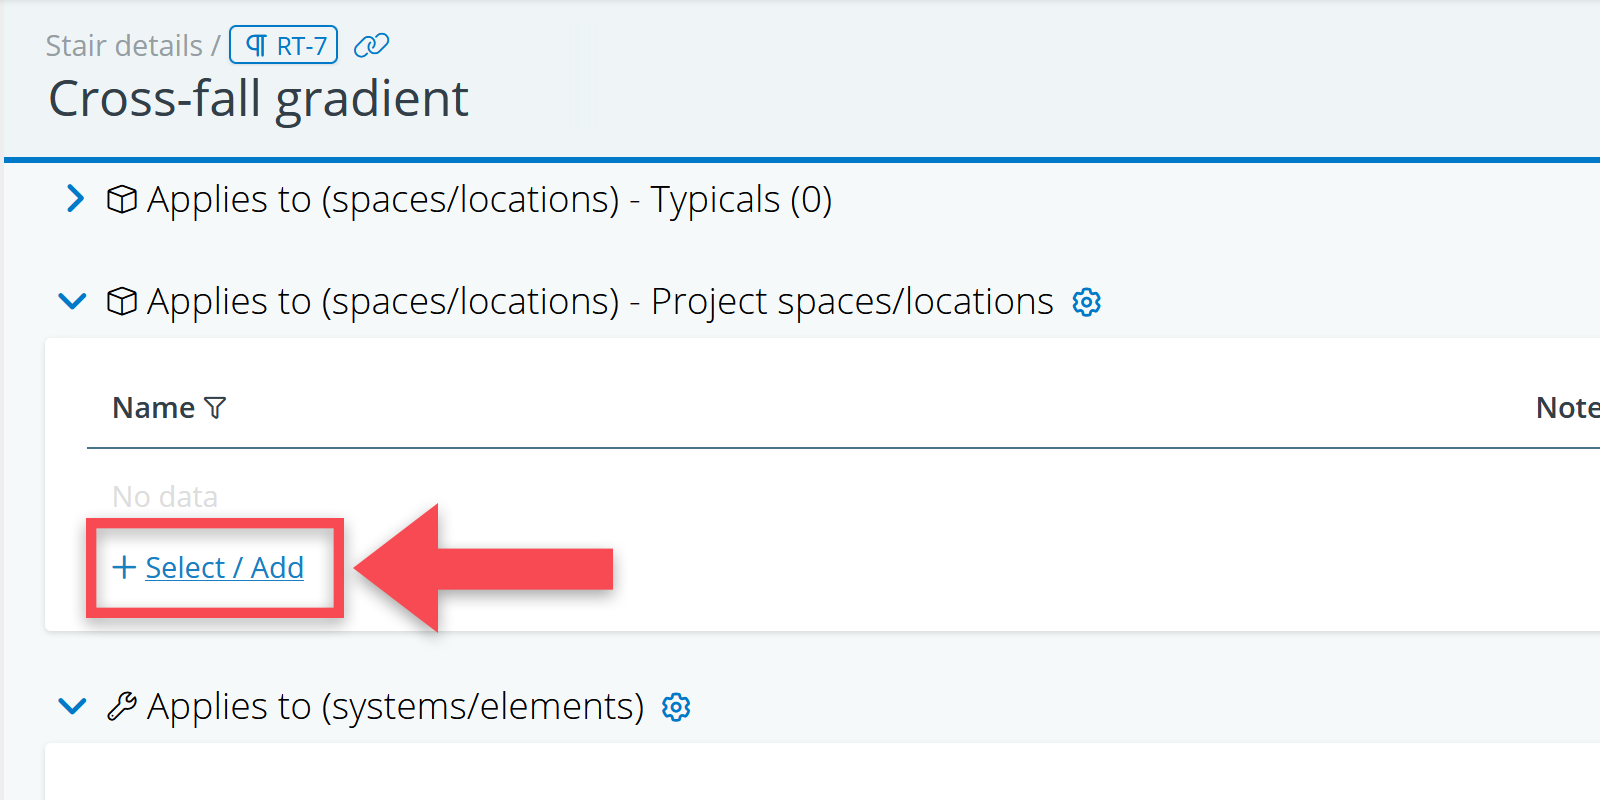
- Check the box(es) for the objects to which the requirement text applies
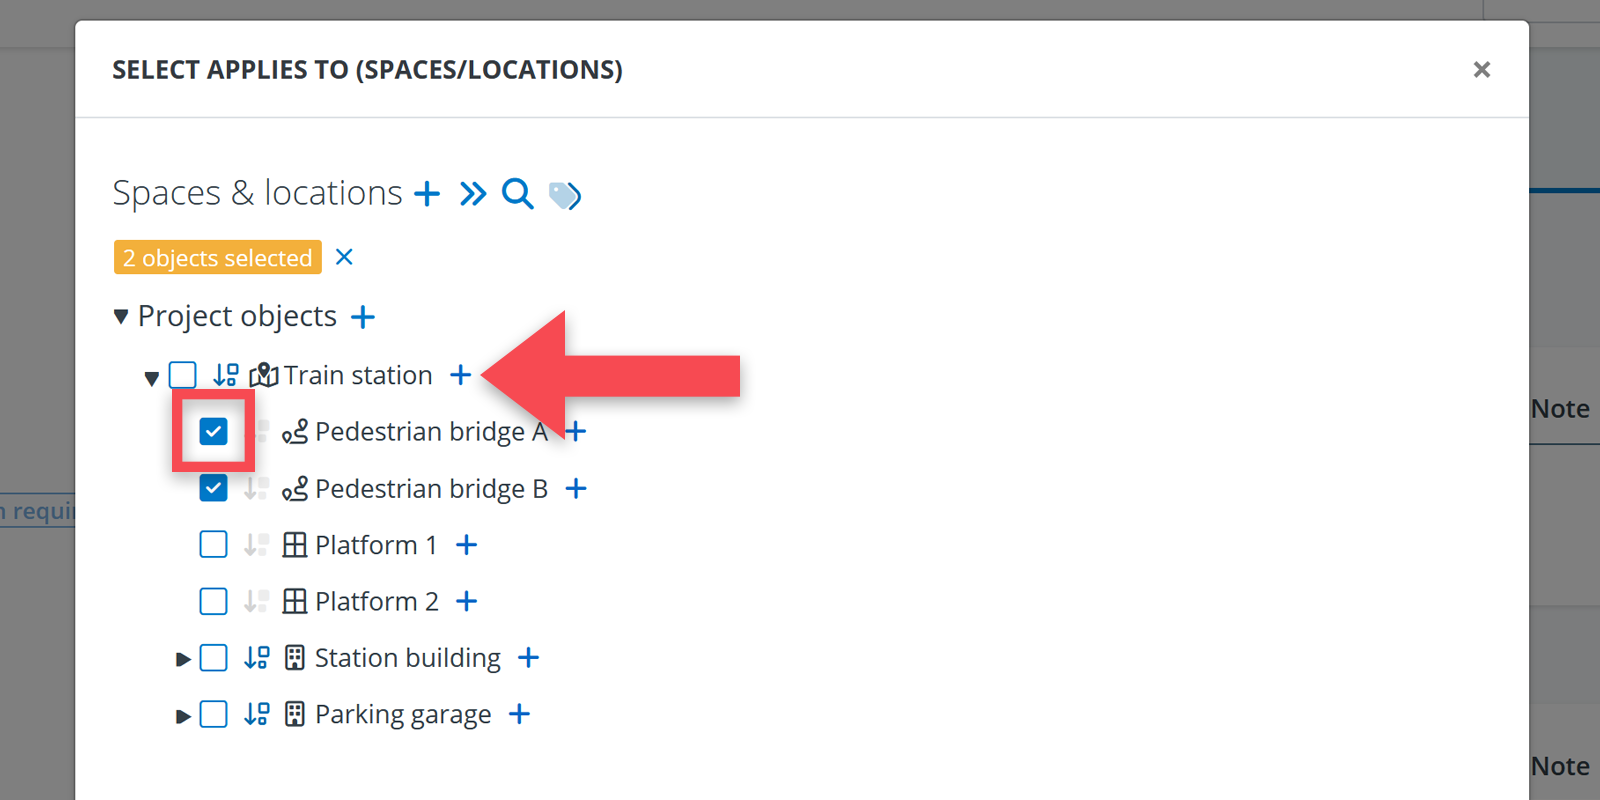
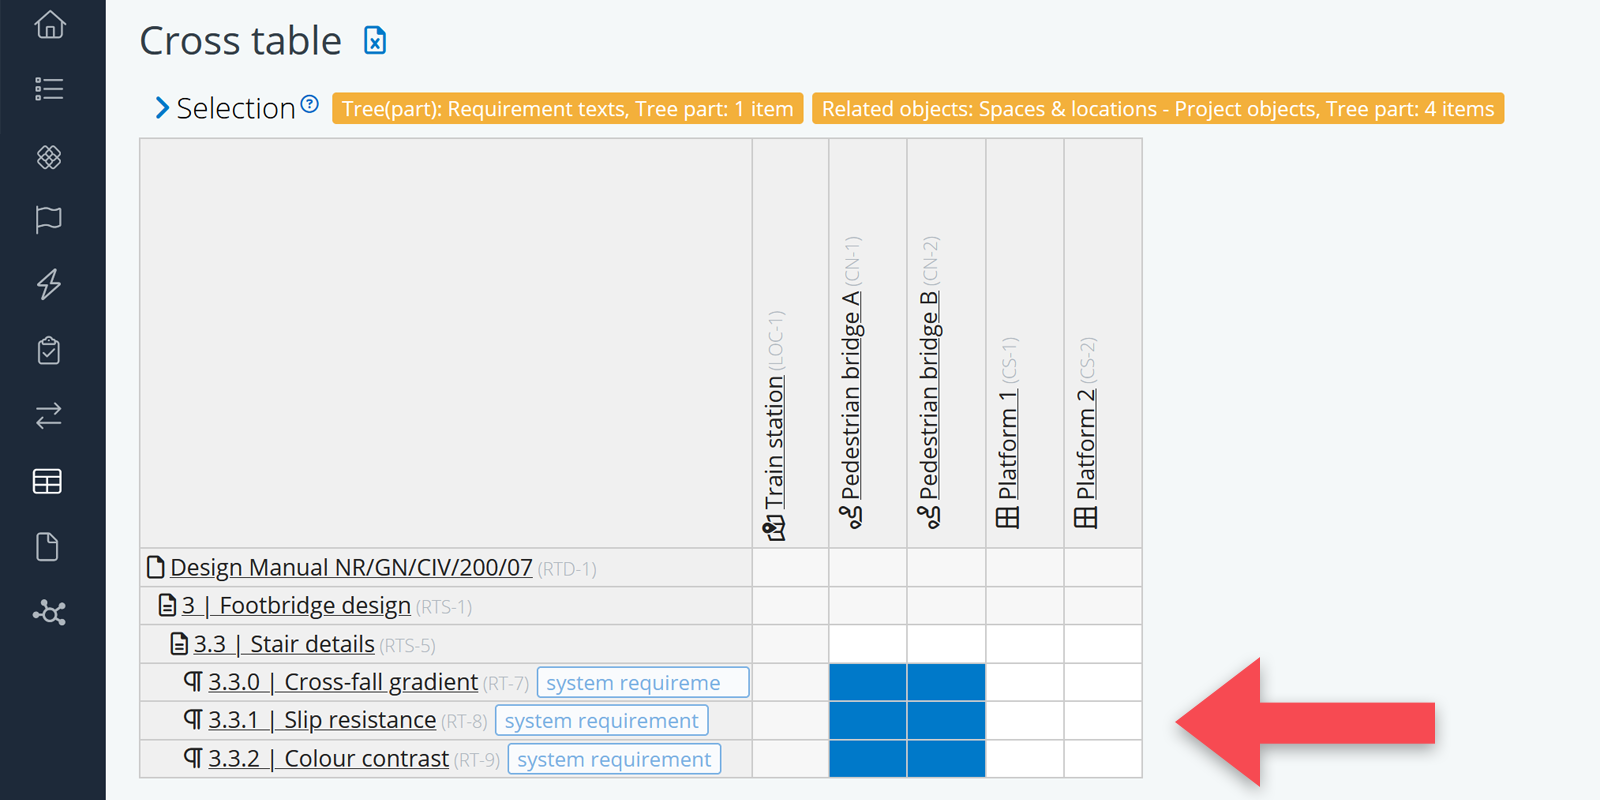
This exercise may—in some cases—feel somewhat redundant. For example, if you have a chapter called Footbridge in your source document, and thus also in your requirements tree, it feels redundant to link all the requirement texts from that chapter to an object called Footbridge in your systems and elements tree.
This is different, however, if you have multiple Footbridge objects in your systems and elements decomposition (e.g. Footbridge A, Footbridge B, as in the example above). In that case, it makes good sense to link the requirements to each of them because then they can be individually be verified and managed.
The creation of relations may also relate to how the project is organized. It can be that it is the construction client who provides the requirements tree, and that it is the contractor that creates the other decompositions based on their design or tender bid. In that case, creating relations is an essential activity for the contractor, specifying which of the client’s requirements have to be applied in the different project parts.
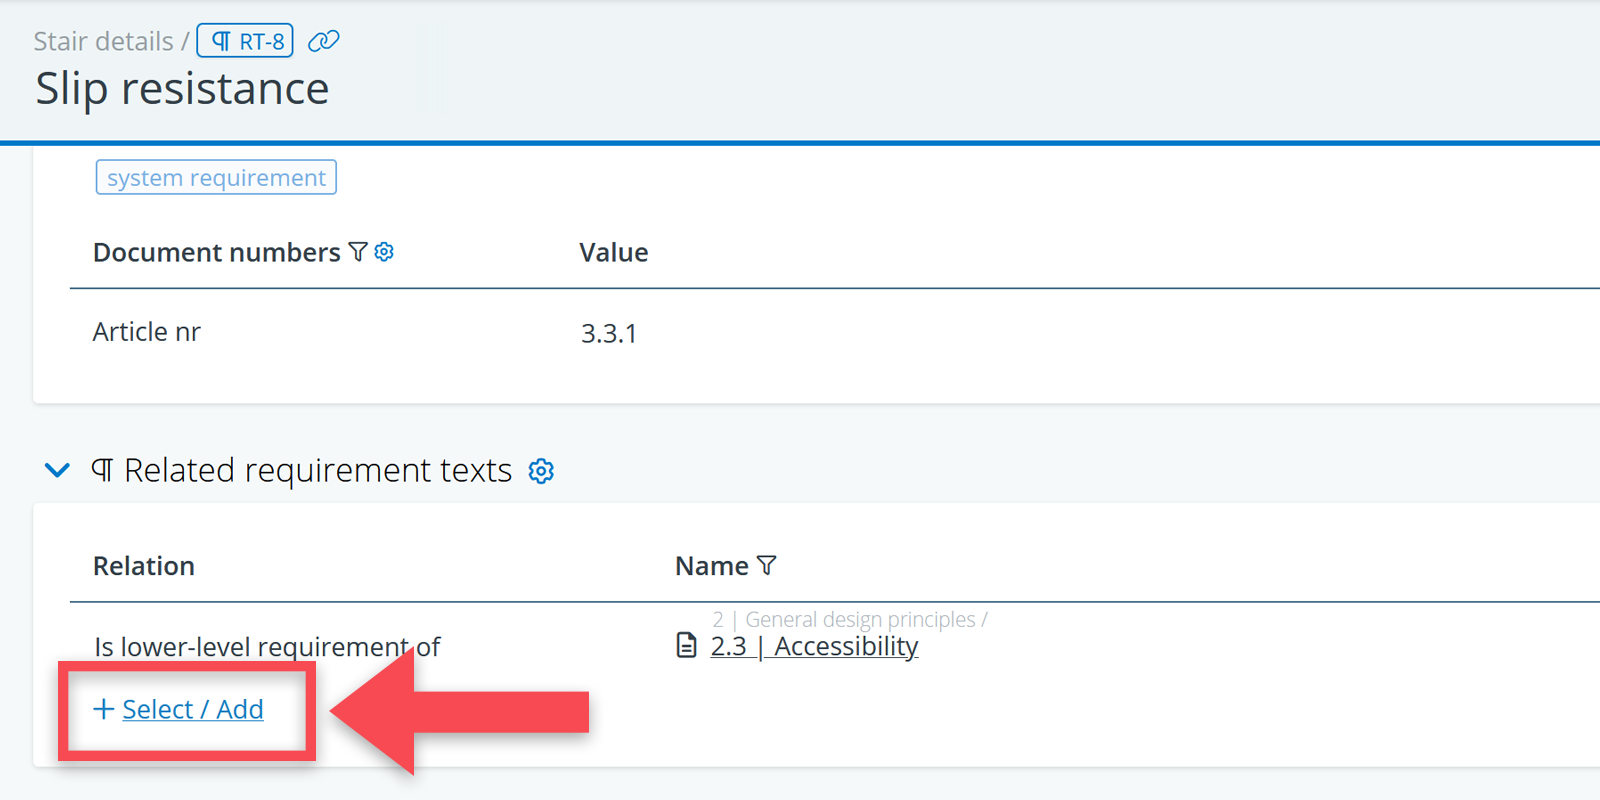
Interlinking requirement texts
When you have a large number of requirement texts, it is quite likely that different requirement texts are related to one another and you may wish to make these relations explicit in your model.
In particular in systems engineering (SE) models, this tends to be a big thing with ‘higher-level’ requirements being linked to ‘lower-level’ requirements.
In BriefBuilder, such relations can be created in the table Related requirement texts.
Depending on what types of relations there have been defined in the settings menu, you’ll be able to choose from different types of relations.
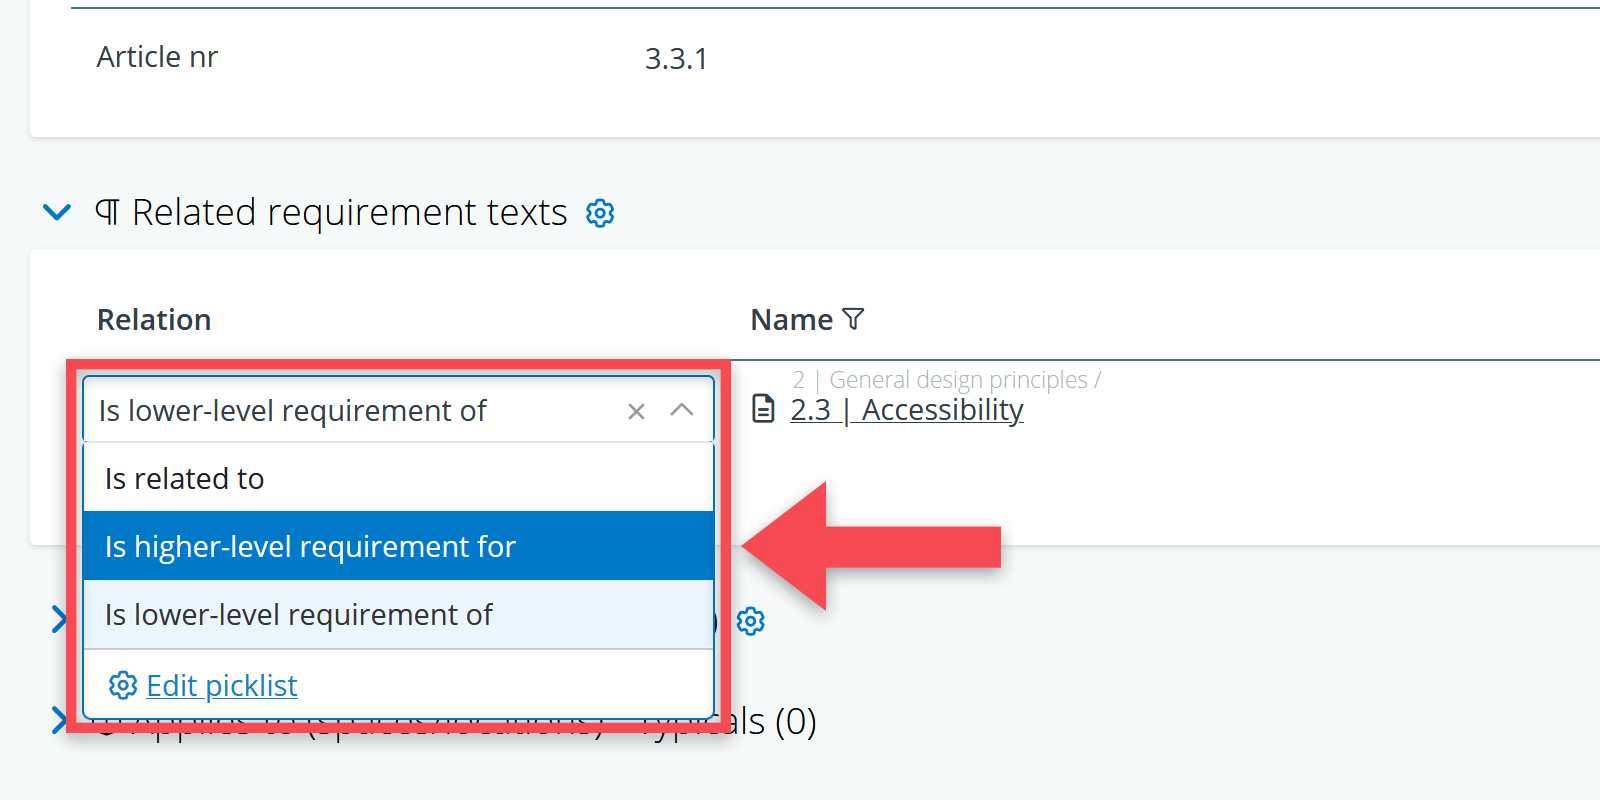
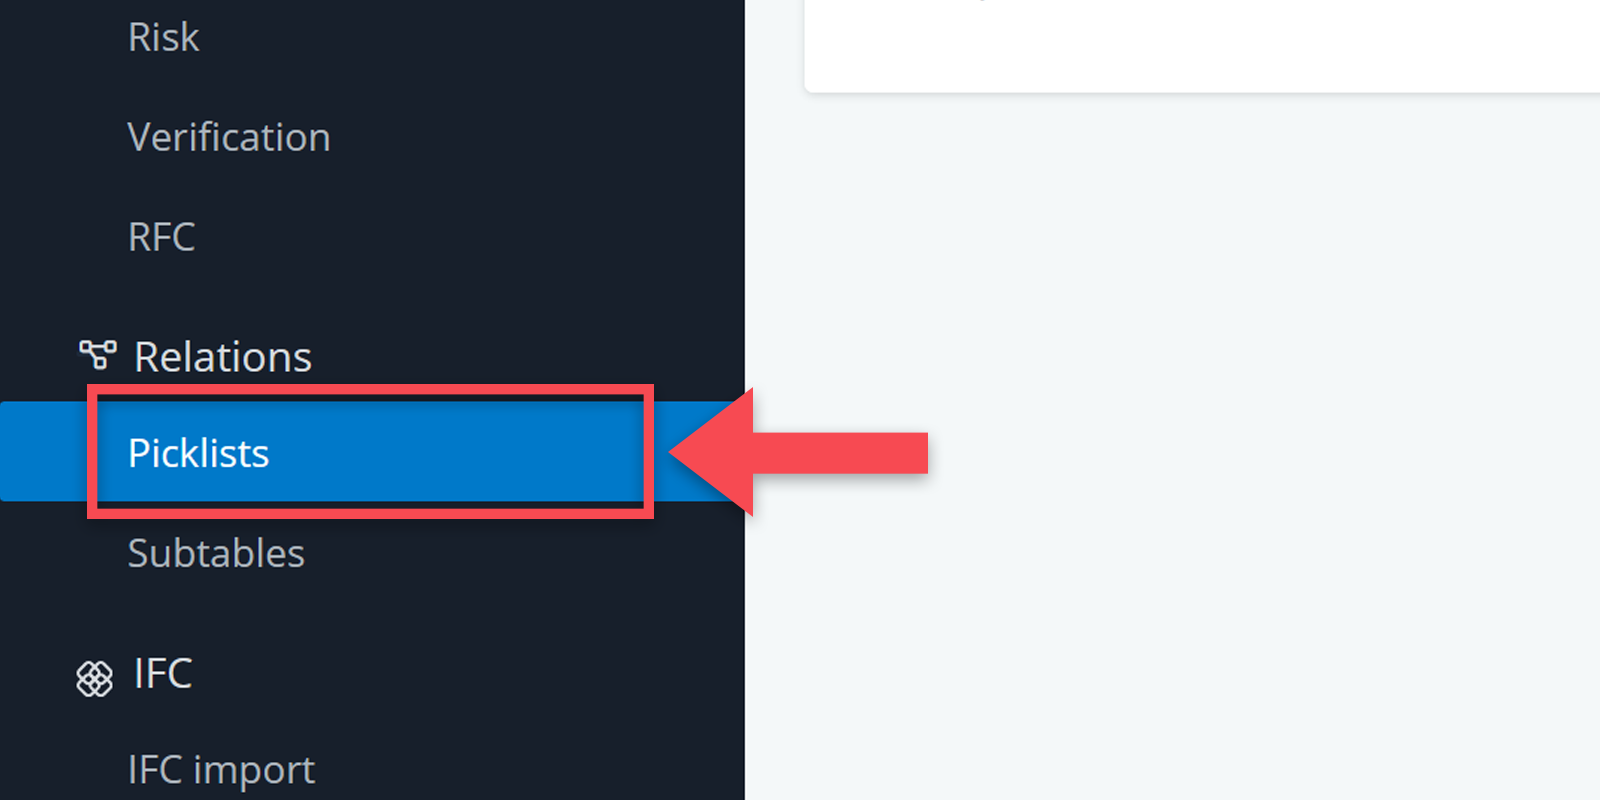
You can define the different options for this relations in the settings menu. You have to go to:
Settings > Relations > Picklists
Analysis tags
In BriefBuilder, you can use the analysis feature to add certain ‘tags’ or categorizations to requirements. You can use this feature for tags that, for example, indicate the stakeholder for a requirement, the source or the type of requirement (e.g. functional or non-functional)
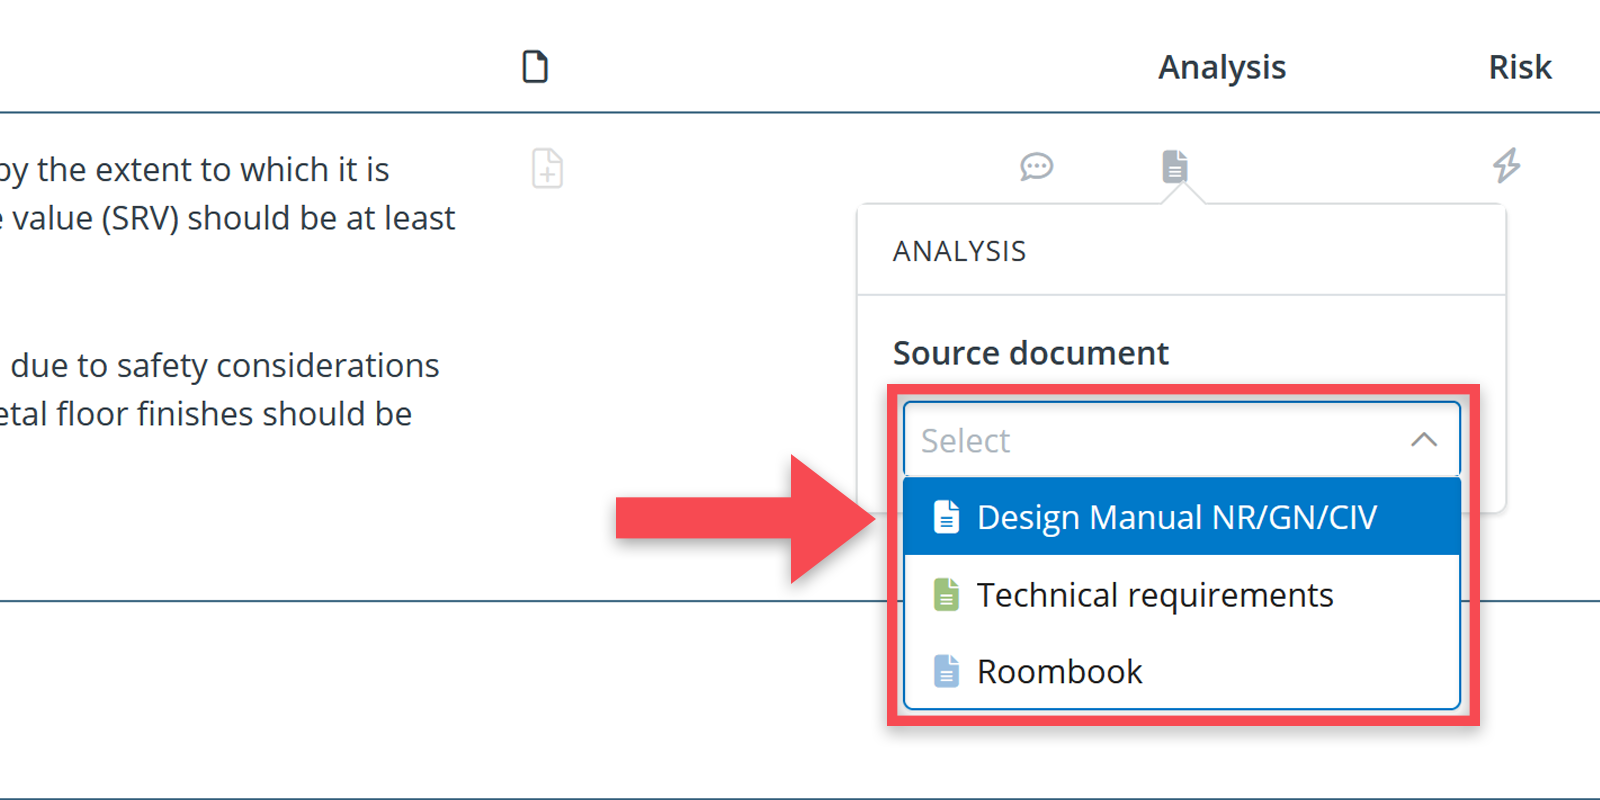
l overview of all analysis outcomes can be found in the analysis table and the analysis dashboard.
Verifying requirement texts
Verification is the process of checking whether the proposed, designed or built solutions meet the set requirements.
Just like with analysis, the verification of requirement texts can be done at two levels:
- The requirement text itself: Has this requirement been met, in the project as a whole?
- The relations between requirements and objects/project parts: Is a particular object (e.g. a space or system) compliant with the requirements that apply to it?
Our general recommendation is to focus on the relations because verifications are, almost by definition, related to a specific object: you are verifying whether a particular design/ engineering solution is compliant with the formulated requirements.
Having said that, it can also be that a requirement is so general in nature that it cannot be linked to a particular object. In that case, you can only verify the text itself, or create a generic object (e.g. Project), to which you link the requirement.
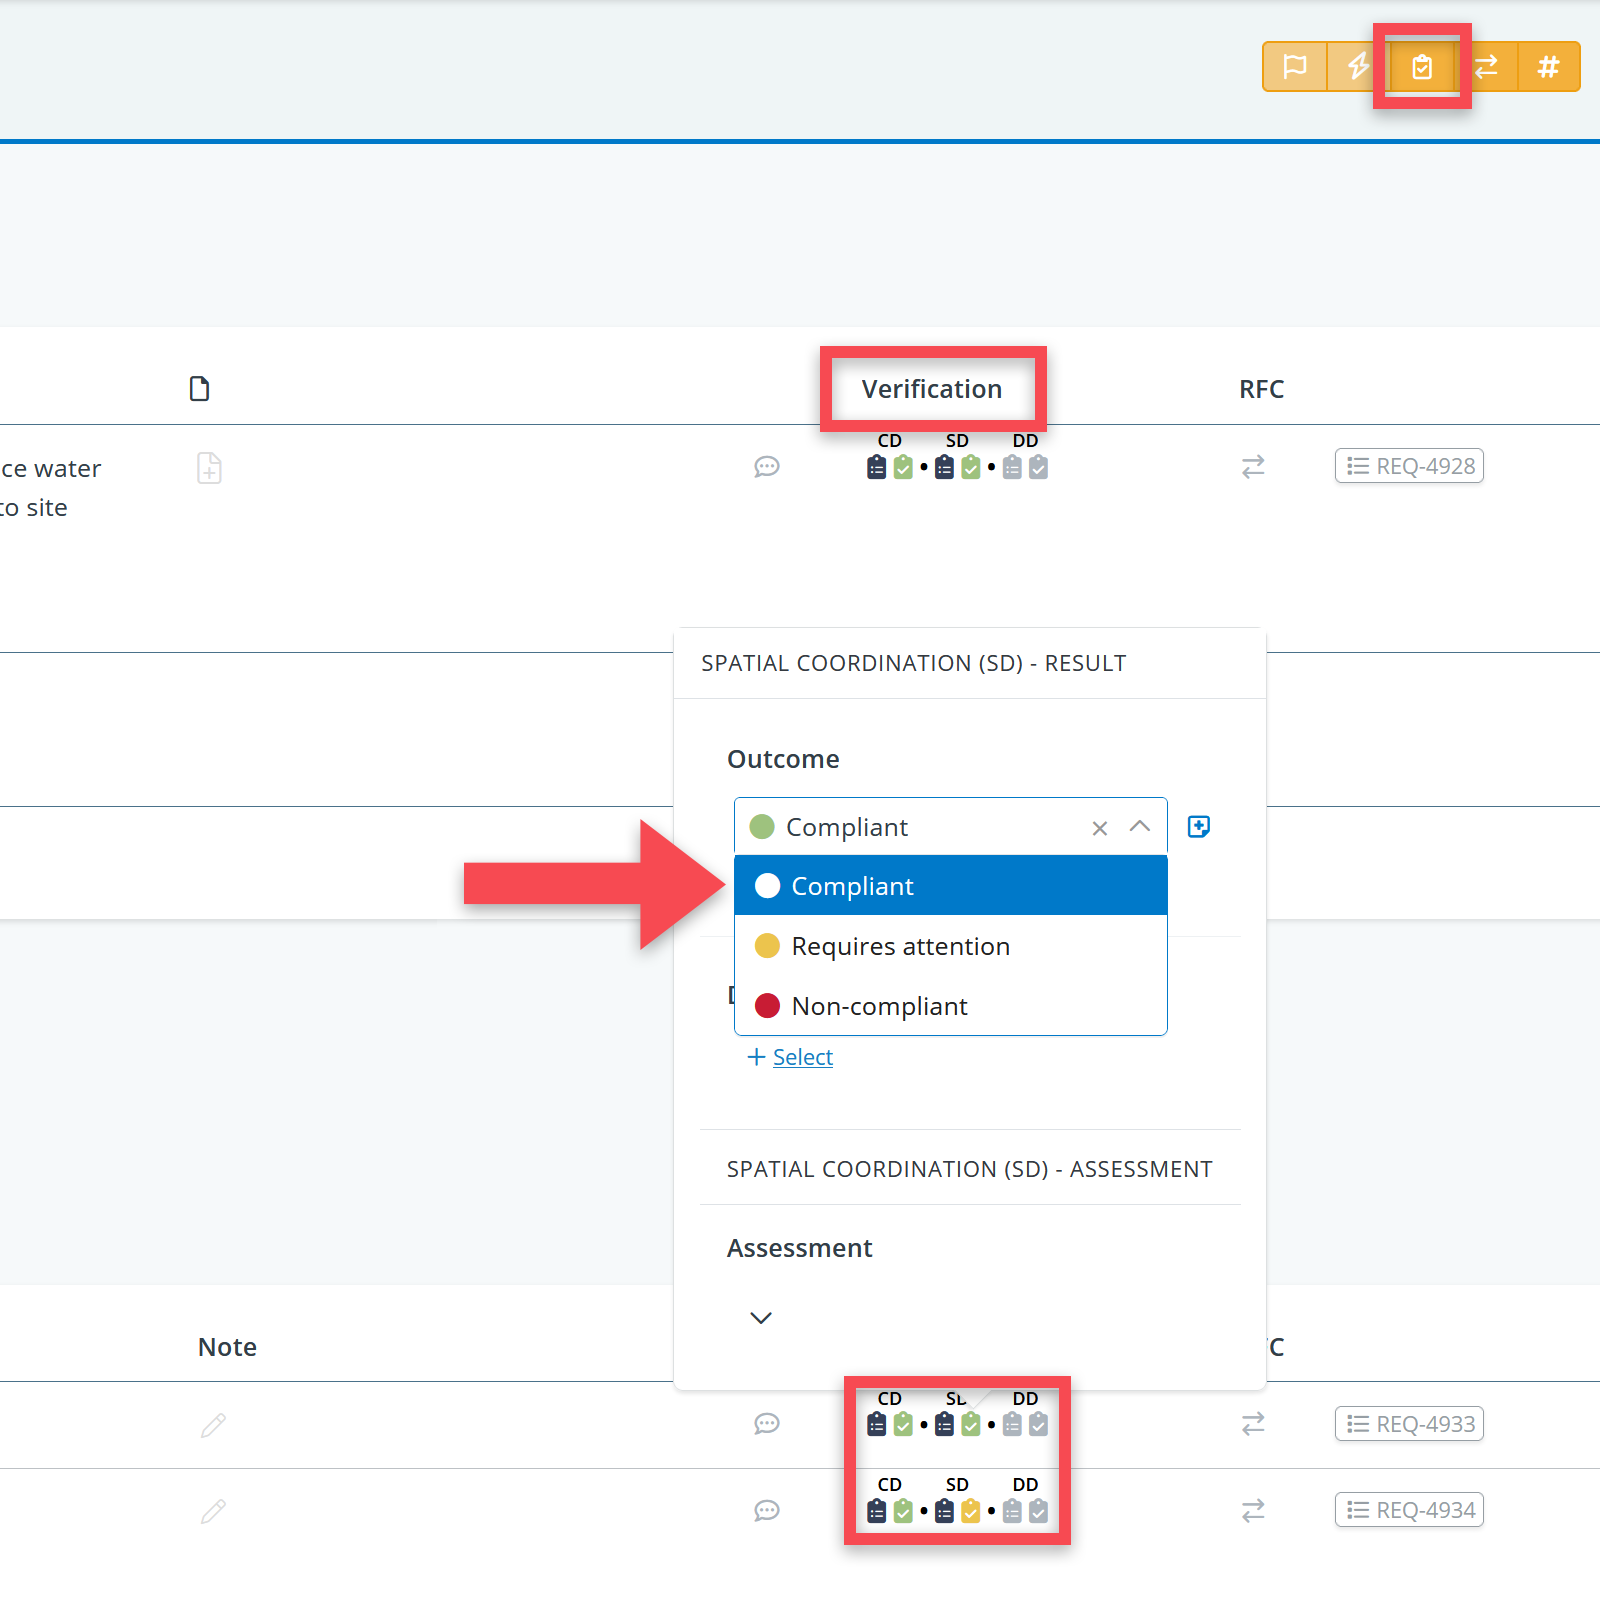
Example of verification on relation level. Note that you have to click on the yellow verification button in the upper right corner of the detail view to see these fields.
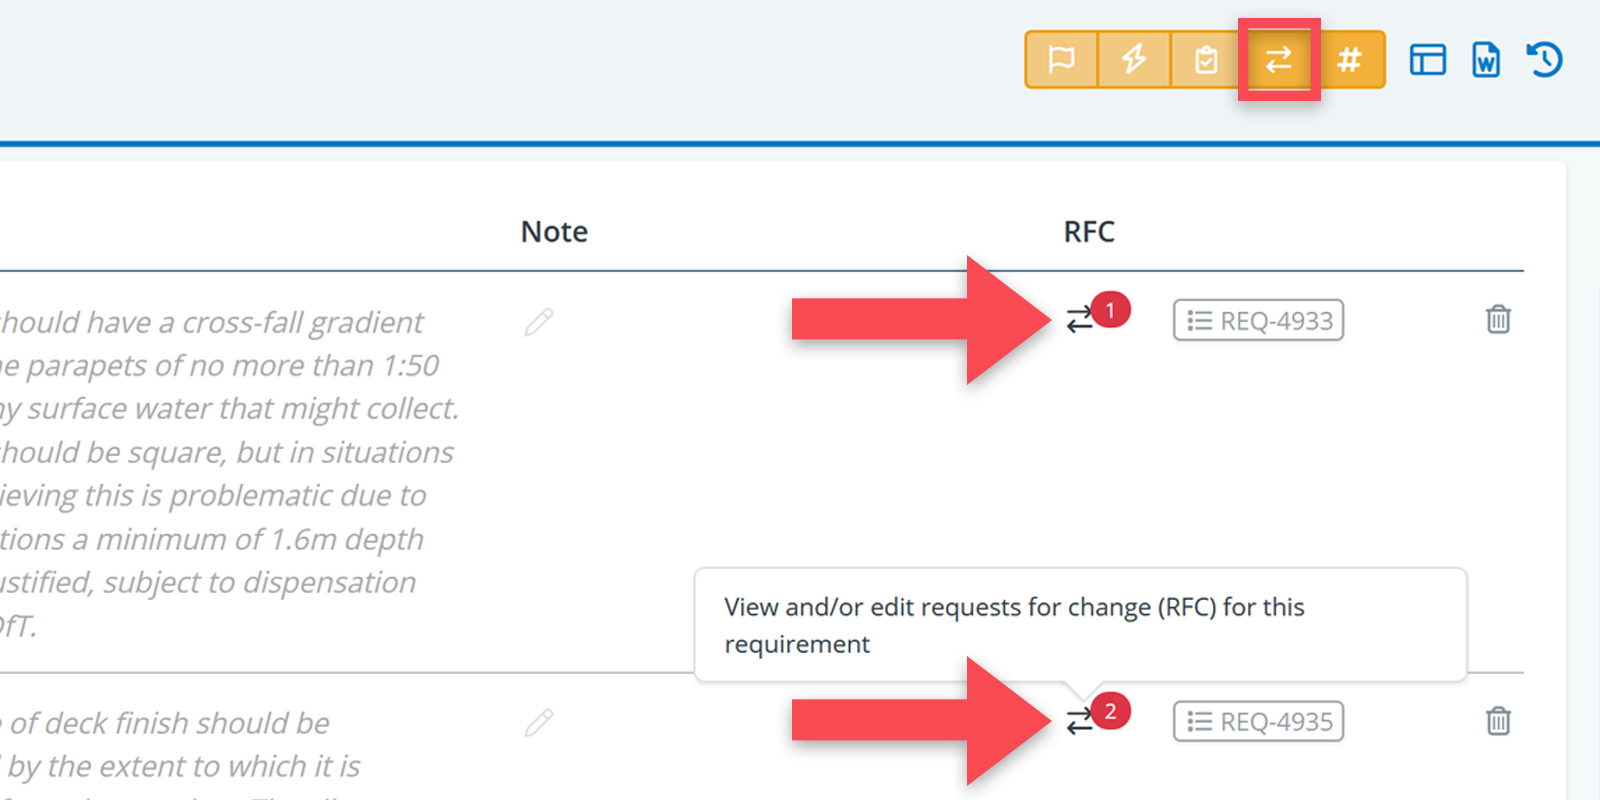
Managing changes
Just like with model-based requirements, you create requests for change (RFCs) for requirement texts. See here for a full explanation of this feature.
Importing from other tools
If requirement texts come from another application (e.g. DOORS, Polarion or Relatics), requirement texts can often easily be imported via Excel.
To do so, you have to do the following:
- Get an Excel export with all requirements from the system in question. Click here to learn about Excel exports / reports.
- Adjust the Excel file according to our format to make it suitable for an import into BriefBuilder.
- Predefine any requirement attributes/classifications that you would like to include in your import (as explained earlier in this article). E.g. if you want to import a requirement number, you first have to create requirement number as a classification/numbering property in BriefBuilder.
- Import the file via the import button () at the top of the requirement text tree.

Import format
The import templates can be found here.
As you will notice, the import template has three sheets: objects, properties, and relations.
If you want to import requirement texts, only the first two are relevant. The sheet relation is relevant when you want import links to objects in other trees.
See below for how to fill out the different columns in the import template.
Worksheet objects
This is the sheet where you place the requirements names and the texts. See below for which columns are relevant.
| Column | Content |
| A (Object type) | The type of object you want to create (folder, document, section, requirement text) |
| B (Object ID) | Not relevant, unless you need to distinguish between requirement texts that have the same name (in column C) |
| C (Object name) | The name or title of the object |
| D (Parent object ID) | Not relevant, unless the parent object has a specific ID (in column B) |
| E (Parent object name) | The name of the object under which an object should be positioned in the tree |
| F (Description) | For requirement texts this is the actual requirement. |
| G (Labels) | Possible labels, if relevant (e.g. system requirement, stakeholder requirement) |

In this example, you are importing two folders and two requirement texts.
Worksheet properties
This is the sheet that you can use to import attributes such a requirement ID or a reference to a source.
| A (Object ID) | Not relevant, unless you have used IDs on the object sheet |
| B (Object name) | The title or name of the object for which you want to add the attribute) |
| C (Property name) | The name of the attribute that you want to import (e.g. external requirement ID) |
| D (Comparator) | Not relevant in this case |
| E (Value) | The value or content of the attribute (e.g. AA.B3 or something like that) |
| F (Note) | Not relevant in this case |
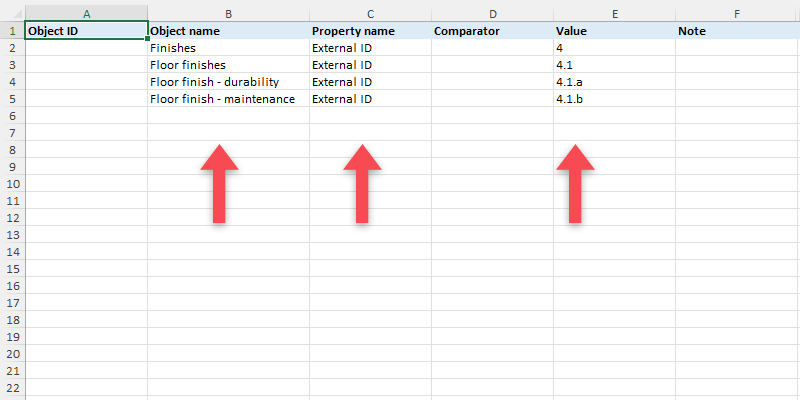
In this example, all four objects (2 x folder, 2 x requirement text) get an an external ID
Worksheet relations
This sheet is only relevant if you want import relations between the requirement texts and objects in other trees (e.g. systems and elements).
| A (Object ID 1) | Not relevant, unless you have used IDs on the object sheet |
| B (Object name 1) | The name of the requirement text that you want to create the relation for |
| C (Object type 2) | The type of object that you want to relate to (e.g. system, element, space, process, …) |
| D (Object ID 2) | Not relevant, unless you need to distinguish between objects with the same name |
| E (Object name 2) | The name of the object that you want to relate a specific requirement text to (e.g. footbridge, platform etc.) |
| F (Value) | Not relevant in this case |
| G (Note) | A possible Note (e.g. additional explanation about why this requirement is relevant for this particular object). |

In this example, there are two requirement texts (concerning durability and maintenance) that will be related to an spatial element called ‘Floor office spaces’