
If you have a large amount of data that you want to add to BriefBuilder, you may want to import that data by means of an Excel import.
You can import the following data:
- Objects
- Properties
- Relations
- Analysis data for objects, properties, and relations.
- Supporting files & Uploads
Importing Excel data can be very powerful, but preparing the import Excel sheets can be a complex operation that requires structuring data in a certain way. But, if you the follow the instructions below, you should be able to manage it just fine : – )
Do you want to go straight to the import templates? Those can be found at the bottom of this page.
The import button
Excel imports can be done by means of the import button that can be found under More options at the top of each tree in the tree options menu.
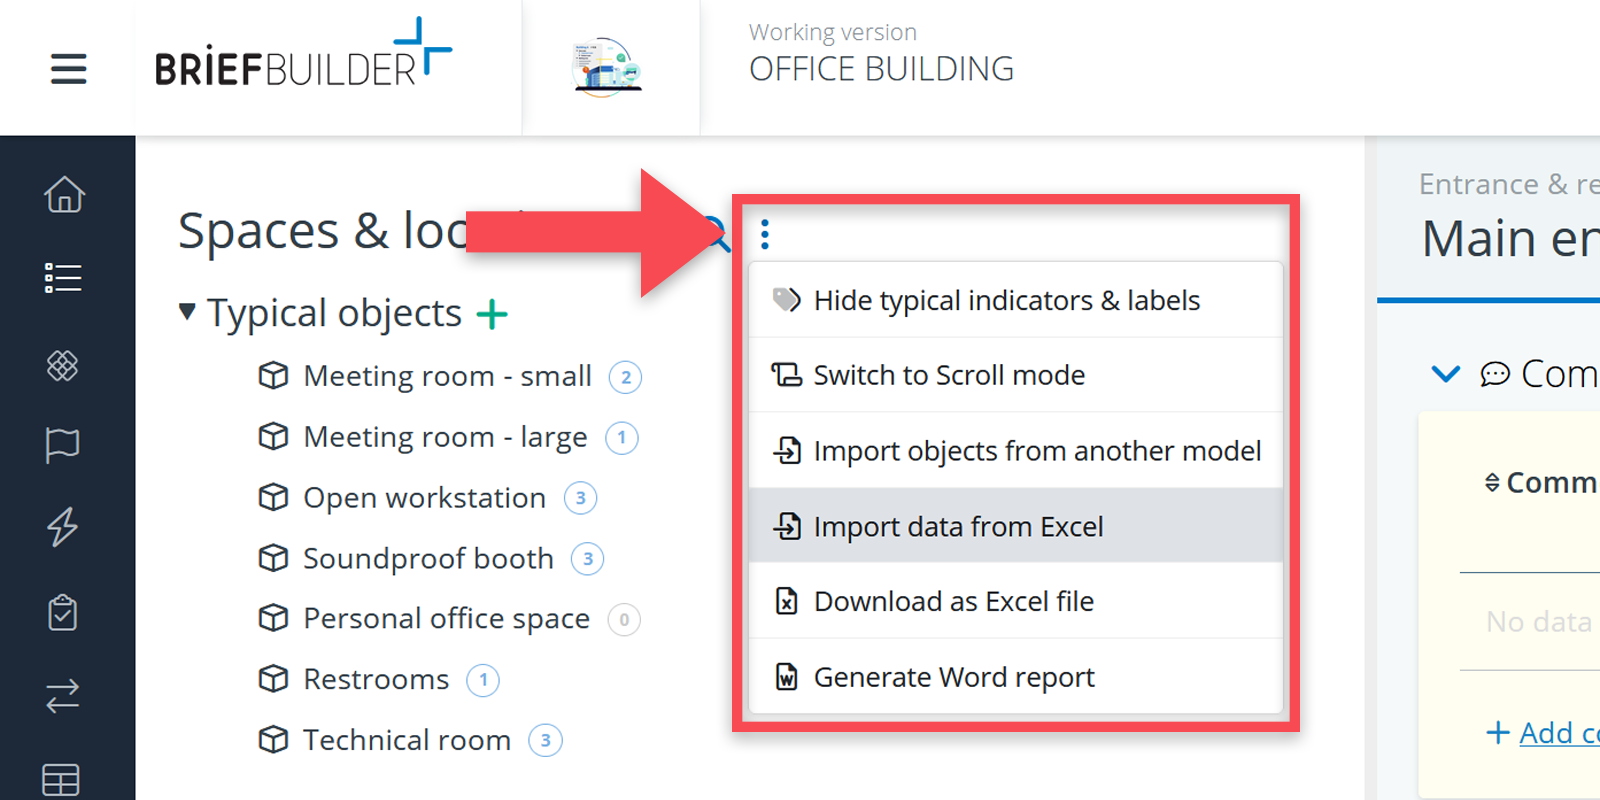
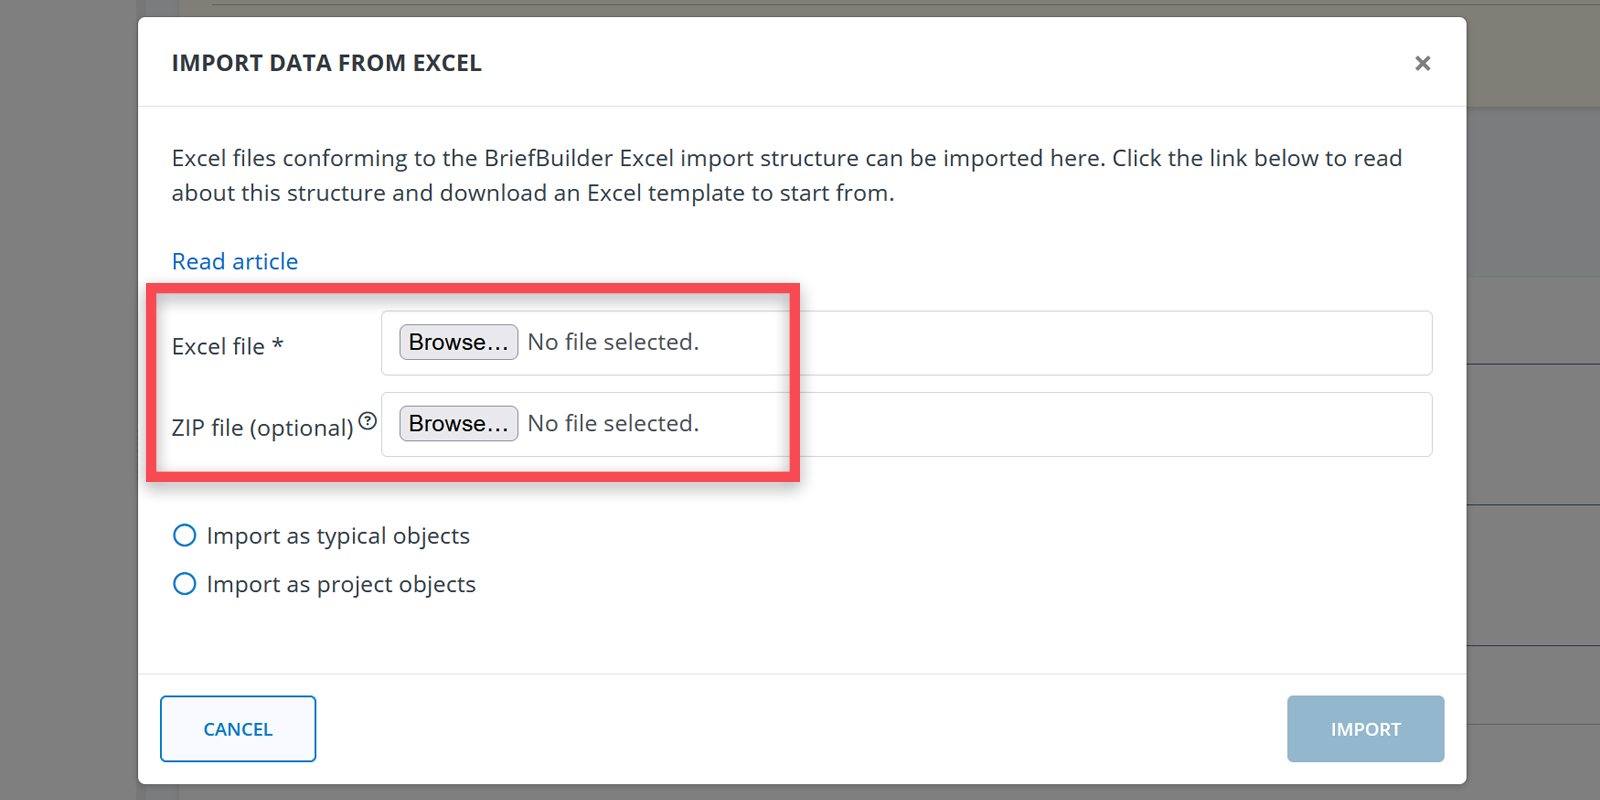
When clicking on the option Import data from Excel, you will see two upload possibilities:
- one for the Excel file for the import of regular data, and
- one for an optional ZIP file for if you also want to import images or other types of files.
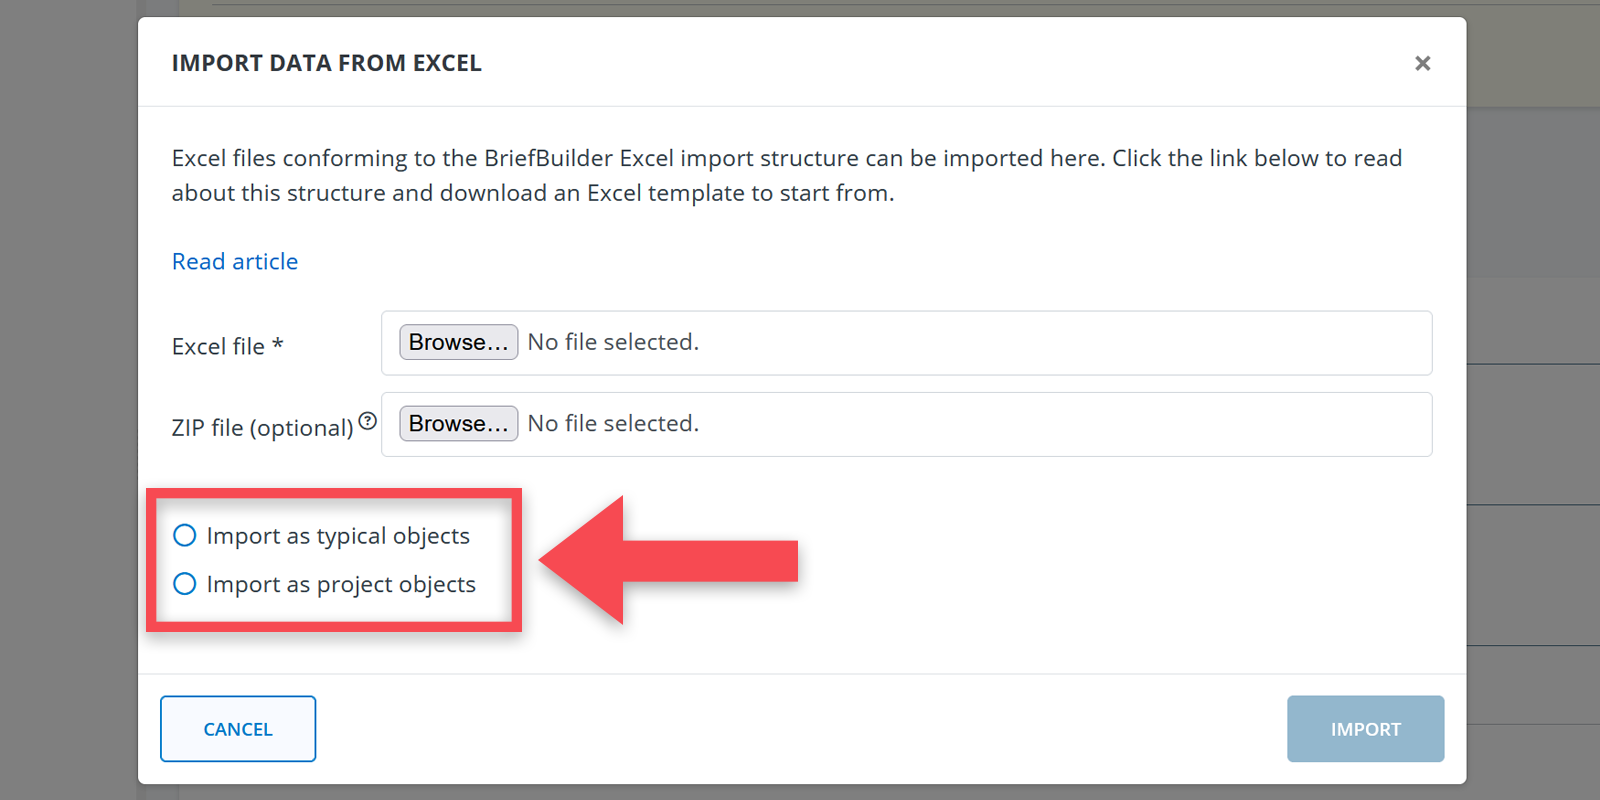
When importing objects in the Spaces & locations tree, you will also see the option to import objects as typical objects or as project objects. Read this article to learn more about the difference.
Examples
To get a quick understanding of the Excel sheet set-up, you can take a look at the example below which has some content in it.
The example concerns an import of data for the Spaces & Locations tree.
It adds several new meeting rooms and office area’s (objects; first tab), including their properties (second tab), their relations (third tab).
There is also a more advanced option in which you import not only text and numbers, but also files. In that case, you have import both an Excel sheet and a ZIP file with images and/or other types of files.
For that use case, we have the following example:
How do you set up your import sheet?
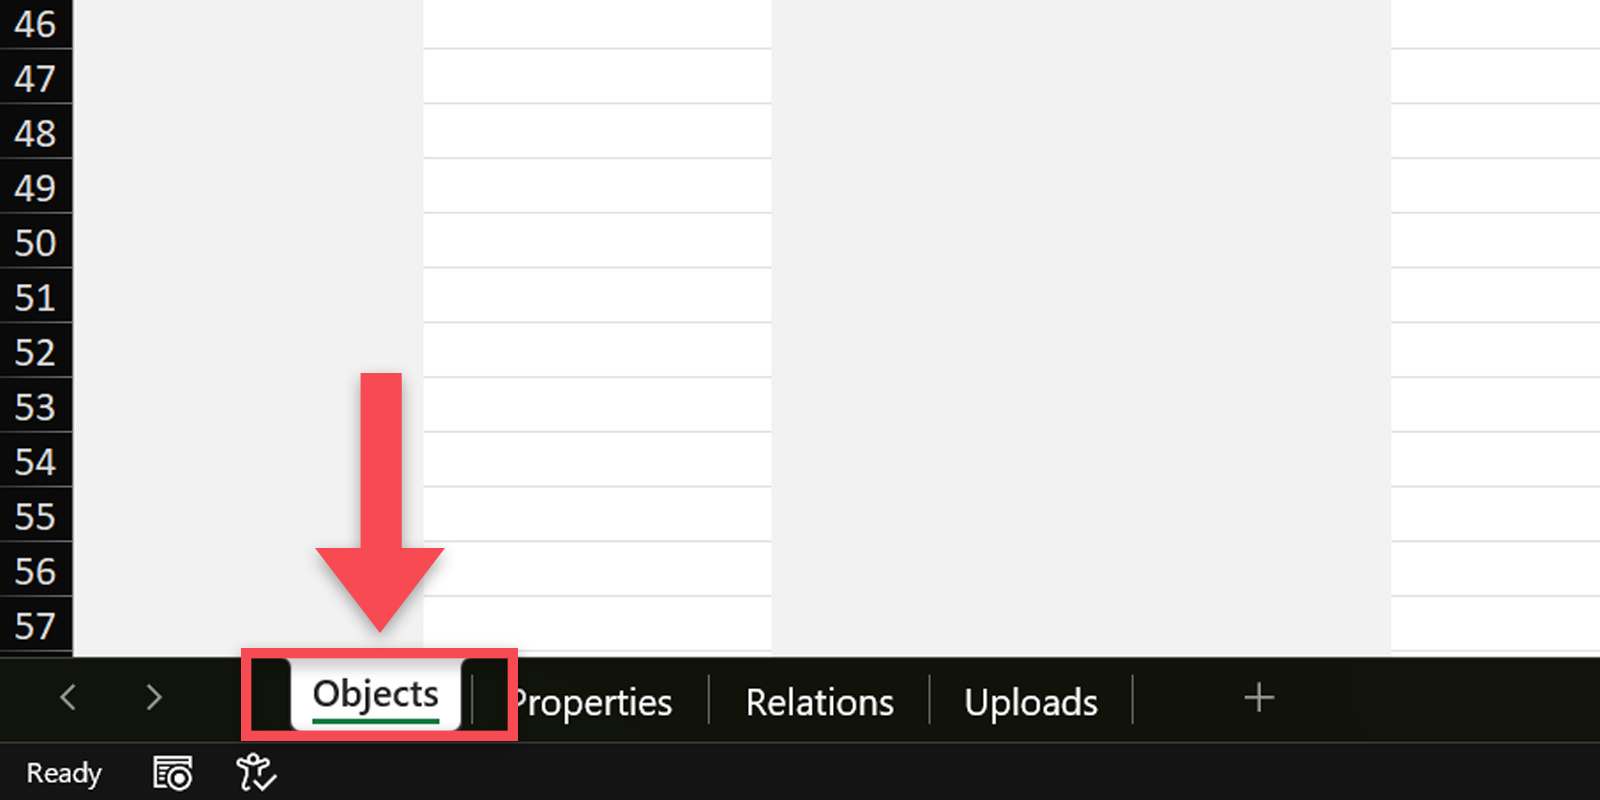
Setting up your import file will require you to fill out information on the Excel template’s three main tabs:
- Objects
- Properties
- Relations
- Uploads
We will explain each of the four tabs below.
Objects
This is the first tab of your import file. You can use it to add new objects to your project model. See below for an explanation of the different columns on this tab.
This tab features the following columns:
Column A: Object type (Mandatory)
The type the object should be (e.g., space or location, or system or element). Click here for a (English) list of possible types.
Column B: Object ID (Optional)
You can use this column to add a unique identifier. This is only relevant when two or more objects have the same name.
Column C: Object name (Mandatory)
The name of your object (e.g., “large meeting room” or “department XYZ”).
Column D: Parent object ID (Optional)
You can use this column alongside the Parent object name column (see below) to add a unique identifier or to refer to a particular existing object, in case there are multiple objects with the same name.
Column E: Parent object name (Optional)
You can use this column if you want to define under which other object (= the ‘parent’) an object needs to be placed (e.g., the object ‘reception desk’ may have ‘entrance area’ as a parent).
Column F: Object ID related typical (Optional)
In this column, you can indicate the ID of the typical to which your object should be connected.
Column G: Object name related typical (Optional)
In this column, you can indicate the name of the typical to which your object should be connected.
Column H: Description (Optional)
The object’s description if it has any.
Column I: Supporting file (Optional)
Supporting files for object descriptions (e.g. a reference image). Enter the full file name for each object description in this column. Make sure you that this file is contained in the zip file.
Column J: Labels (Optional)
The object’s labels if it has any. Separate multiple labels by using a comma.
Properties
This is the second tab on your import sheet. You can use it to add new properties to your model or to add values to existing standard properties. It can also be used to add supporting files to properties.
Make sure that all the properties you add on this tab have a correct reference (object name, and object ID if relevant) to the objects you want to add them to.
In case you are adding new properties to existing objects (objects that are already present in your BriefBuilder model), it is smart to look up the objects’ IDs in BriefBuilder and add that ID to the column Object ID (unless all object’s have unique names – in that case you can run the import just on object names without IDs).
See below for an explanation for all the columns on the Property tab.
Column A: Non-standard property (Optional)
Here is you can define whether a property should be imported as a ‘custom’ property or as a standard property.
Since most import actions concern standard properties, the default (= leaving these fields empty) is that the data will be imported as standard properties, assuming that you have also defined these in your model.
If the properties should not be seen as standard properties, you have to fill in ‘yes’ (or simply ‘y’) in this column.
Column B: Object ID (Optional)
Here you can refer to the Object IDs you have used on the objects tab (see above) or to refer to an existing object in BriefBuilder.
Column C: Object name (Mandatory)
This is the name of the object to which the property should be added. It can refer to names on the tab ‘Objects’ OR to an existing object in BriefBuilder.
Column D: Property name (Mandatory)
The name of the property (e.g., size, floor area, …).
Column E: Comparator (Optional)
The kind of value that the property defines, expressed as a mathematical symbol. You can choose between the options: < > = ≤ ≥ ≈ ±
Column F: Value (Mandatory)
The value of the property (can be a number, a text, …).
Column G: Unit of measure (Optional)
The unit of measure of the property (e.g., m, m², dB etc).
Column H: Note (Optional)
An explanatory note to describe any specifics for this property.
Column J: Supporting file (Optional)
Supporting files for properties (e.g. a reference image). Enter the full file name for each supporting file in this column. Make sure you that this file is contained in a separate .zip folder that has to be included in the import.
Column K: ID (Optional)
Optional requirement ID of an existing property. When multiple properties with the same name exist for a single object, this field is required for BriefBuilder to ‘understand’ that these properties are actually unique despite the same name.
Relations
This is the third tab on your import sheet. You can use it to add new relations between objects in your project model.
Again, you can find an explanation of all the different colums below.
Column A: Object ID 1 (Optional)
Here you can refer to the IDs of the objects on earlier mentioned tab ‘Objects’ OR to an existing object in BriefBuilder. Note: if you choose to use the Object IDs in the ‘Objects’ Tab, you will have to use them here as well.
Column B: Object name 1 (Mandatory)
The name of the relevant object on the tab ‘Objects’ OR an existing object in BriefBuilder.
Column C: Object type 2 (Mandatory)
The type of object that you want to relate to (e.g., system, spatial element, process, etc). Click here for a list of possible types (in English).
Column D: Object ID 2 (Optional)
Here, you can refer to the ID of an object that already exists in BriefBuilder. You can also choose to leave this column empty and rely on the name of ‘Object 2’. Note: this only works if there are no duplicates in object names.
Column E: Object name 2 (Mandatory)
Here, you can refer to an object that already exists in BriefBuilder.
Column F: Value (Optional)
The value of the relation (e.g., the quantity of spatial elements in a space).
Column G: Note (Optional)
Explanatory note to describe any specifics for this relation.
Column H: Relation (Optional)
Can be used to populate the Relation value of the relation. Not all type of relations support this.
Uploads
This is the fourth and final tab on your import sheet. You can use it to add uploads to your project objects. They will be listed at the bottom of an object detail page in BriefBuilder. Make sure each file mentioned here is included in your zip file.
Column A: Object ID (Optional)
This is the object ID of the object to which the file should be added. It can refer to names on the tab ‘Objects’ OR to an existing object in BriefBuilder.
Column B: Object name (Mandatory)
This is the name of the object to which the file should be added. It can refer to names on the tab ‘Objects’ OR to an existing object in BriefBuilder.
Column C: Filename (Mandatory)
Enter the full file name for each upload file in this column.
Column D: Note (Optional)
Explanatory note to describe any specifics of the uploaded file.
Column E: ID (Optional)
Optional requirement ID of already existing uploaded files. If you use the ID you can replace existing files with new ones.
Analysis
Analysis does not have its own tab on the import sheet.
To import analysis data, you will have to add columns yourself.
- For analysis data concerning object descriptions, add your columns to the first tab
- For analysis data concerning properties, add columns to the second tab
- For analysis data concerning relations add columns to the third tab
Ground rules for imports
To avoid error notifications, it is important to understand the following ground rules when running an import:
(1) You can only import object types or properties for ONE tree at a time. Every import sheet must be created specifically for each tree.
(2) The language used for the object types in your import file must match the language of your project. If you want to look up the right terms for your project, simply go to the tree and click on the plus button. You will get a list of all available object types for that tree.
(3) If Object names or Property names (for the same Object) are exactly the same, you must add an Object or Property ID. Otherwise, the import will fail. The ID helps the software differentiate between those objects or properties.
(4a) Analysis properties must be defined in your BriefBuilder model before importing analysis data. If you have, for example, added an analysis column ‘stakeholder’ in your import file, you should first create ‘stakeholder’ as analysis property in BriefBuilder (via the Analysis Settings menu). Otherwise, BriefBuilder will not find a match with the data from your sheet and will not import your analysis data.
(4b) Classification properties must be defined in your BriefBuilder model before importing classification data. The same principle for standard properties applies here. You can create and modify classification properties via the Classification / numbering Settings.
(4c) Standard properties must be added to your BriefBuilder model before importing standard property data. The same principle for standard properties applies here, as well. So, if you want to add “material” as a standard property for all your spatial elements, you should first create a standard property named “material” in your model. If you don’t do this, all those properties in your import sheet will be imported as regular properties.
(5) Analysis property names must be unique. Analysis names must be unique from each other AND they cannot share a name with any of the other headers on your import sheet. If they do, BriefBuilder will consider this a conflict and abort your import.
(6) Rules and limitations for .ZIP files. If you also upload a .zip file to import supporting files and uploads, you may supply up to 10.000 files in 1 zip file. Each filename should be unique, even when the files are placed in separate folders inside the zip file. The zip file must be at most 4GB in size and the total size of all files contained in the zip file must not be larger then 10GB when unzipped.
Troubleshooting
The error messages that BriefBuilder displays let you know which row on which tab of your import sheet is causing a potential conflict. You will need to open up your import file and check that specific row or cell to examine the problem.
The error message also clarifies what type of issue is causing the import to fail. For example, a lack of unique names (i.e., two properties with the same name without a unique ID or identifier), a wrong ID of an object or a type of object that does not exist within your project.
Checking the ground rules might help you further identify the problem. For example, are you importing your file in the right tree? Does your file’s language and type match that of your project? Are your analysis property names unique?
Import templates for BriefBuilder
Download an Excel import template for BriefBuilder down below. Be sure to use the language of your project when specifying object types. For example, Danish BriefBuilder does not understand what a “space” is, and English BriefBuilder does not know what a “rum” is.
Import templates contain four tabs: one for importing objects, one for importing properties, one for importing relations between objects and one for importing files. It is okay to leave tabs empty if they aren’t relevant for your import.
You will need to add analysis data to any of these three tabs yourself, because those properties are fully customizable and will thus differ per project.
Tips & Tricks
Unpivoting Excel tables
Sometimes, you already have legacy data available in a pivot table, which is a format you cannot just import in BriefBuilder.
In that case, you will want to ‘unpivot’ your table. This video shows you a simple way of doing so.
Mixing exports and imports
It’s possible that you want to edit BriefBuilder-data by using Excel (such as changing all analysis values in one go). In that case, you should generate an Excel export or download first (by using the Excel button on an overview or table), then modify the data in that Excel file, and then import it again in BriefBuilder.
Learn more about creating Excel exports here.
Please note however that those Excel exports cannot be imported again without any modification. You will first have to restructure the information according to the original import template (with the three tabs: objects, properties, and relations).