To structure and define the format of your requirements, you can take advantage of various available settings.
These settings can be found in the lower part of the navigation menu.
The available settings are:
- Classification/numbering
- Standard properties
- Picklists for relations
- Labels
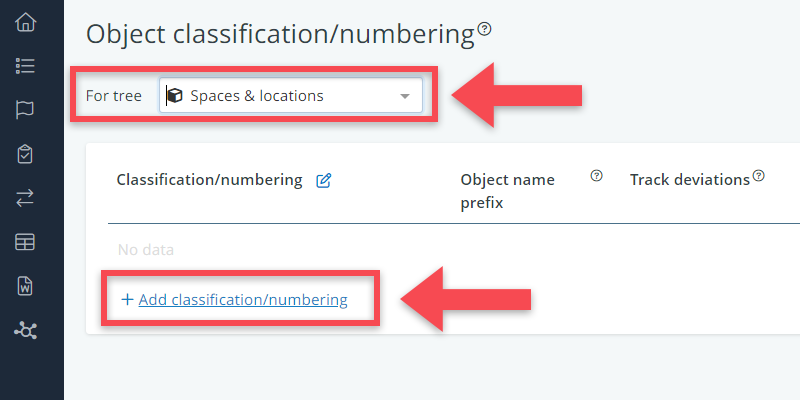
Classification/numbering
Classifications and numberings can be used to add identifiers to objects (other than the automatically generated object- IDs). Think of room numbers for spaces or classification codes for technical systems (e.g. Uniclass, OmniClass, SfB).
Via this menu-item, you can specify the relevant classifications and numberings per tree, indicate whether they should be used as prefixes in object names, and even import IDs via Excel.
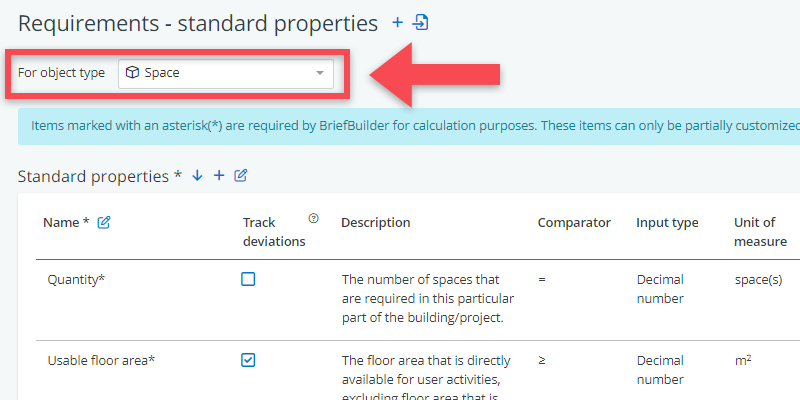
Standard properties
Standard properties are pre-defined properties for objects. You can use these to create standardized entry fields on the detail views for each object type, which can then also easily be used to create cross tables.
You may for example want to predefine that all spaces should have a property ‘minimum floor-to-ceiling height’, or that all deliverables should have a property ‘submission moment’.
Via the settings menu, you can define property names, descriptions, value lists, units of measure and more.
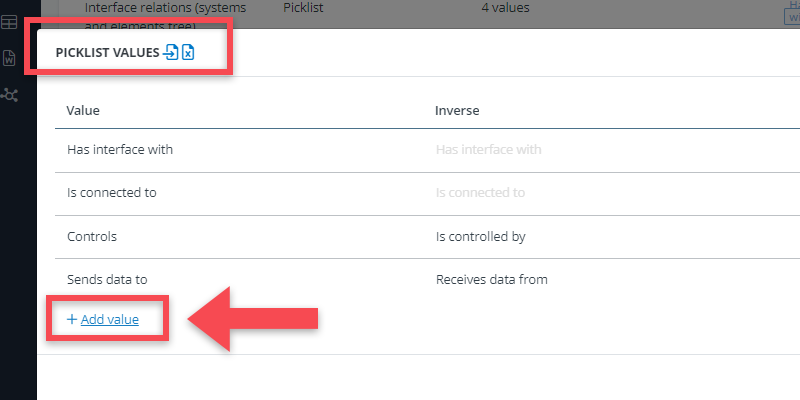
Picklists for relations
For the following relations, it is possible to define pick list values that can help you to be more specific about the nature of the relation.
- Interface relations (Systems & elements tree)
- Adjacency relations (Spaces & locations tree)
- Requirement relations (Requirement texts tree)
The available settings allow you to define a single value (that is displayed for both related objects) or to also add an inverse value (that is only displayed for the object to which you are relating).
For example: you may have an interface relation between a tunnel management system and the air quality sensors inside the tunnel. You can then use the picklists to narrow down the nature of the relation, specifying e.g. that the sensors should ‘send data to’ the tunnel management system, and that the system should ‘receive data’ from the sensors.
Likewise, for adjacency relations you may, for example, want to specify that an entrance way ‘gives access to’ the parking garage, and that the parking garage ‘can be accessed from’ the entrance way.
For requirements texts, you can use the picklist to indicate that a requirement text ‘is a lower-level requirement of’ or ‘is a higher-level requirement for’ another one (something that is relevant in text-based systems engineering models).
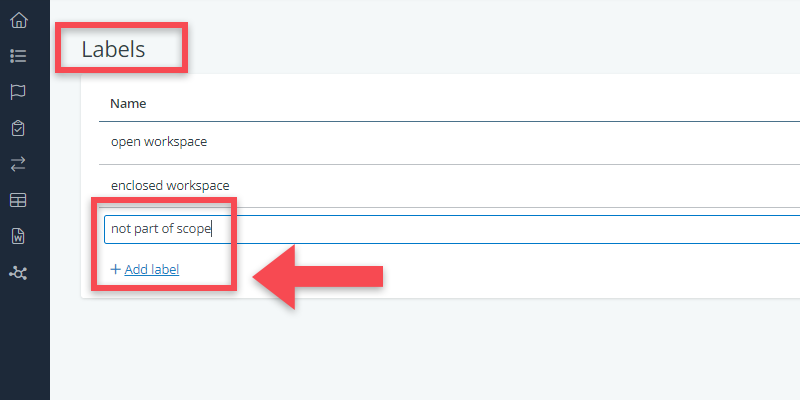
Labels
Labels are tags or categorizations that you can add to objects. You can add them to any of the objects you are able to create in a BriefBuilder project model. For example, in a building project, you may wish to label spaces that are optional or label whether a space is within a project’s scope (or not).
Via the Label settings, you can create, change or delete a label for your entire project model.