
This article will explain the concept and practicalities of working with ‘typicals’.
The typicals feature allows you to easily manage the requirements of objects that frequently reoccur in the Spaces & locations tree of your project. Think of patient rooms in hospitals, classrooms in schools, or segments in road or tunnel projects.
Check out the video below to get an overall impression of this feature, or scroll down to read about all the details.
The concept
In large projects, your spaces & locations tree is likely to contain lots of reoccurring objects, which more or less all need to have the same requirements.
To manage the requirements of such objects, you can define what-we-call typicals. Typicals are spaces (in case of buildings), outdoor spaces, or segments (in case of infrastructure projects) that you can predefine and then use as standardized ‘building blocks’ for the spatial breakdown of your project.
The spaces or segments that you create on the basis of a typical are called instances. Instances automatically get the same requirements as the typical from which they are derived.
To give an example: say that you are working on an office project and you have created a typical called Meeting room, which should be at least 16 square metres in size. You can use this typical to create various meeting rooms in your project decomposition (Meeting room 1, Meeting room 2, etc.) as instances of this typical. These instances will then automatically get the same size requirement.
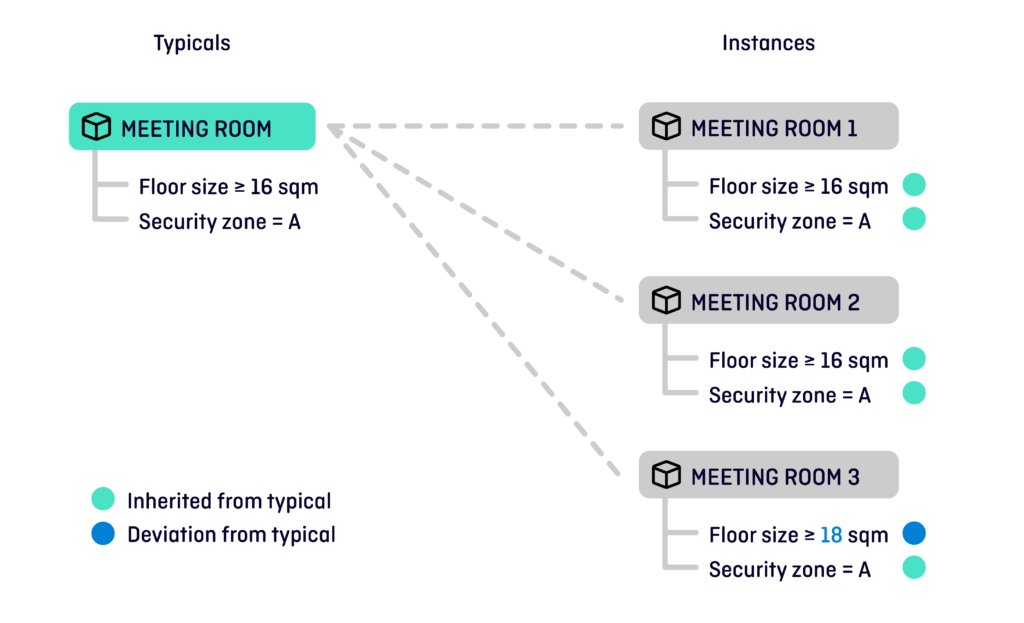
Also, later changes to a typical will automatically apply to all of its instances. So, if the earlier mentioned size of 16 sqm is changed into 17 sqm, that change will automatically be applied to all the instances as well.
In database lingo, this mechanism is called inheritance.
It is important to know that BriefBuilder’s inheritance mechanism isn’t rigid. You can still make changes to the requirements of an instance, but these are then marked as a deviation from the typical.
To use the same example again: if one of the meeting room instances needs to be slightly bigger than the others, say 18 sqm, you can easily make that change. The only thing that happens is that the changed requirement gets a small marker (a blue dot) that indicates that it is deviating from the typical’s original requirement—which is crucial information for the design team.
Also important to know is that such deviations will be excluded from the inheritance mechanism, based on the assumption that you are making a deliberate deviation, and that you don’t want that deviation to disappear once the typical is updated.
Activating the typicals module
Before explaining the typicals feature in detail, you should know how to activate this module. This is done via the settings in the navigation menu.
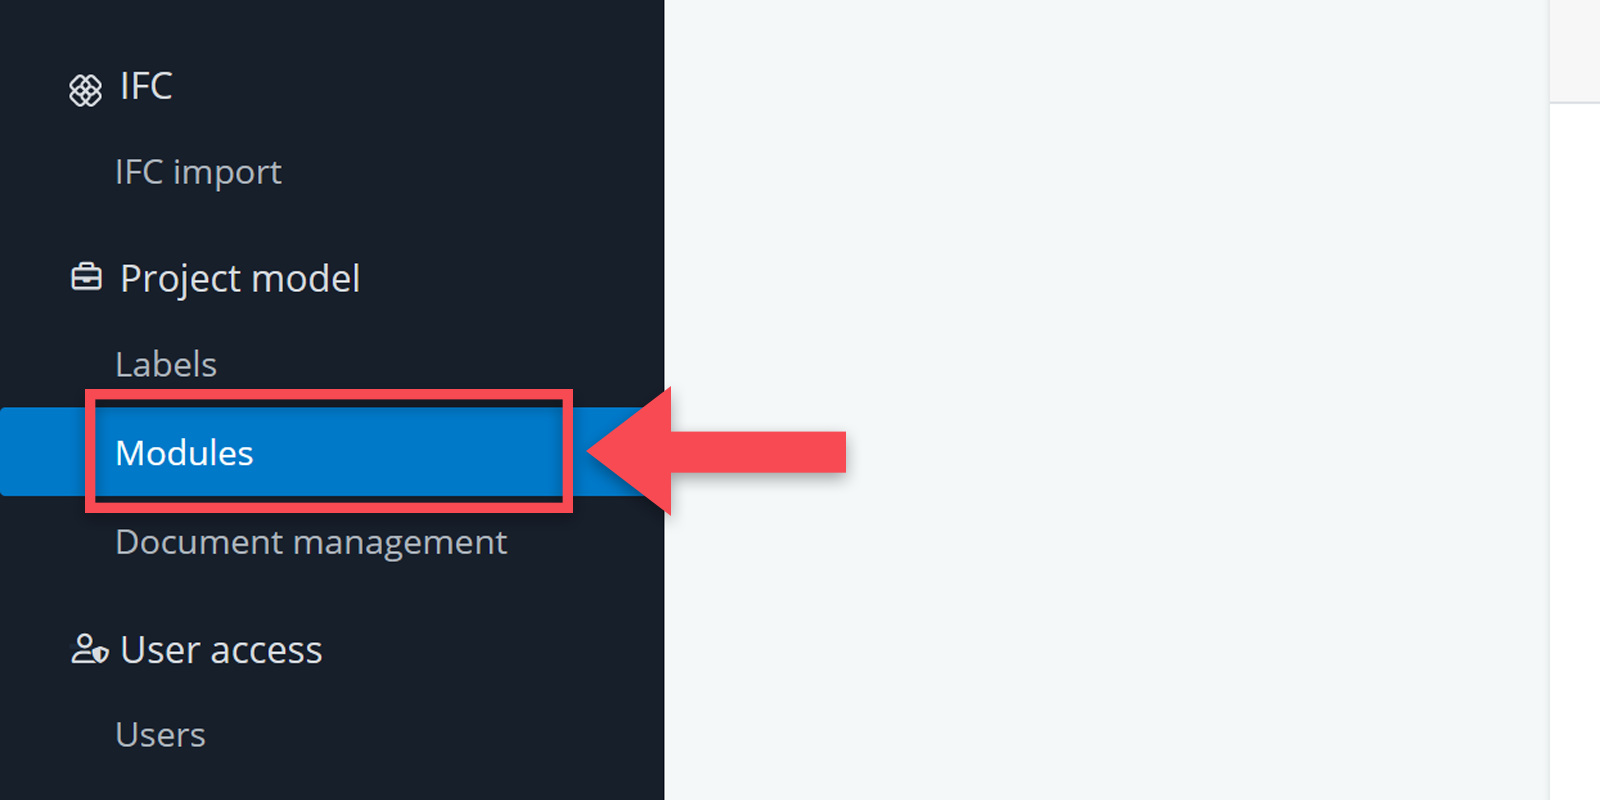
1. Go to Navigation menu > Settings > Project model > Modules.
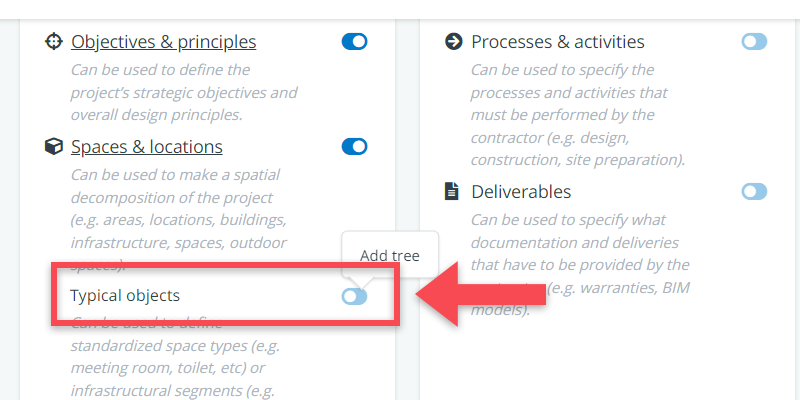
2. Find the Typical objects module under Spaces & locations and activate it by means of the ‘toggle’.
Creating typicals
To create a typical, do the following:
1. Go to the Spaces & locations tree (the only tree for which you can define typical objects).
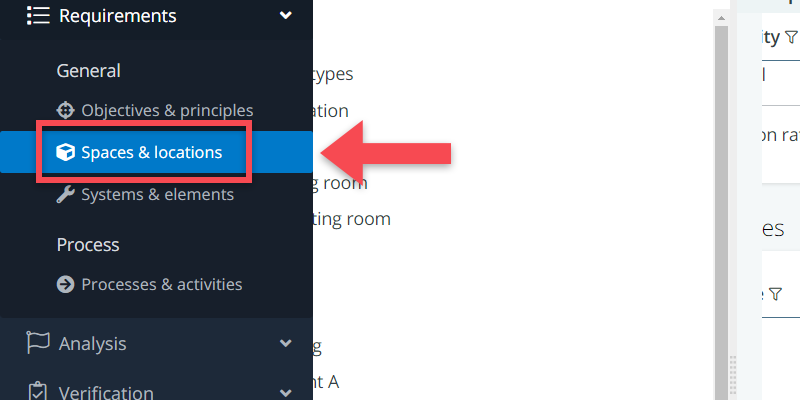
2. There, you will see two starting points: Typical objects and Project objects. As the name already suggests, you have to go to the Typical objects part.
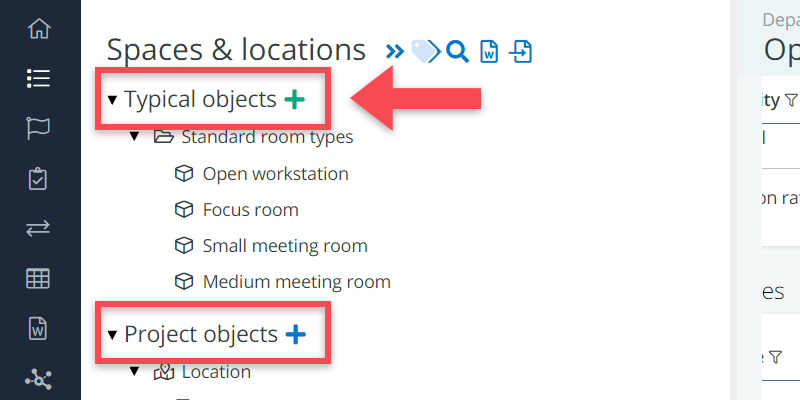
3. In the typicals part of the tree, you can create typical objects in the same way as you create objects elsewhere in the model: by using the button.
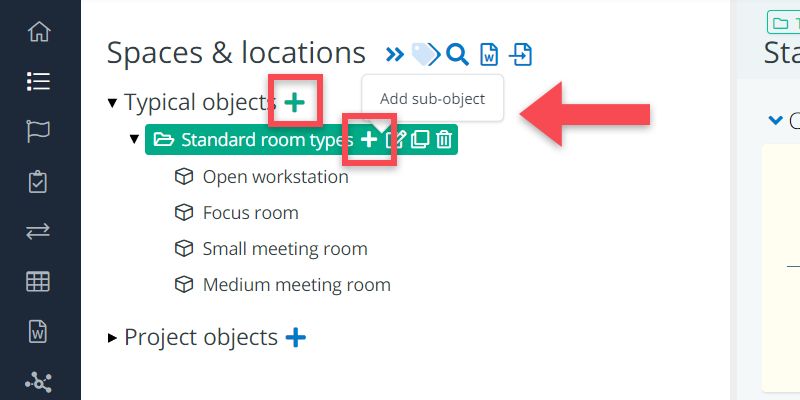
As explained earlier, you can create spaces, outdoor spaces, and segments as typicals. You can use folders to organize these objects in a neat list.
Creating instances from typicals
As explained earlier, an instance (e.g., Meeting room 1) is an object that is derived from a typical (e.g., Standard meeting room), which then automatically inherits the requirements from that typical.
There are two ways to create instances from typicals:
(1) Dragging in the tree
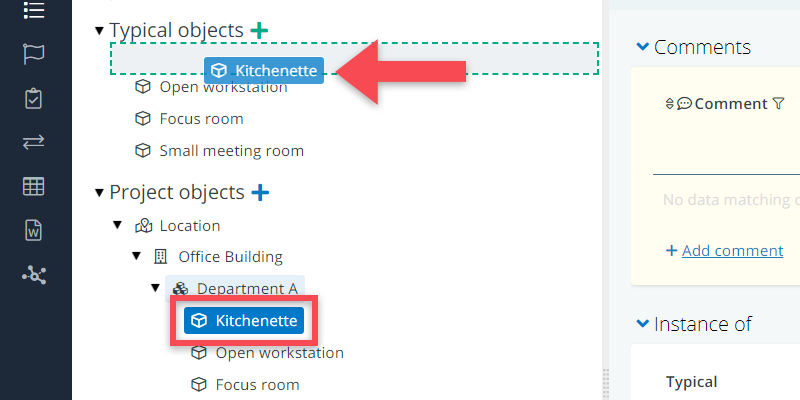
When you have created a typical, you can simply ‘drag’ that typical down to the project part of the tree to create an instance of it.
1. Click on the typical that you want to use (or an entire folder with typicals).
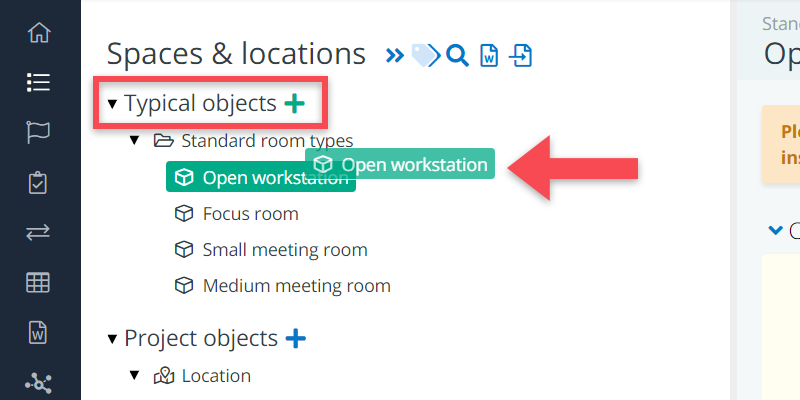
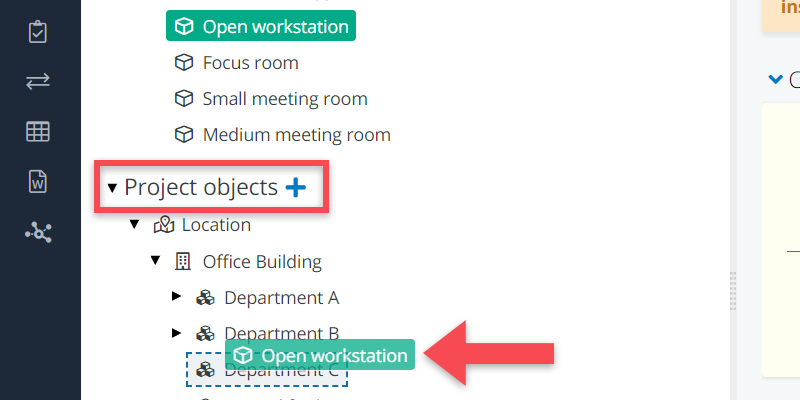
2. Hold down your mouse button and drag the typical to the project objects part of tree.
3. Release your mouse button when the typical is in the position where you want it to be.
(2) Selecting ‘create from typical’ when creating a new object
You can also create instances when creating objects in your project decomposition. In that case, you have to do the following:
1. Click on the button in the project part of the tree.
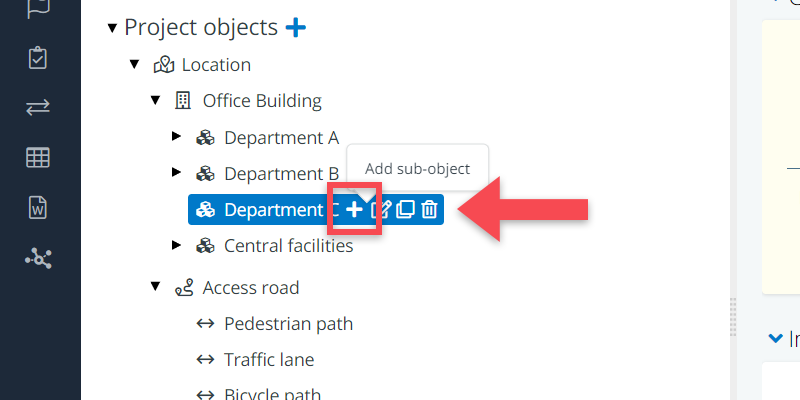
2. Select Create from typical.
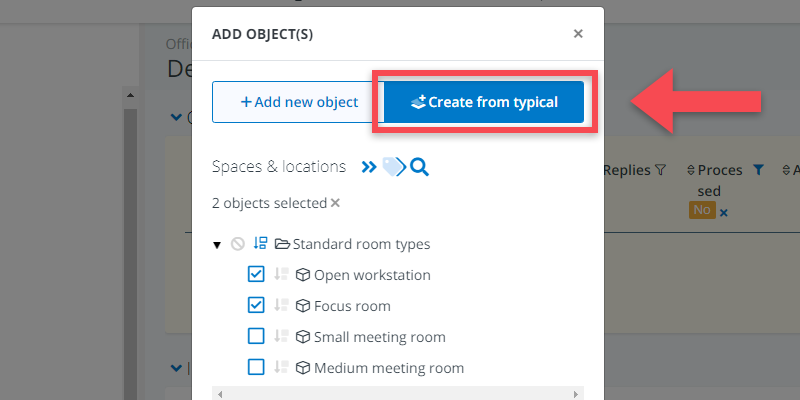
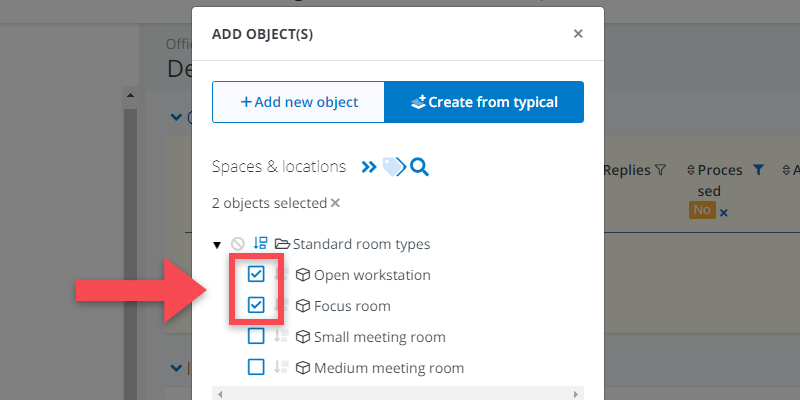
3. Select one or more typicals and click on Add.
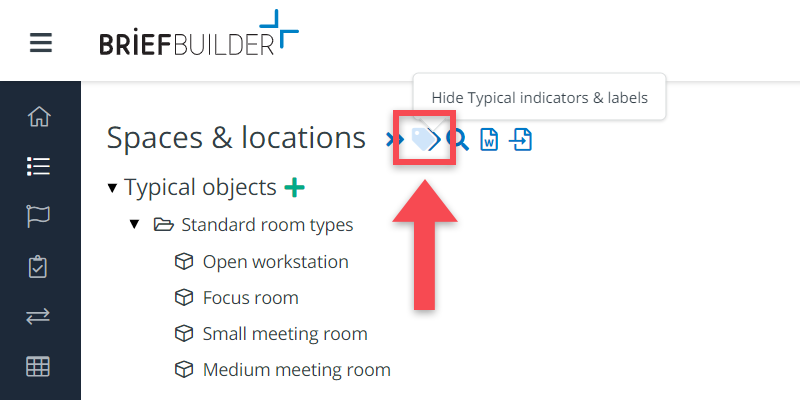
Typical indicators
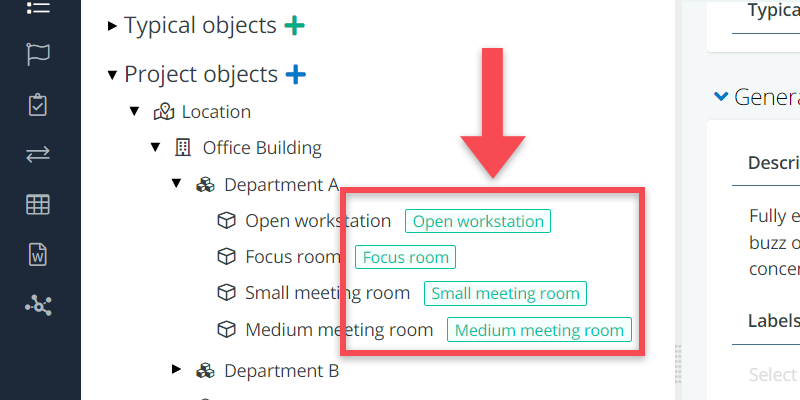
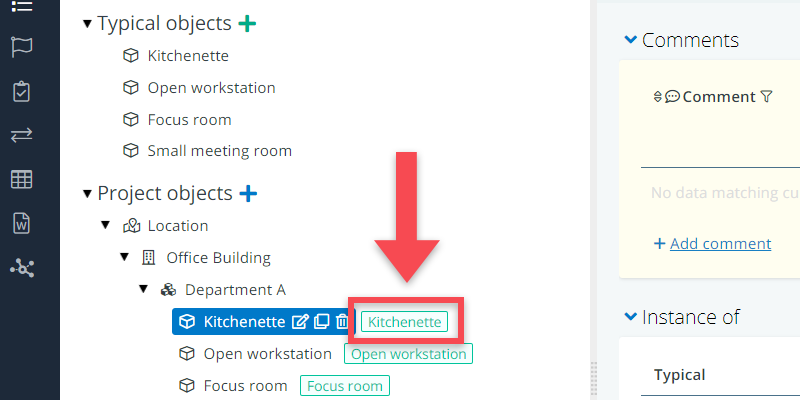
When creating an instance, you will notice that, in the tree, you will get a green-coloured typical indicator behind the object’s name. This indicator shows the name of the typical to which it is connected.
Connecting existing objects to typicals
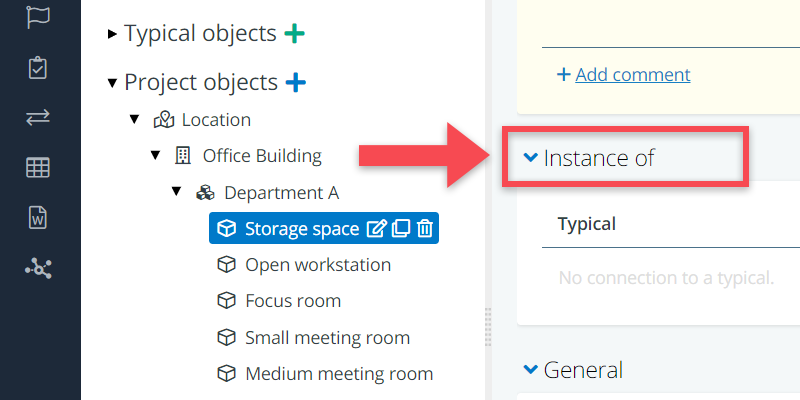
If you have an existing space or segment in your project decomposition and wish to connect that object to a typical, you can do so on the object’s detail view.
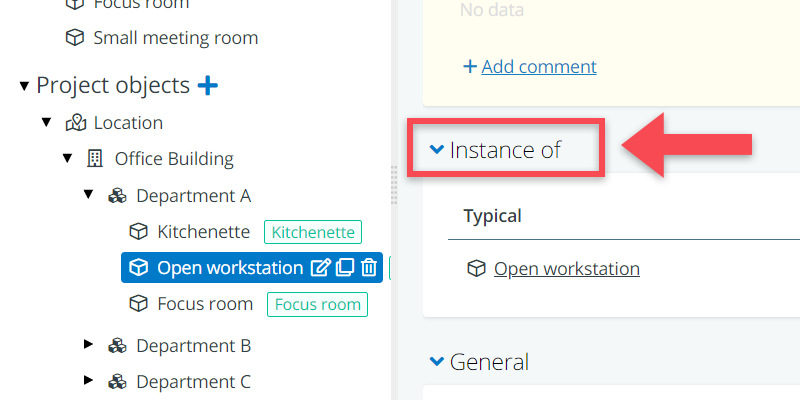
1. Go the object’s detail view and the table Instance of.
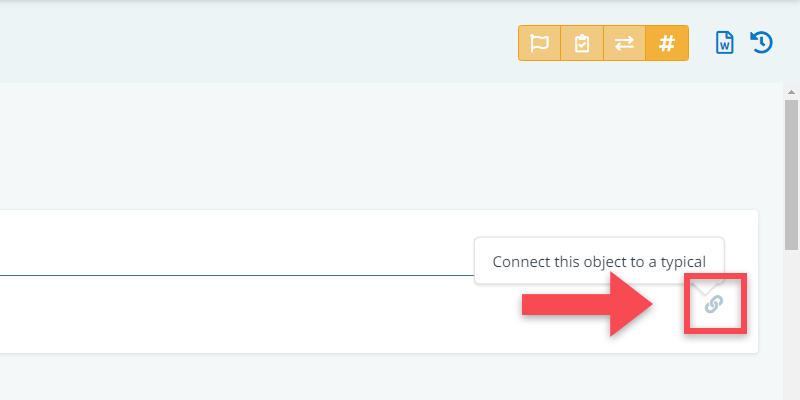
2. Click on the icon.
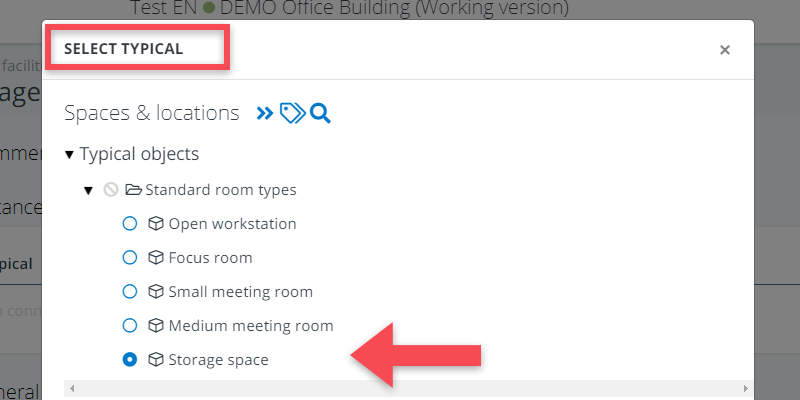
3. Select the typical that you want to connect the spatial object to and click on confirm.
Instance detail view: green, blue and grey dots
As explained earlier, when an object is an instance of a typical, it inherits the requirements from that typical. So, lots of the requirements will be the same, but it is also possible to make changes to those requirements or to add new requirements. These are deviations from the typical.
For the design/delivery team, it will be crucial to know in which way a space or segment is different from its typical. Therefore, we have devised the following color coding scheme:
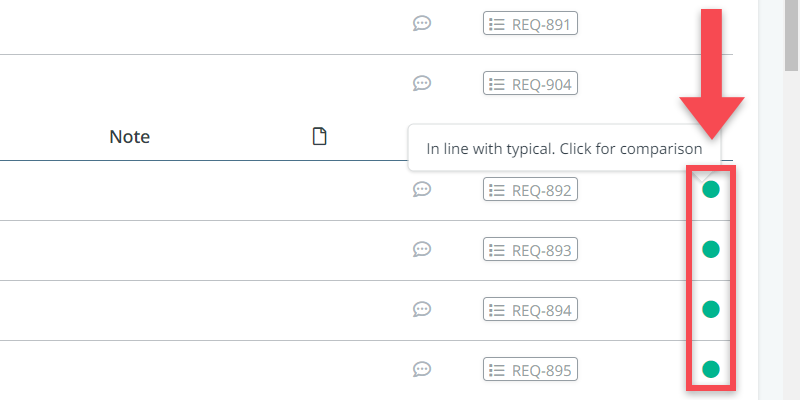
- A green dot: a requirement that is fully in line with the typical
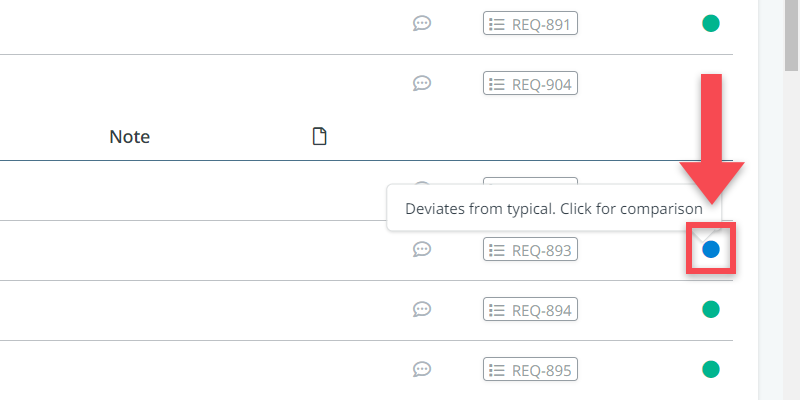
- A blue dot: a requirement that deviates from the typical
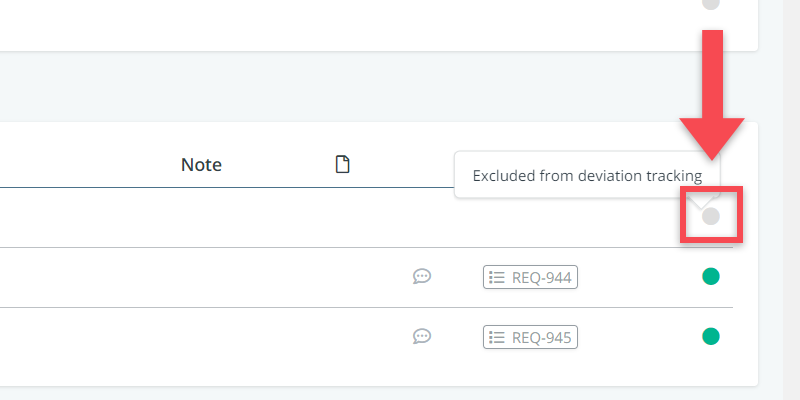
- A grey dot: a requirement that is not tracked for deviations from the typical
Green dots: in line with typical
Requirements that are exactly the same as those from the typical, are marked with a green dot.
Blue dots: deviation from typical
If inherited requirements have been changed at an instance level, they get a blue dot to indicate that this concerns a deviation from the typical.
Greys dots: not tracked for deviations from the typical
Grey dots indicate information that is not be part of the tracking mechanism for deviations from the typical.
This usually concerns the objects’ classification or quantity. Also, adjacency relations aren’t tracked for deviations as these can relations can only be created at instance level.
Deviation tracking settings
For standard properties and for classifications/numberings, you can decide whether these should be checked for deviations from the typical or not.
For standard properties
Standard properties are by default all set as to be checked for deviations.
There is, however, one exception and that is the property quantity. This is because typicals usually do not have quantities, while their instances do (e.g., a particular number of meeting rooms for a particular department), and you probably don’t want that difference to cause a space or segment to be marked as a genuine deviation.
But this is something that you can easily regulate yourself:
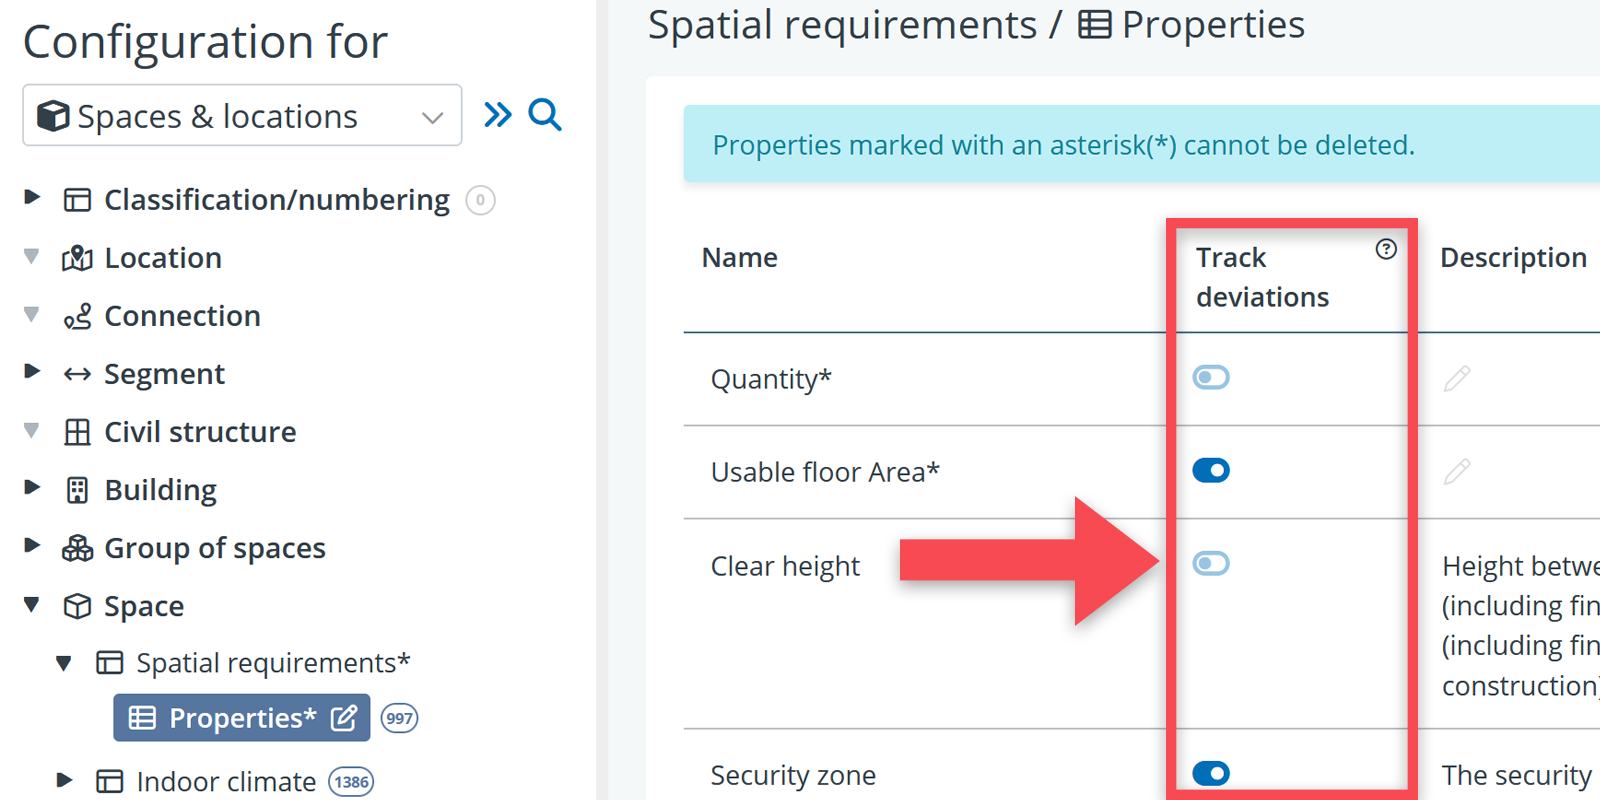
1. Go to Settings > Attributes > Requirements
2. Select the appropriate object type (Space, Outdoor space or Segment) in the settings tree on the left and on the relevant property table.
3. Use the toggle buttons in the column Track deviations to determine whether a property should be checked for deviations or not.
For classifications/numberings
In contrast to standard properties (see above), classifications/numberings are by default all set as not to be checked for deviations.
This is because you probably don’t want a meeting room to be marked as deviating from its typical just because it has a different room number. You can change this in the settings menu if you wish to in the very same was as you can do for the standard properties.
1. Go to Settings > Attributes > Requirements >
2) Select the relevant requirement tree in the drop-down list at the top (spaces & locations in this case)
3) Select Classifications/numbering block at the top of the settings tree.
2. Use the toggle buttons in the column Track deviations to determine whether a classification/numbering property should be checked for deviations or not.

Upgrading project objects to typicals
It is possible that you have created a neat project space or segment that you would like to ‘upgrade’ to a typical. This is something that you can easily do by dragging & dropping that object in the tree.
There are two possibilities:
1) Create typical on the basis of a project object
This is the option where you create a typical on the basis of project object without removing or deleting the original project object.
This is relevant when you are working on your project decomposition while thinking: this is a very neat space or segment, and I am probably going to need more of those in the rest of my decomposition, so let’s make it a typical of it.
1. Click on the project object that you want to upgrade.
2. Hold down your mouse button and drag the object up to the typicals part of tree.
3. Release your mouse button when the object is in the position where you want it to be.
2) Turn a project object into a typical
It is also possible to move a project object to the typicals part of the tree without keeping the original project object.
In that case, you must combine your ‘drag & drop’ action (as described above) with pressing the Shift-button.
Disconnecting objects from a typical
Sometimes, an instance object has so many deviations from the related typical that it no longer makes sense for it to be an instance of that typical. In that case, you will want to disconnect that spatial object from its typical. This is how you can do that:
1. Go to the table Instance of on the instance object’s detail view.
2. Click on the icon.
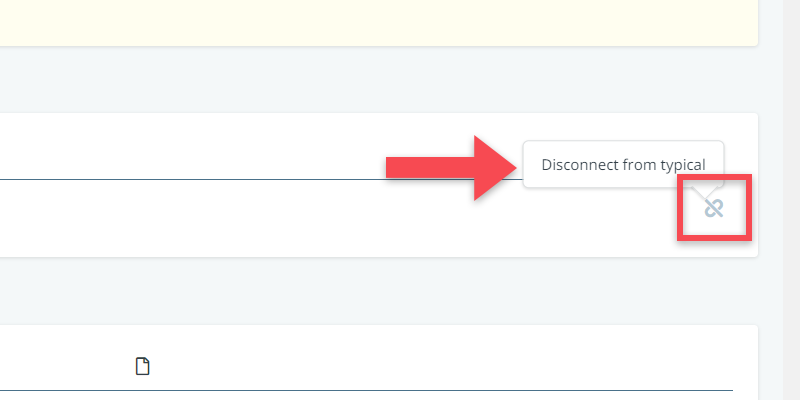
3. Click on confirm.
Deleting typicals
Typicals can be deleted via the action menu in tree, just like with all other objects. But typicals can only be deleted if they don’t have any instances.
So, before you can delete a typical, you have disconnect it from any spaces or segments in the list of project objects.