The term Attributes refers to different kinds of information that can be attached to an object: standard properties, classifications/numberings and descriptions.
You can manage these via the Attributes menu in the settings menu. If all modules are active in your model, this part of the menu will show the following sub-items:
- Requirements
- Risk
- Analysis
- Verification
- RFC
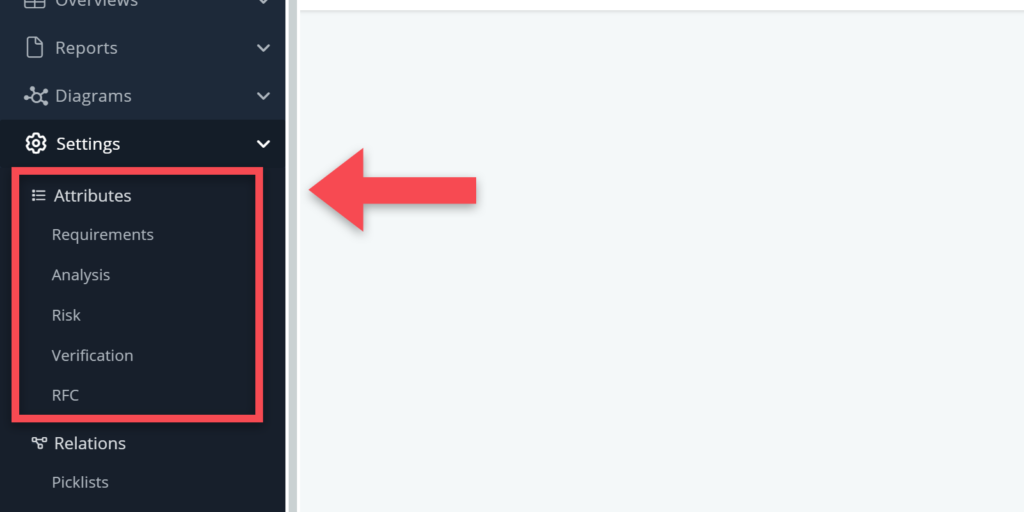
In this article, we briefly explain all five.
Requirements
For requirement objects (spaces, systems, elements, …), you can manage the following attributes from this part of the menu:
- Classifications/numberings
- Object descriptions
- Standard properties
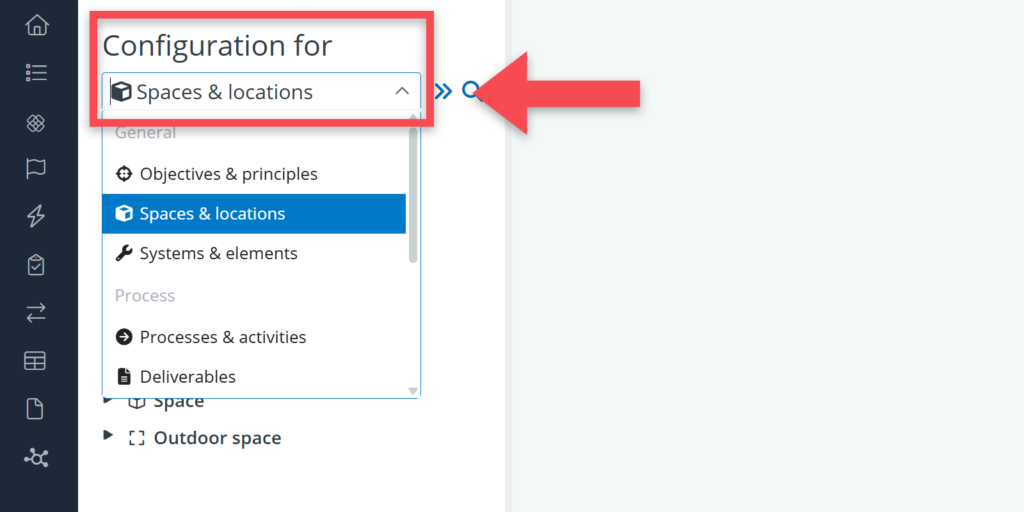
These attributes are managed per tree (Spaces & locations, Systems & elements, etc) so you must first select a tree type in the Configuration for field.
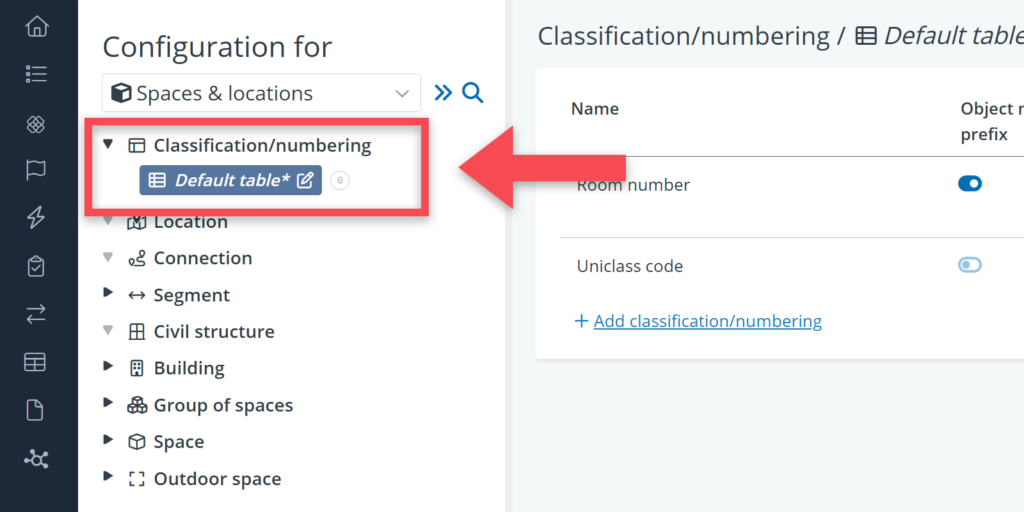
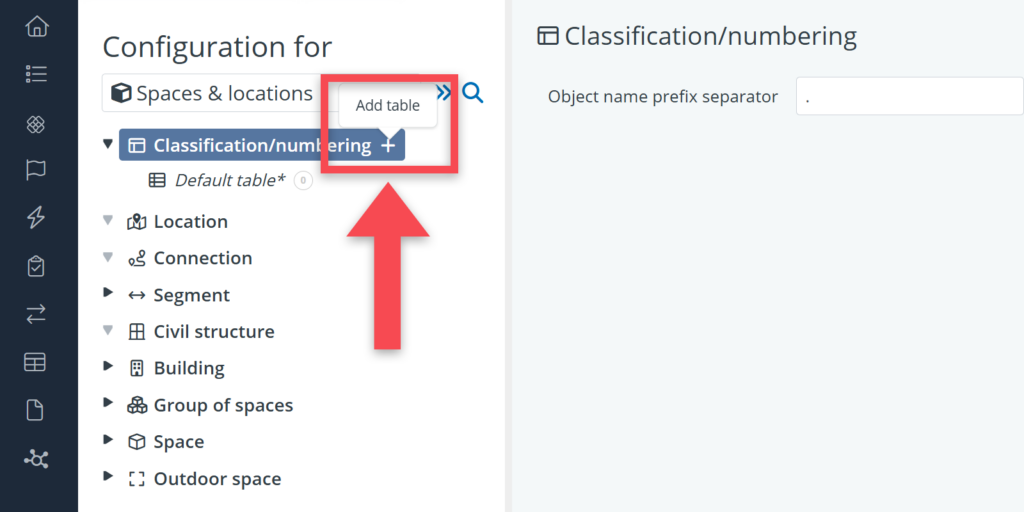
Classifications/numberings
At the top of the settings tree, you will find Classification / numbering. Classifications and numberings are non-requirement fields that can be used to add identifiers or classifications to objects. Think of room numbers for spaces or classification codes for technical systems (e.g. Uniclass, OmniClass, SfB).
Steps for adding classifications/numberings:
- Click on Classification/numbering in the settings tree
- Click on Default table
- Click on + Add classification/numbering
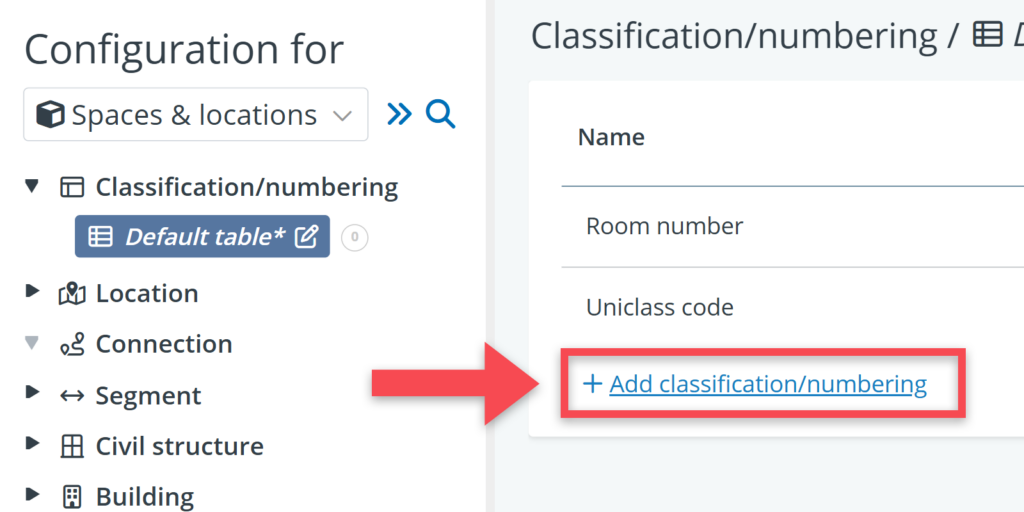
If you want create multiple classification/numbering tables, click the plus icon (Add table) at block level. See below.
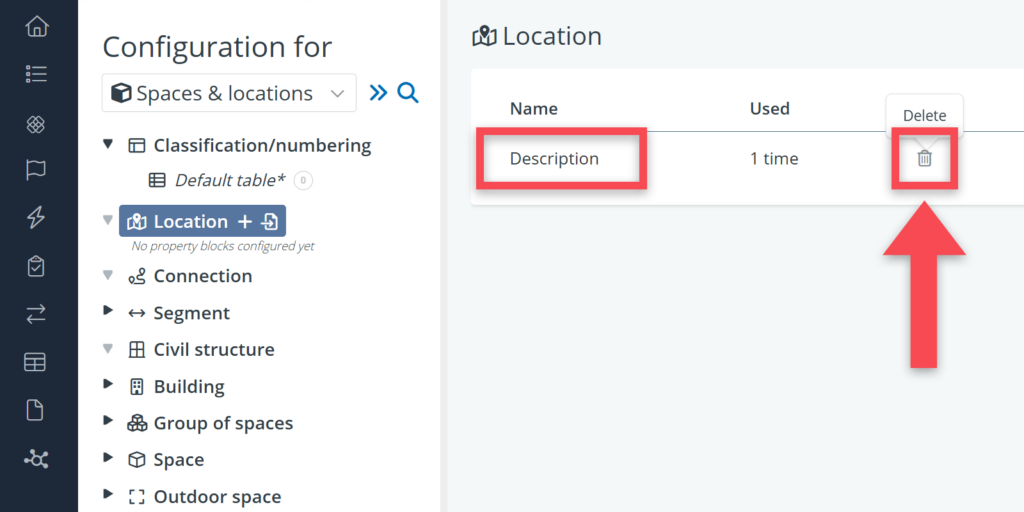
Object descriptions
When selecting an object type in the settings tree, the option to (de)activate the description field for that object type becomes available, in the detail view on the right.
Object descriptions are text fields that can be used to describe the general purpose or nature of an object. It is a field that is not always relevant for use. It can easily be deactivated by clicking on the bin icon.
Steps to de-activate object descriptions:
- Click on the relevant object type in the settings tree.
- On the object type’s detail view, use the bin icon to deactivate this field.
Standard properties
Standard properties for object types can be managed via the blocks and tables that you see in the settings tree.
As you may already know, standard properties are predefined properties for objects. They are very useful when lots of objects in your model need the same type of property (e.g. a Floor area property for all the spaces in your model).
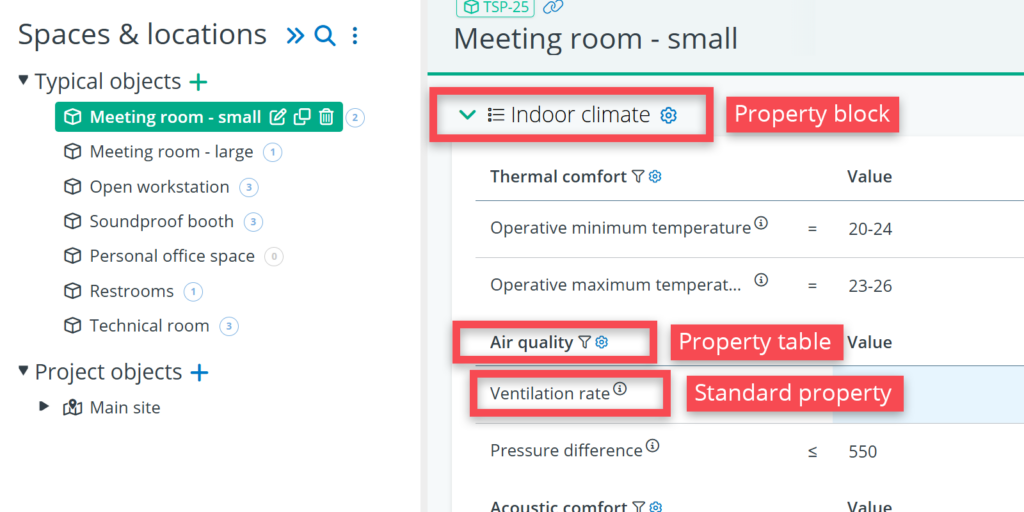
For defining and managing the standard properties in the settings menu, it is important to be familiar with the concepts of blocks and tables.
- Property block: a grouping of one or more property tables (typically concerning a general topic, e.g. Indoor climate)
- Property table: a table that contains a specific set of standard properties (usually concerning a specific topic, e.g. Air quality)
And in the tables, you can then define standard properties (e.g. Ventilation rate) with a name, a comparator, a UoM, and so on.
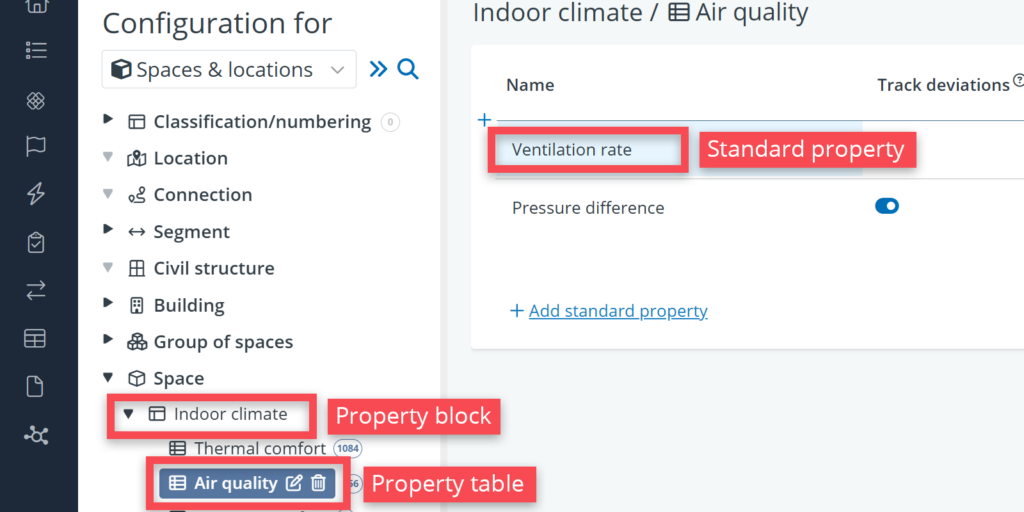
Below is an example of how blocks, tables and standard properties are presented on an object’s detail view. The property block acts as the main header; the property table a sub-header, and the properties themselves appear underneath.
For the blocks it is also important to be familiar with the concept of optional blocks and non-optional blocks.
- Optional block: a property block that can be linked to specific objects (either via the settings menu, or via the detail view of an object). E.g. a block called Door properties that it is only relevant for the door elements in the model.
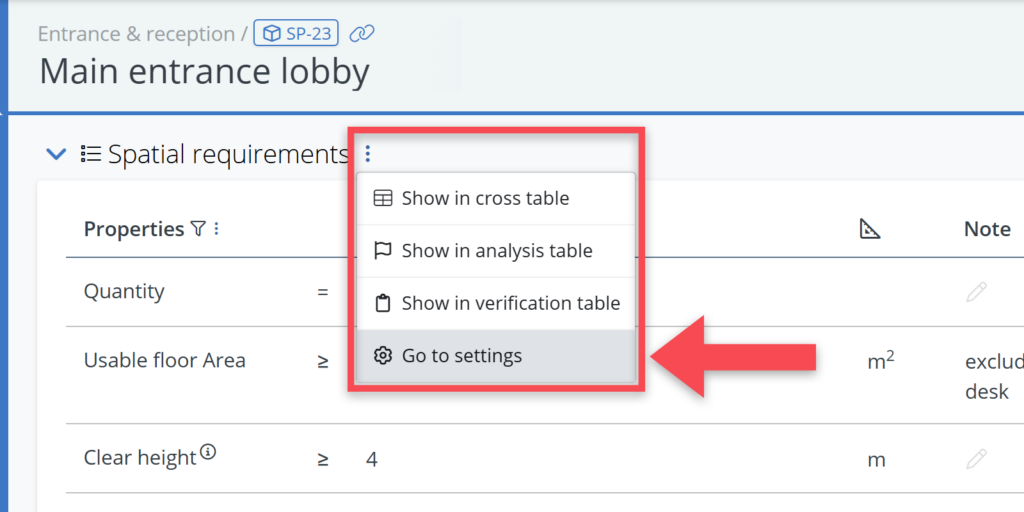
- Non-optional block: a property block that is automatically linked to all objects of that particular type. Good example is the block Spatial requirements that is usually relevant for all spaces in a model.
With this in mind, you can easily define a set of standard properties for an object by doing the following:
- Go to the relevant object type in the settings tree.
- Click on the plus-icon to add a new block
- Give the block a name (e.g. Spatial requirements, Safety requirements, …)
- Decide whether the block should be optional or not.
- Go to the table that is automatically created for that block (called Default table).
- In that table, click on + Add standard property
- And for that property, add a name, a unit of measure, an input type and so on.
If you have created a non-optional block, this information will then be visible on the detail views of all objects of that type.
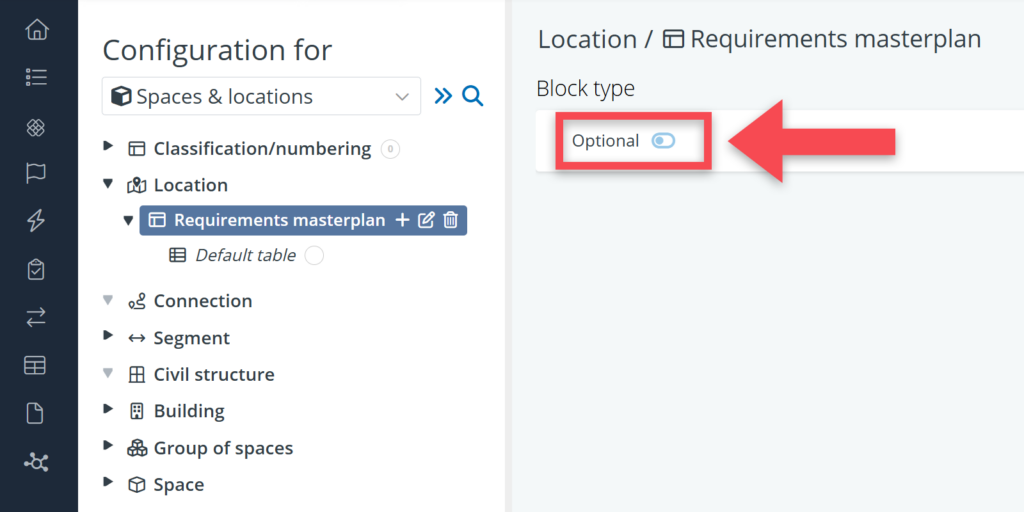
You can define whether a block is optional or not when you create it (as explained above), or at a later stage using the toggle on the detail view of the block. See below.
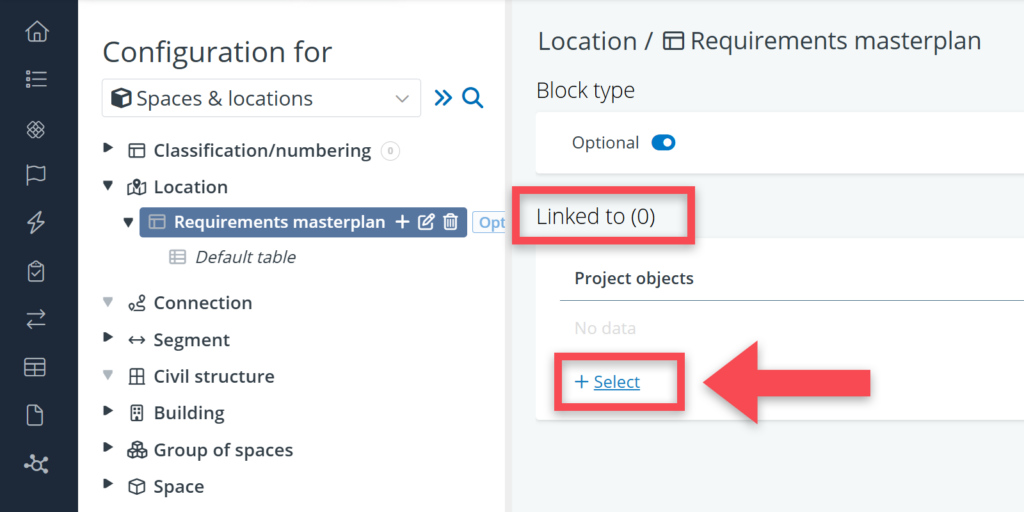
If you have created an optional block, you can link it to specific objects in the following way:
- Open the block‘s detail view.
- In the Linked to table, click on + Select.
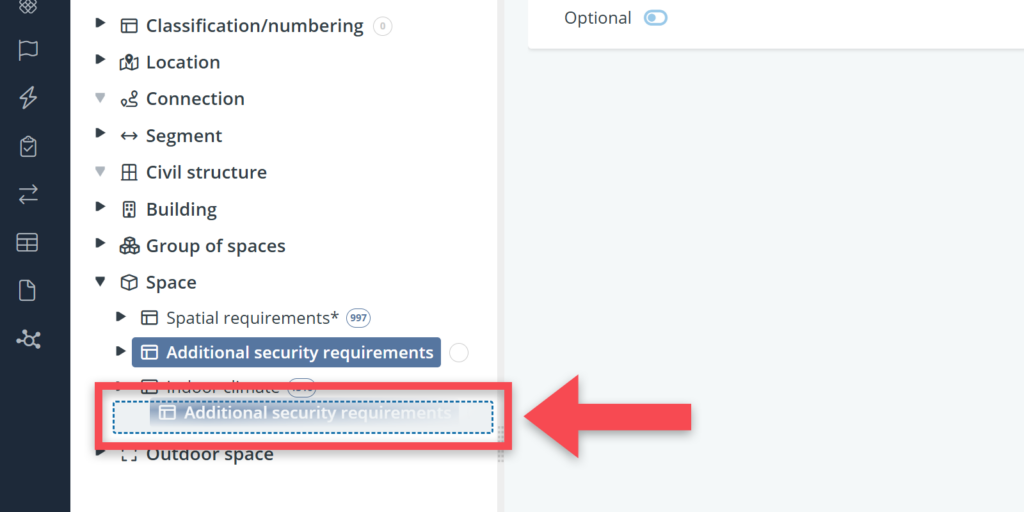
The same action can also be performed from the other direction, via the detail view of a specific object by clicking the table icon in the top-right corner.
The order of blocks can be changed in the same way as you can move objects in other trees, using drag and drop.
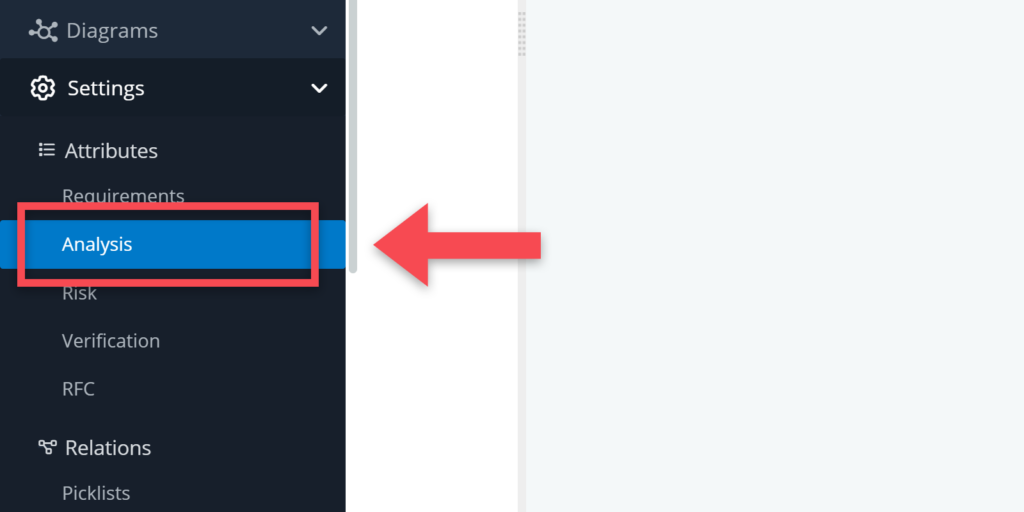
Analysis
The analysis settings in BriefBuilder allows ‘tags’ to be defined for requirements. Think of tags concerning a requirement’s topic, relevance or related discipline.
Steps to add analysis properties:
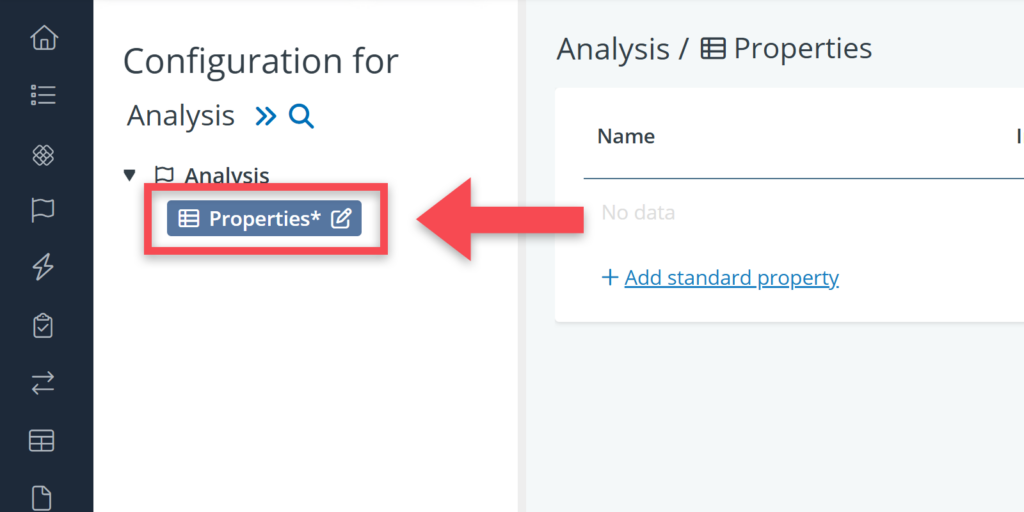
- Click on Analysis in the Attributes menu.
- Go to the default property table in the settings tree (called Properties).
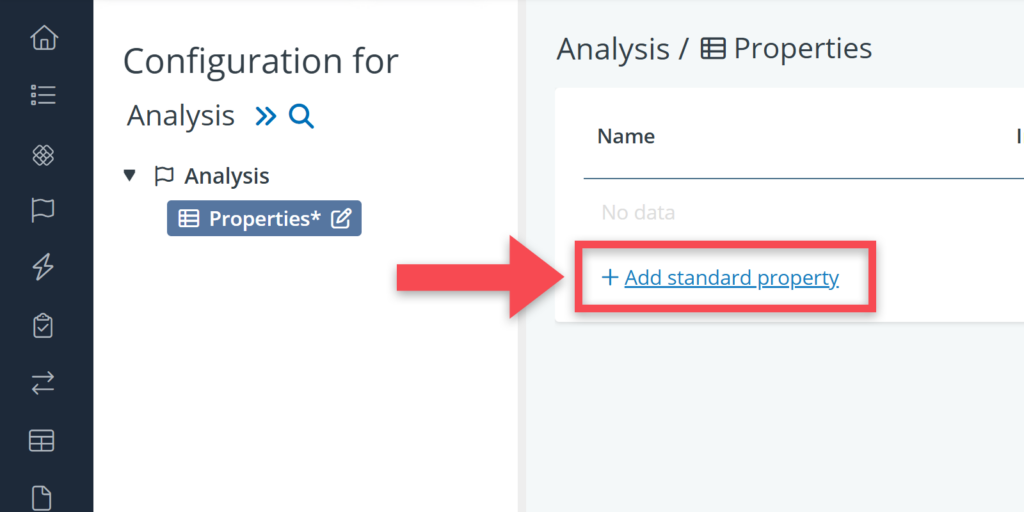
- Click on + Add standard property in the table on the detail view.
- For that property, add a name, an input type, an icon and so on.
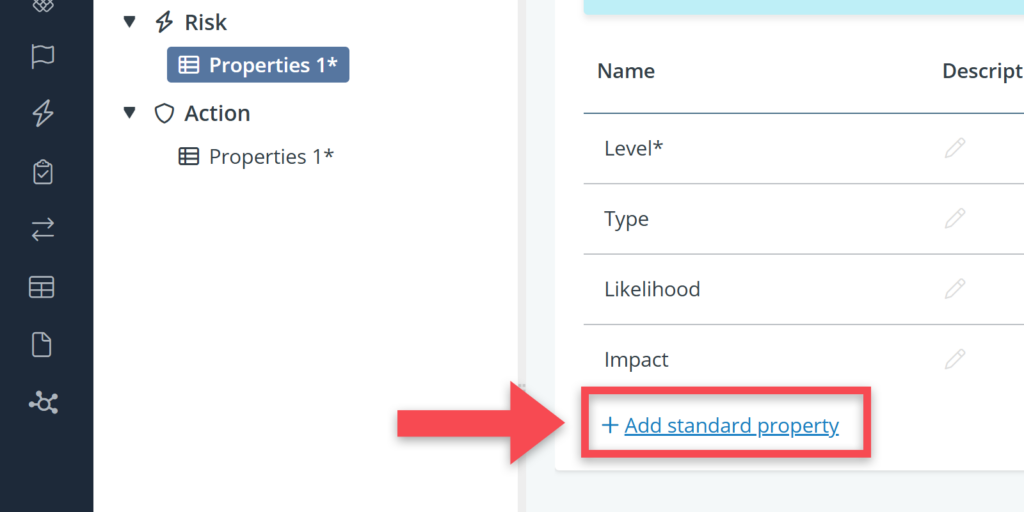
Risk
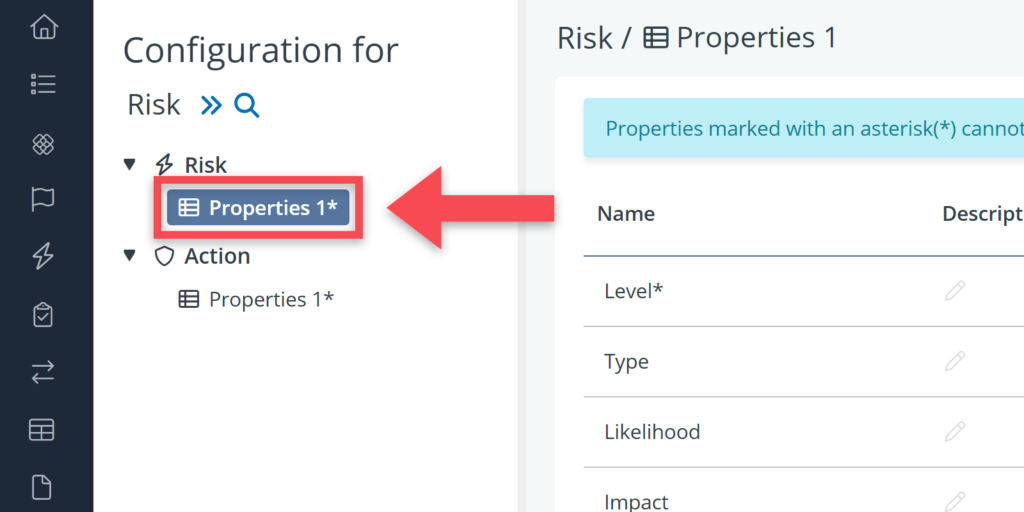
In the risk settings, you see two objects: risk and action. The risk object is the risk itself, which can have a description and properties like Risk type, Likelihood or Impact. Action refers to the actions that have to be undertaken to mitigate the risk. Relevant action properties could be Responsible party or Phase.
To define such properties:
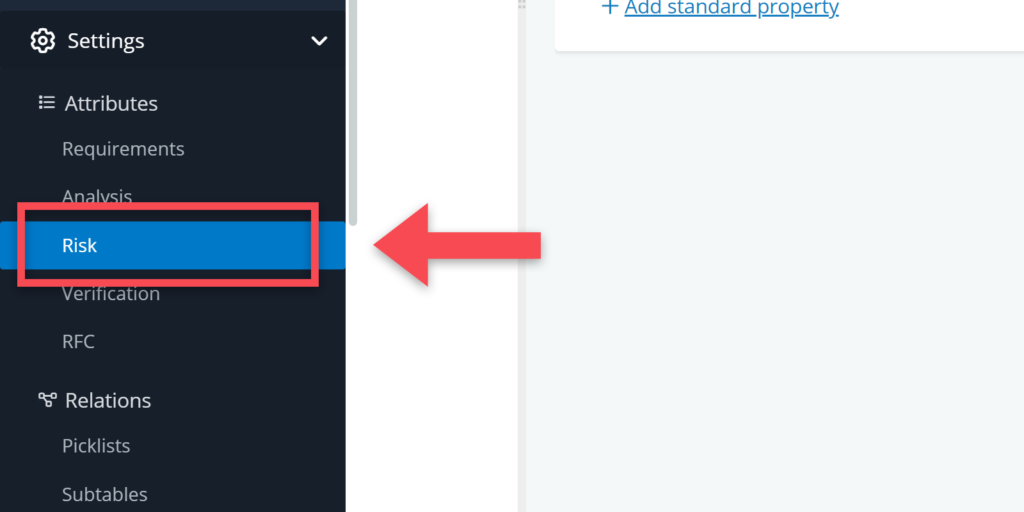
- Click on Risk in the Attributes menu.
- Click on the relevant object type (Risk or Action).
- Click on the property table (called Properties) in which you want to add the property.
- Click on + Add standard property.
- For that property, add a name, an input type and so on.
Verification
For verification, there are several settings available. You can define verification phases and properties for verification plans, results and assessments and demonstration documents.
To find the settings, click on Verification under the Attribute settings.
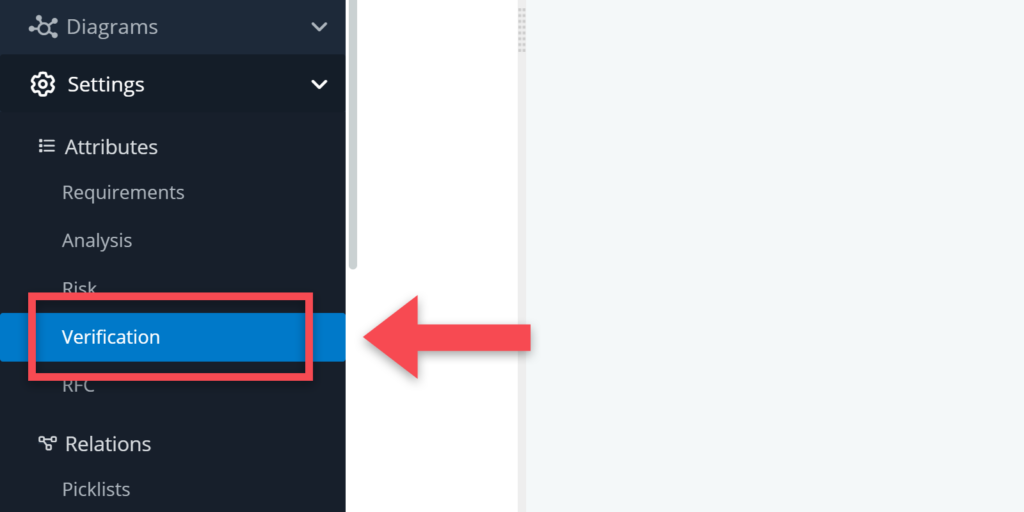
See below for a short explanation of the various settings that you get to see.
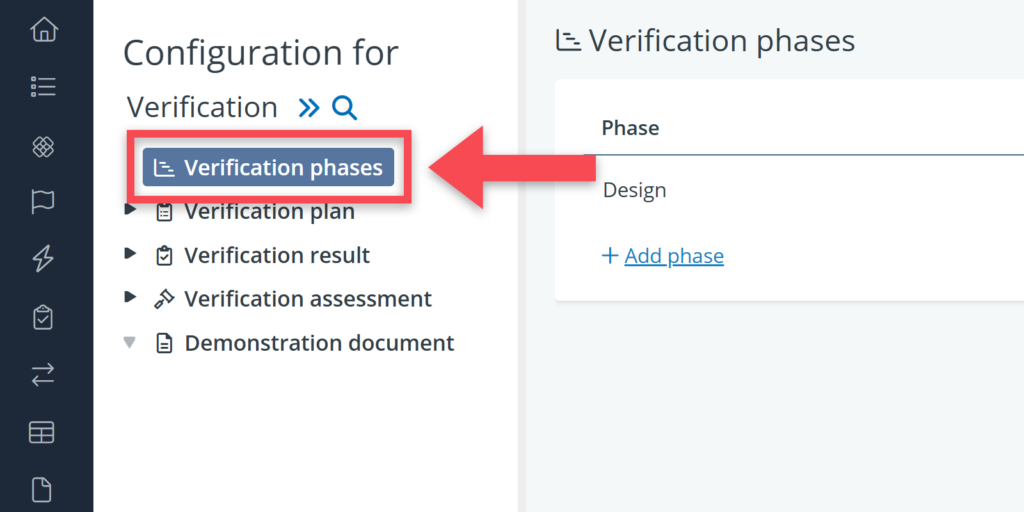
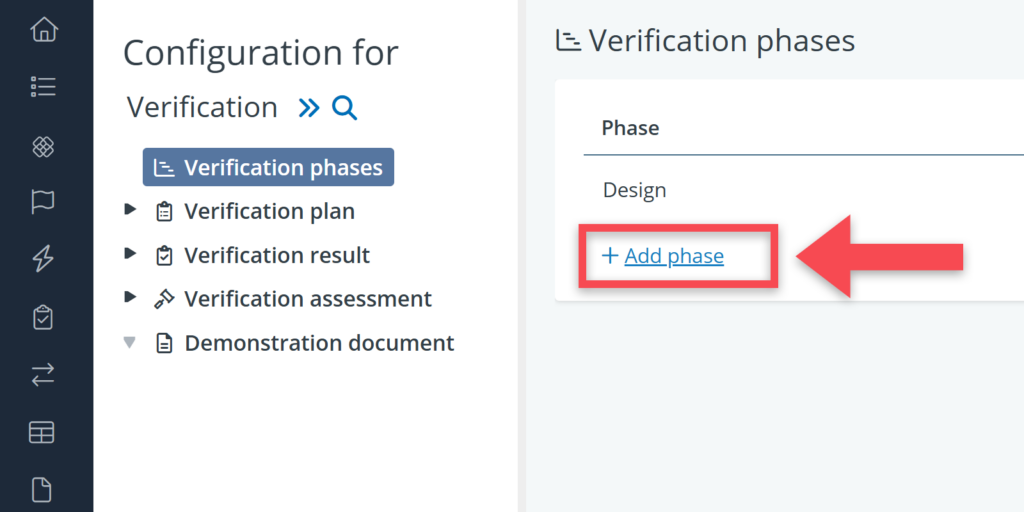
Verification phase
Verification phases are the different phases in a project during which verification activities have to be carried out. Steps to define these phases:
- Click on Verification phase.
- Click on + Add phase on the detail view of this setting.
- Give the phase a name and, optionally, add an abbreviation and a status of the phase (active or inactive).
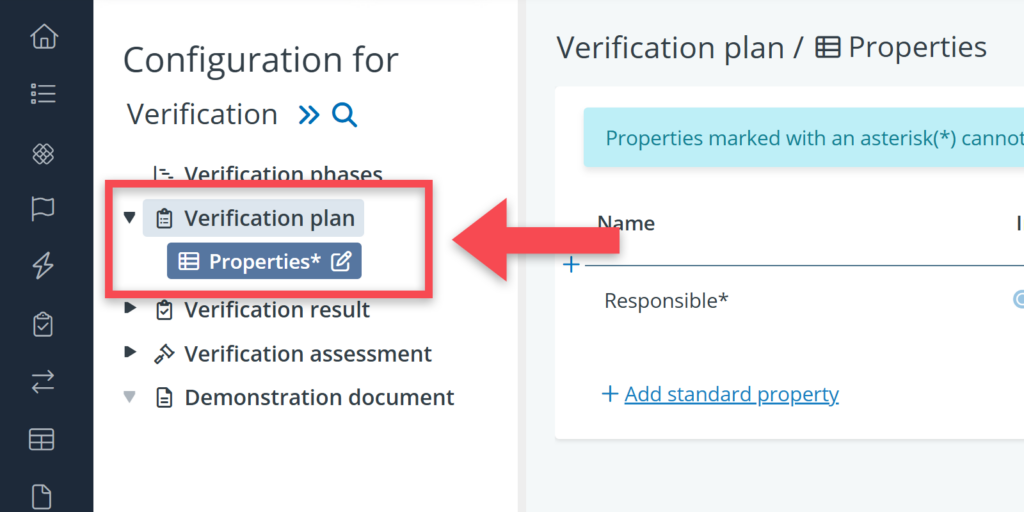
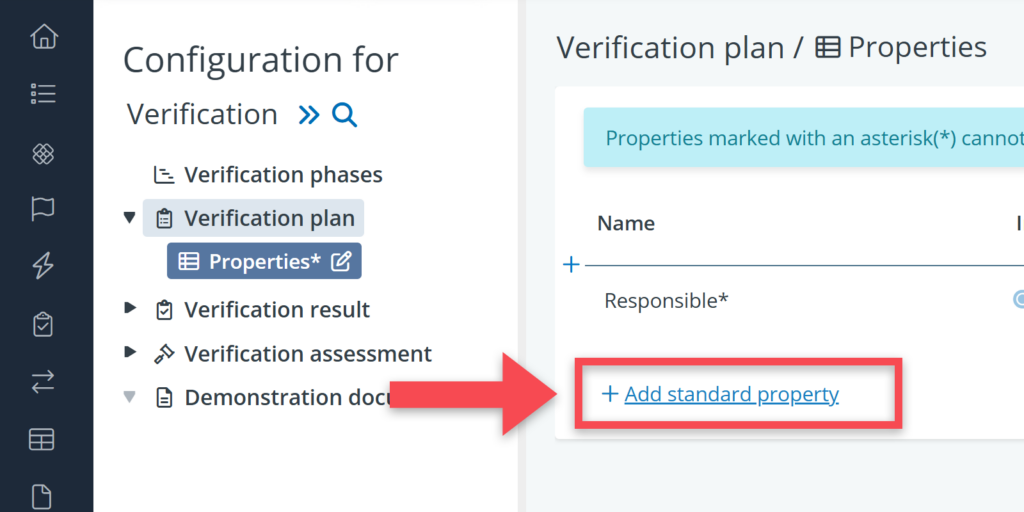
Verification plan
Verification plans can be used to define who should verify a requirement and what kind of verification method should be used. Steps to define verification plan properties:
- Click on Verification plan in the settings tree.
- Click on the relevant property table (called Properties).
- Click on + Add standard property on the detail view of this setting.
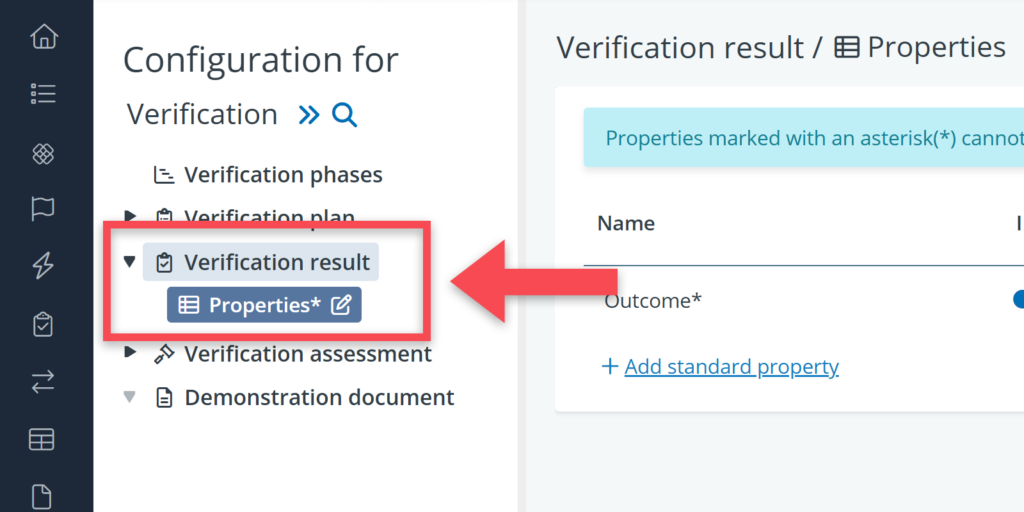
Verification result
The verification result reflects the outcome of the compliance check: has a requirement been met or not. In the settings, you can define additional properties for the verification result, e.g. a field for follow-up actions.
Adding properties here, works in the exact same way as for verification plan:
- In this case, click on Verification result in the settings tree.
- Click on the relevant property table (called Properties).
- Click on + Add standard property on the detail view of this setting.

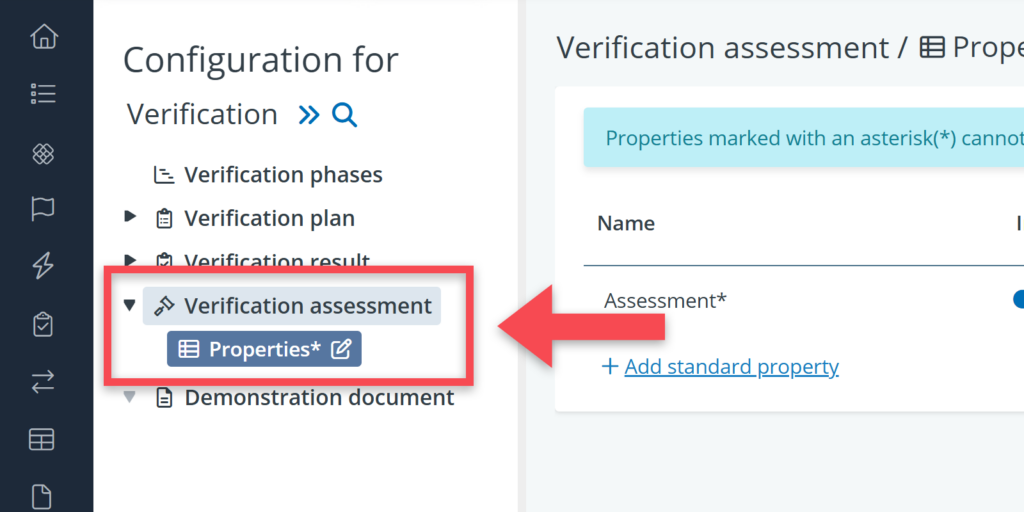
Verification assessment
Verification assessment is about reviewing or approving the verification results and the related demonstration documents. Typical properties are follow-up actions (e.g. re-verification, adjustment of requirements, adjustment of the (design)solution) and assessment outcomes (e.g. accepted versus rejected).
Again, you can add these properties via the following steps
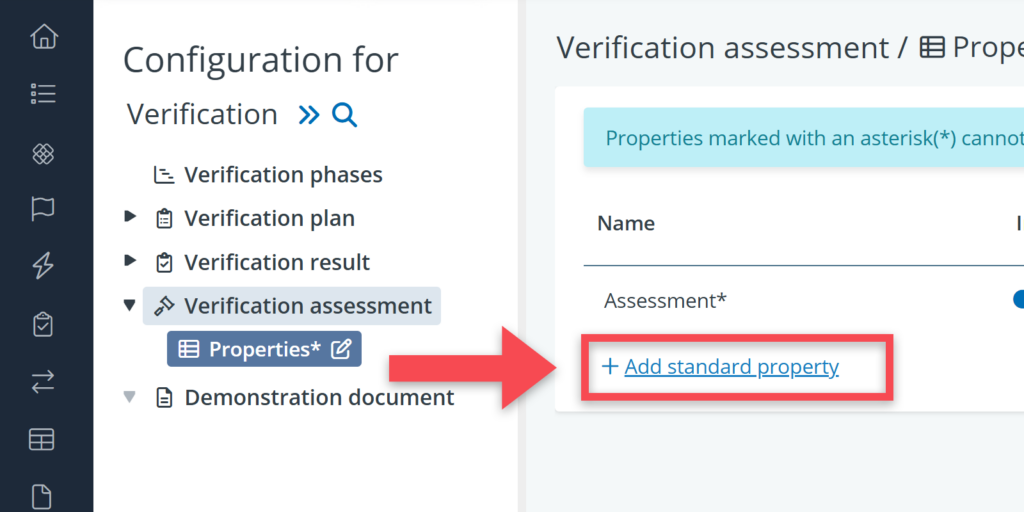
- Click on Verification assessment in the settings tree.
- Click on the relevant property table (called Properties).
- Click on + Add standard property on the detail view of this setting.
Demonstration documents
Demonstration documents are documents or files that can be linked to a verification result for demonstrating compliance. Examples of demonstration documents are test reports, inspection reports, and compliance certificates.
Also for demonstration documents, it is possible to define blocks, tables and properties:
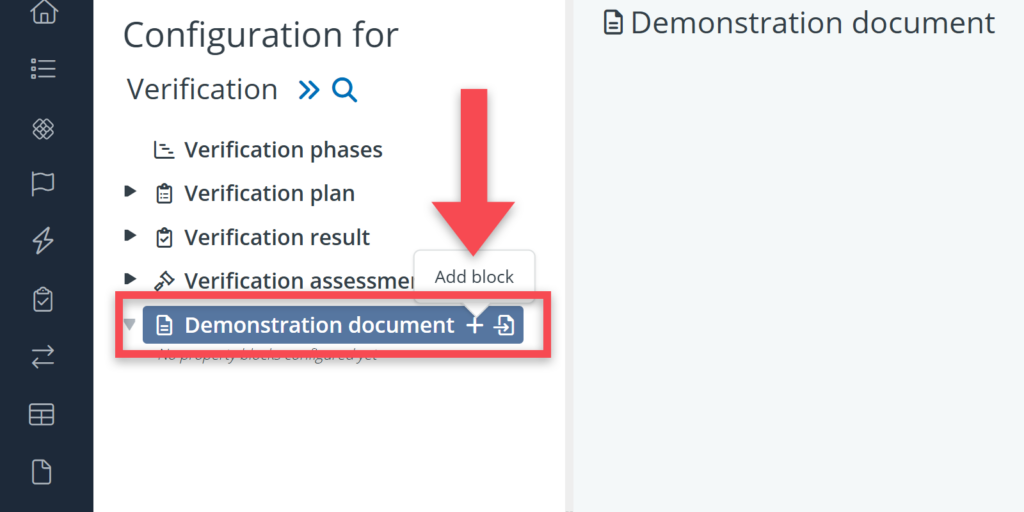
- Click on demonstration document in the settings tree.
- Click on the plus-icon to add a new block.
- Give the block a name (e.g. Document specifications).
- Decide whether the block should be optional or not.
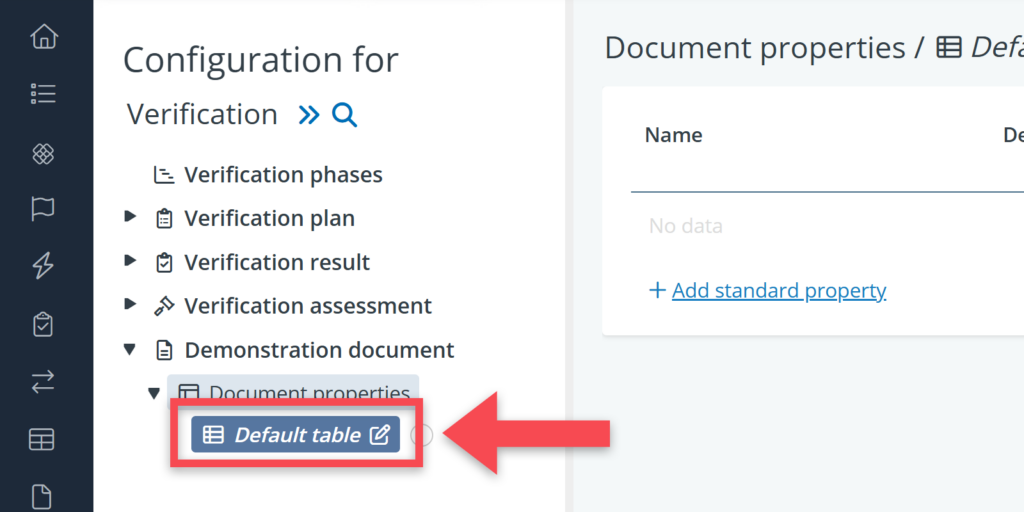
- Go to the table that is automatically created for that block (called Default table).
- In that table, click on + Add standard property.
- And for that property, add a name, a unit of measure, an input type and so on.

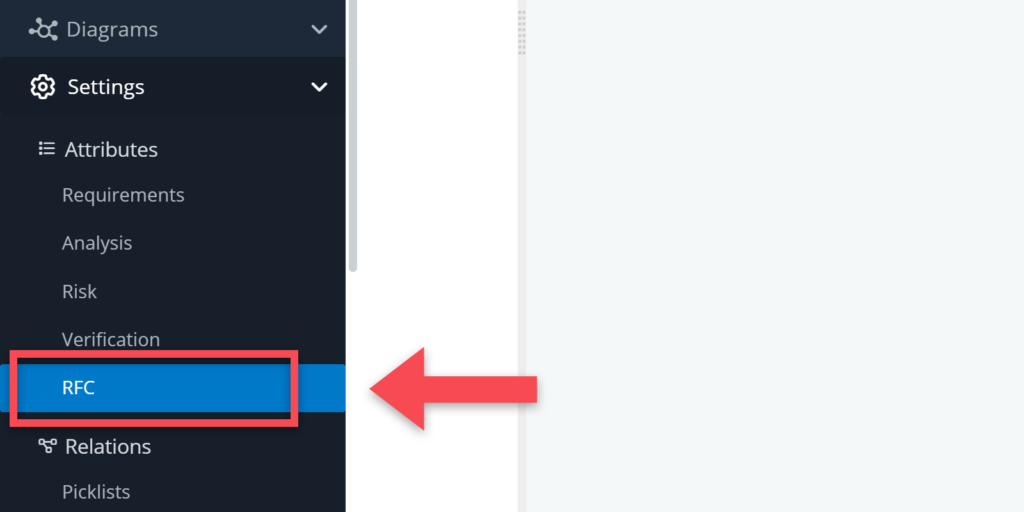
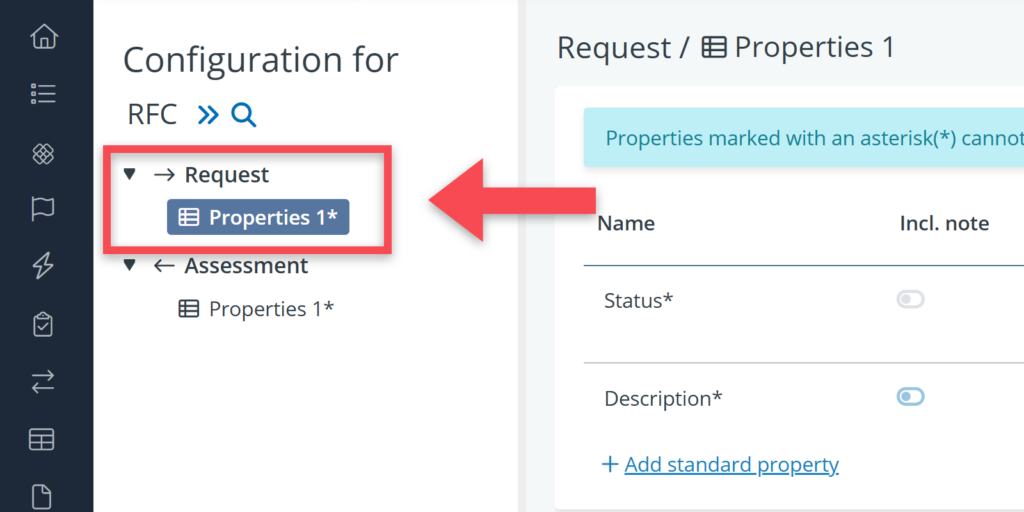
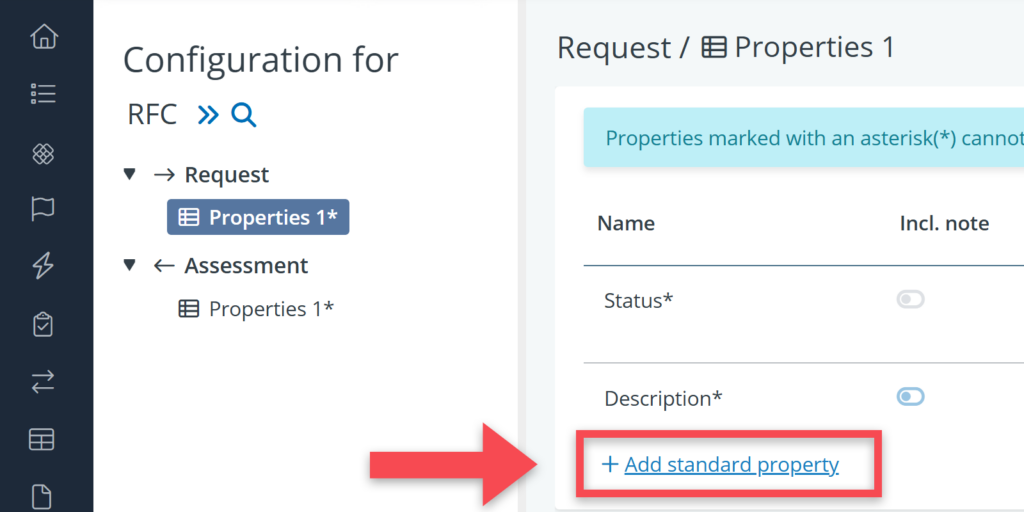
RFC attributes
In the RFC settings tree, you will see two objects: request and assessment. Request is where users can add information about their request (What is it? To whom is it addressed? What is its status?). Assessment contains properties that can be used for the assessment of a request (e.g. for indicating whether a request is accepted or rejected).
To define properties for the RFC parts:
- Go to Settings > Attributes > RFC.
- Click on the relevant object type (Request or Assessment).
- Click on the relevant property table (or create a table).
- Click on + Add standard property.
- For that property, add a name, an input type and so on.