
Optional standard property blocks are the same as normal standard property blocks (you can predefine them, create picklists, use them in cross tables, …) with the difference that they are only shown on an object’s detail view when you have explicitly selected or linked them to that object.
Optional blocks are very useful when you have a set of properties that are relevant for a specific set of objects only (e.g. for a set of floor finish elements or a particular group of spaces). In this article, we’ll explain how to work with these optional blocks.
Creating optional blocks
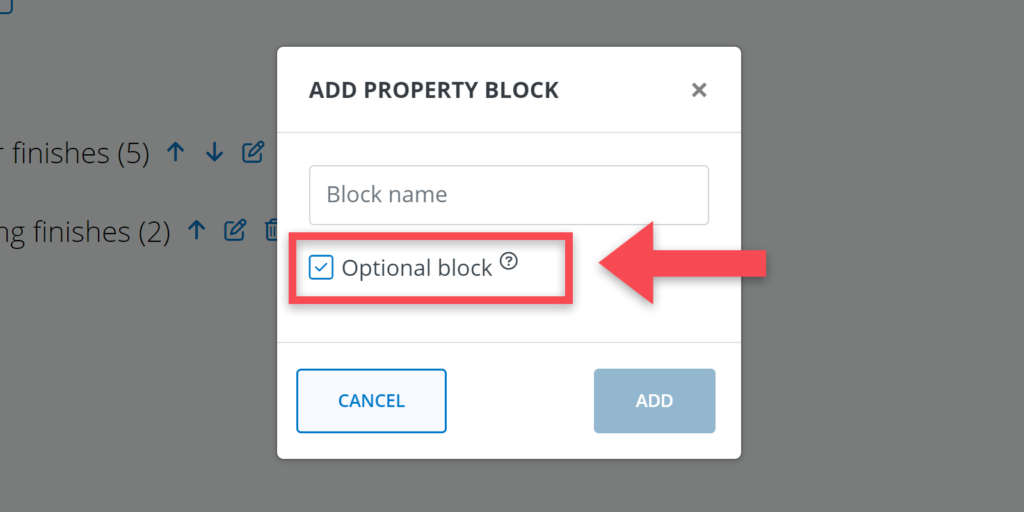
Creating optional blocks works in the same way as creating other standard property blocks, via the settings menu. The only difference is that you have to check the box Optional block in the pop-up.
In short, you have to do the following:
- Go to Settings > Attributes > Requirements
- Select the relevant tree (e.g. Spaces & locations or Systems & elements)
- Select the relevant object type for which the optional block should be available.
- .Click on Add block next to object type’s name in the settings tree.
- Give the block a name and check the box Optional block.
- Create the properties you need by clicking on Add standard property.
For a more detailed explanation about defining standard properties, read the standard properties article.
Adding optional blocks to objects
There are two ways to add an option block to an object:
- via the detail view of an object
- via the settings menu
Below, we’ll explain both.
Via the detail view of an object
If you are working in your model and you want to add an optional block to a specific object, you can go can do the following:
1) Go to the property icon () in the upper right corner of the detail view.
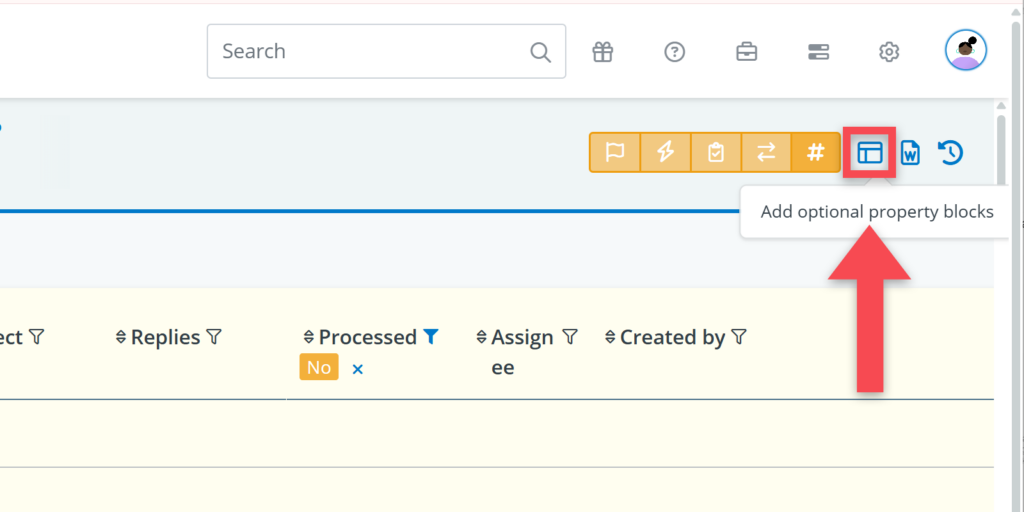
2) Select the relevant optional blocks and click on Add.
Via the settings menu
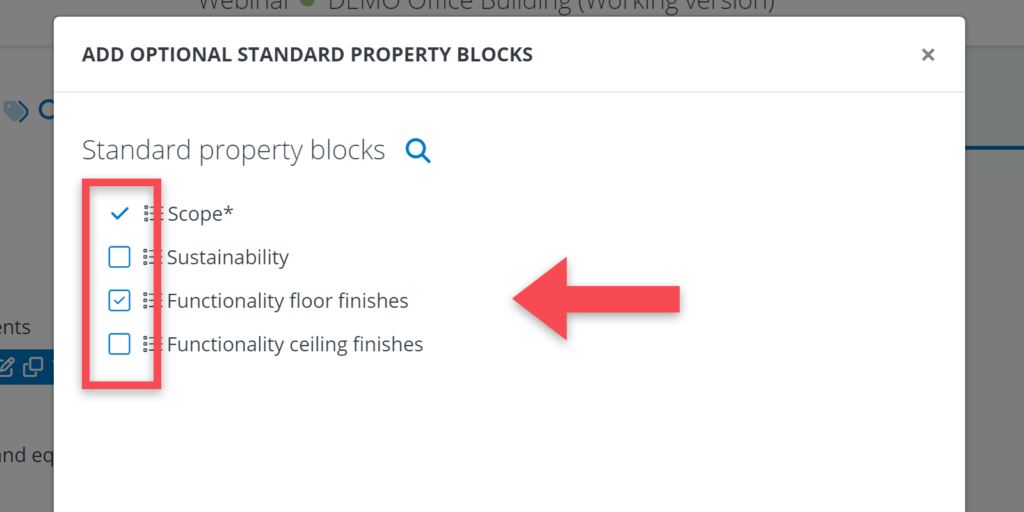
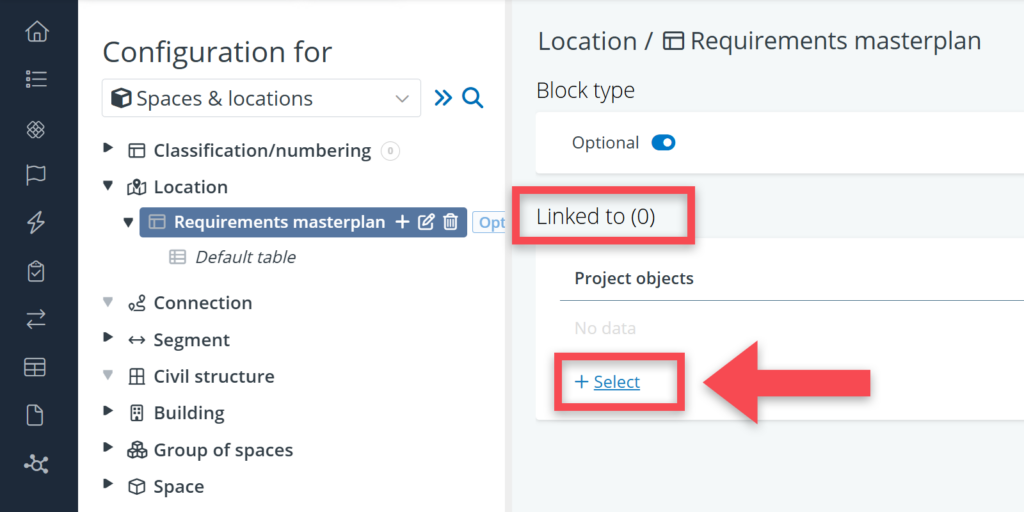
In the settings menu, where you have created your optional block, you can also directly link that block to the relevant objects.
- Go to the relevant property block in the settings tree.
- Go to he table Linked to on the block’s detail view.
- Click on the + Select button
Removing optional blocks from a detail view
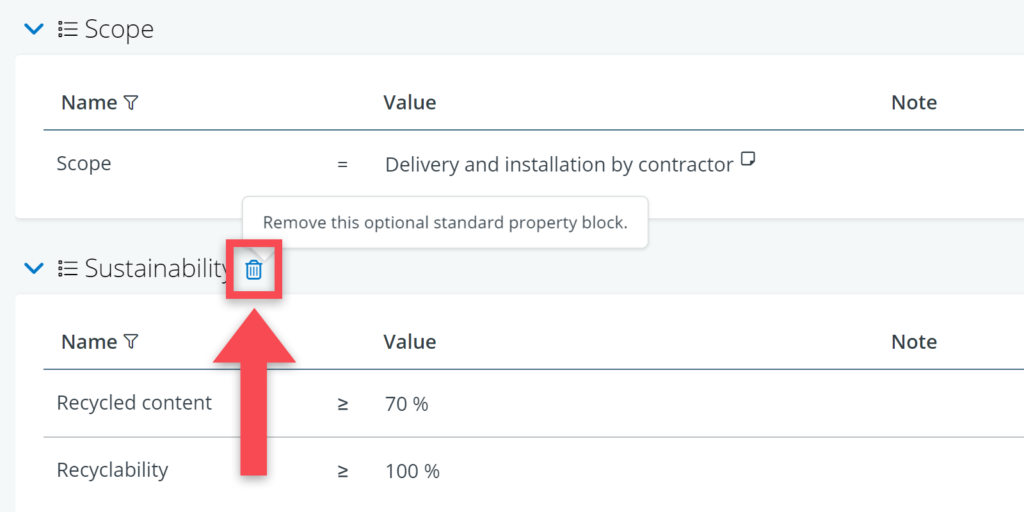
The removal of optional blocks can again be done via the settings or via the object’s detail view.
In the settings, you have to click on Remove button at the very right side of the Linked to table.
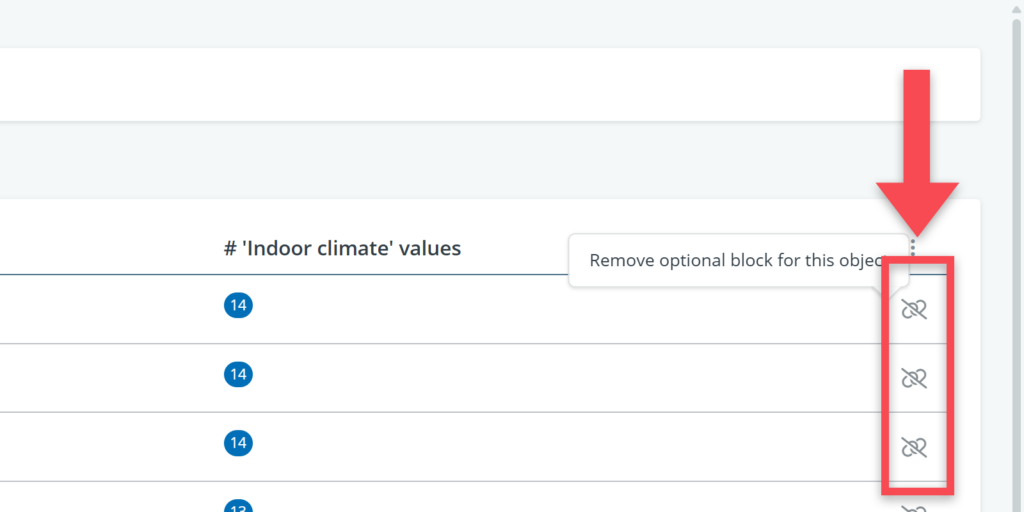
On object’s detail view, you have to go the relevant block and click on the recycle bin icon ().
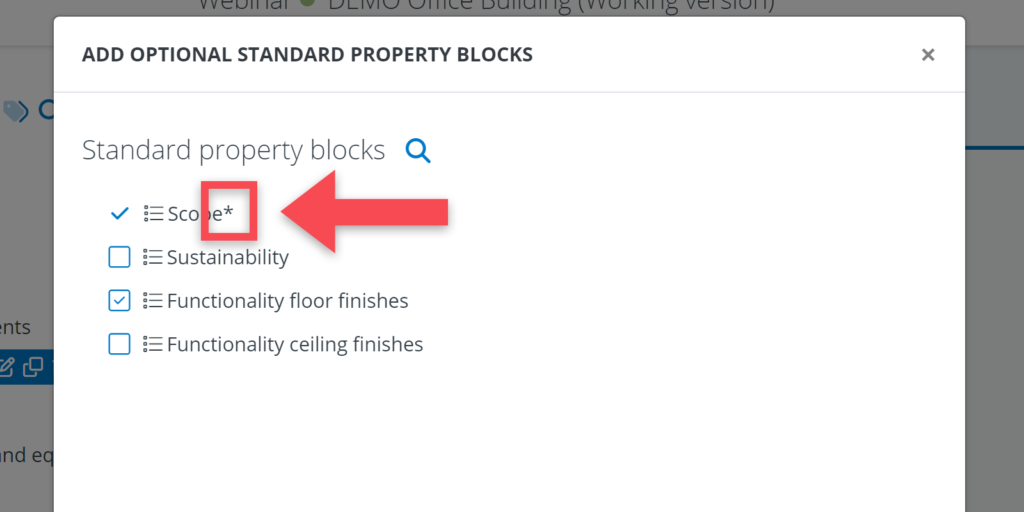
Making default blocks optional or vice versa
When you have an optional block that you want to turn into a non-optional block (= a block that is automatically linked to all objects of that type, e.g. all spaces, all elements, etc.), you can do this in the settings:
1) In the settings tree, click on the relevant block.
2) On the block’s detail view adjust the Optional toggle.
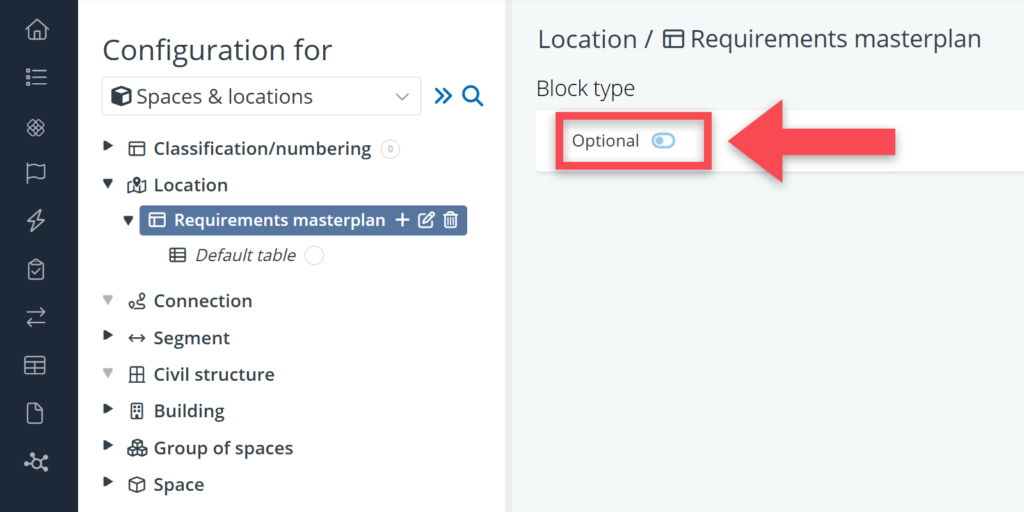
If you want to turn a default block into an optional block, you do the opposite.