BriefBuilder is not a planning tool, but it can still be relevant to work with dates at some places in the model. You may, for example, want to indicate a due date for a response to an RFC, or a deadline for when verification results need to have been entered in BriefBuilder.
Defining date fields
Date fields can be defined for standard properties in the settings menu. This can be done for requirements, analysis items, verification plans and results, and RFCs.
Do the following:
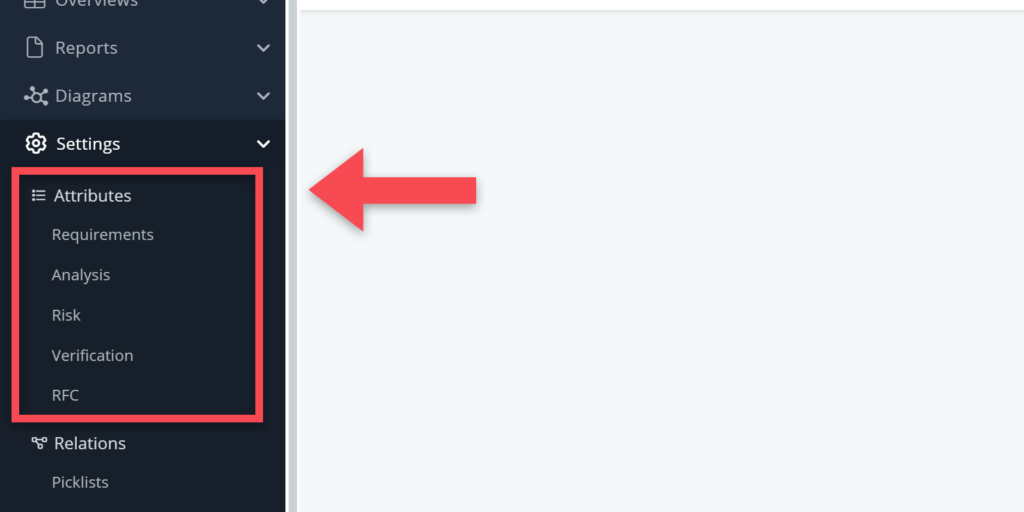
1) In the settings menu, go to Attributes to select the relevant model part.
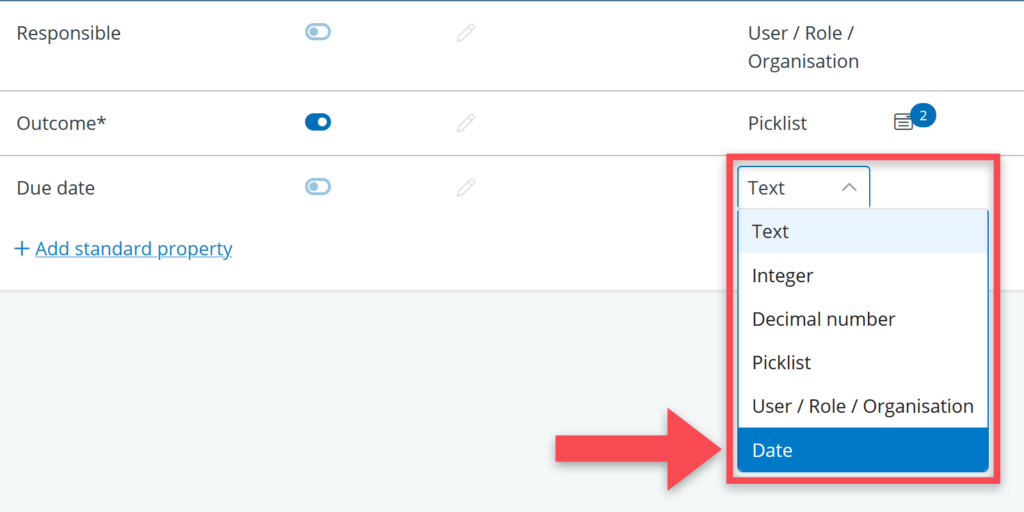
2) Find the property table of the object type for which you want to add a date property (in the example below, the table Properties 1 for the object RFC Assessment).
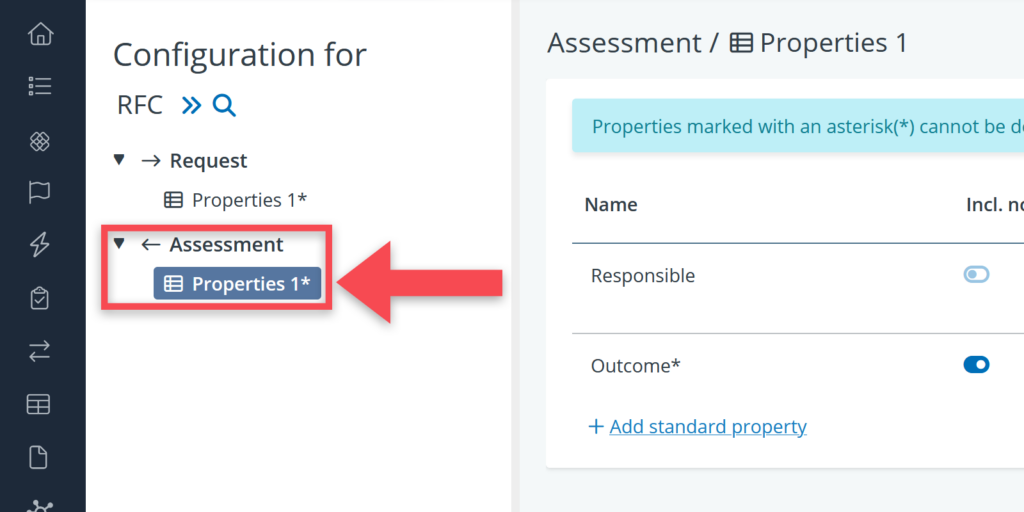
3. Create a new property by clicking on Add standard property.
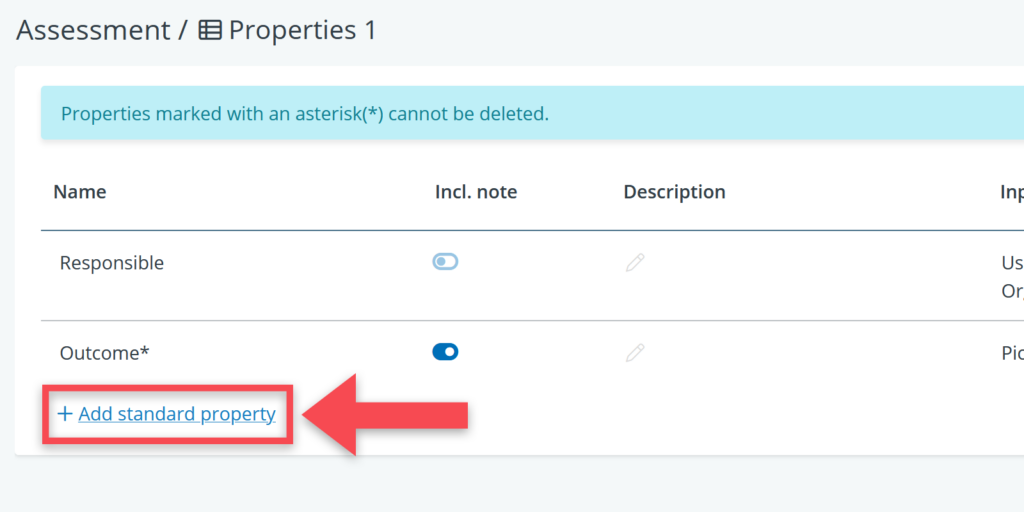
4. For your property, go to the column Input type and select Date.
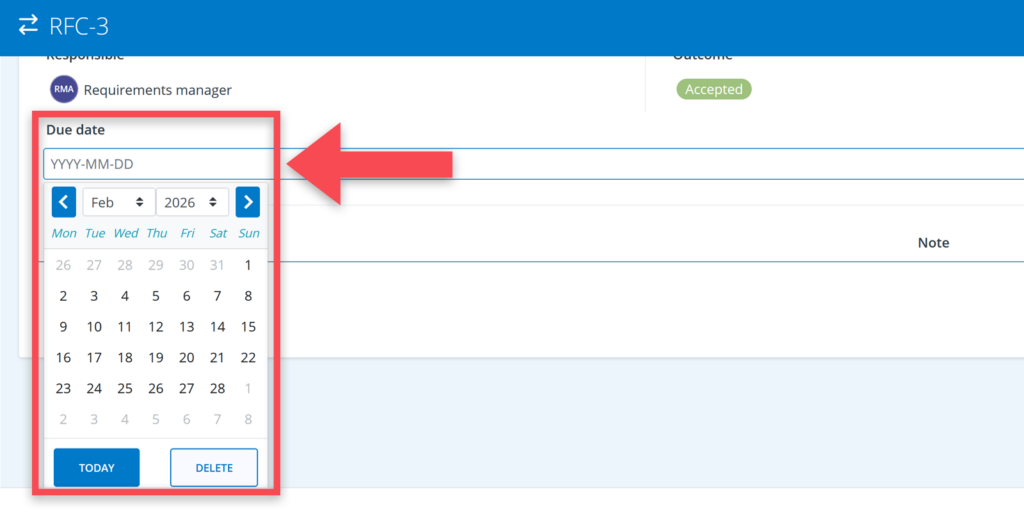
And that’s it. To check your work, go to the model. The relevant property should now have a date selection window for the entry field. See the screenshot below.
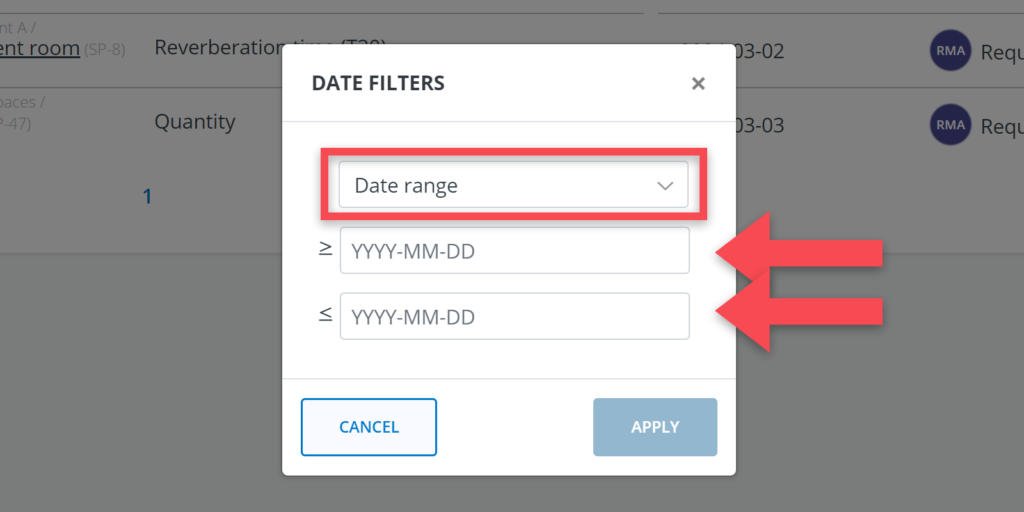
Filtering on dates
When working with date properties, these will also be shown in tabular overviews like the RFC table or the verification table. In such tables it will then be possible to filter on specific date ranges.
To do so, go to the relevant column header and click on the filter icon ().
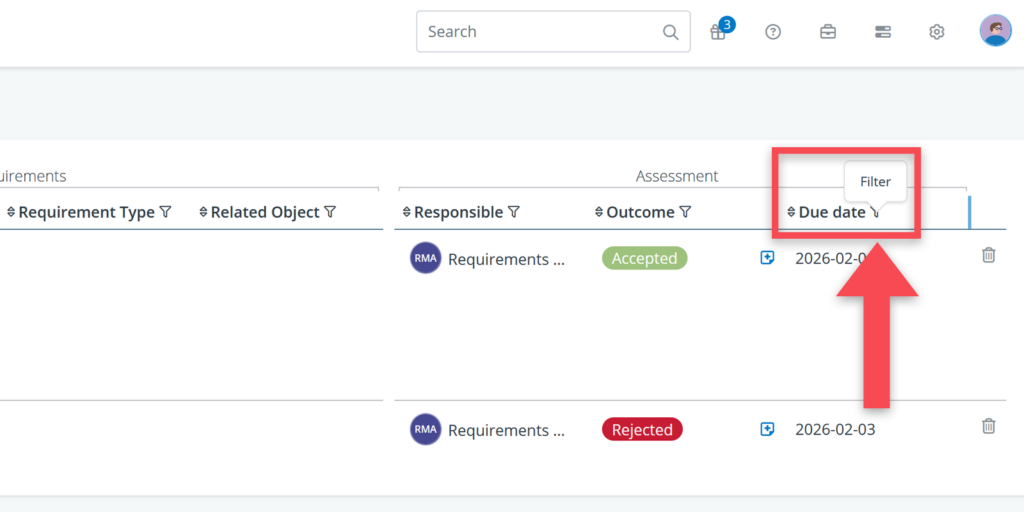
When clicking on the filter, you can enter a start date and end date for your range.