For building projects, it is crucial to have a clear overview of the project’s total size in terms of square meters/feet. This calculation is therefore part of the default set-up of BriefBuilder.
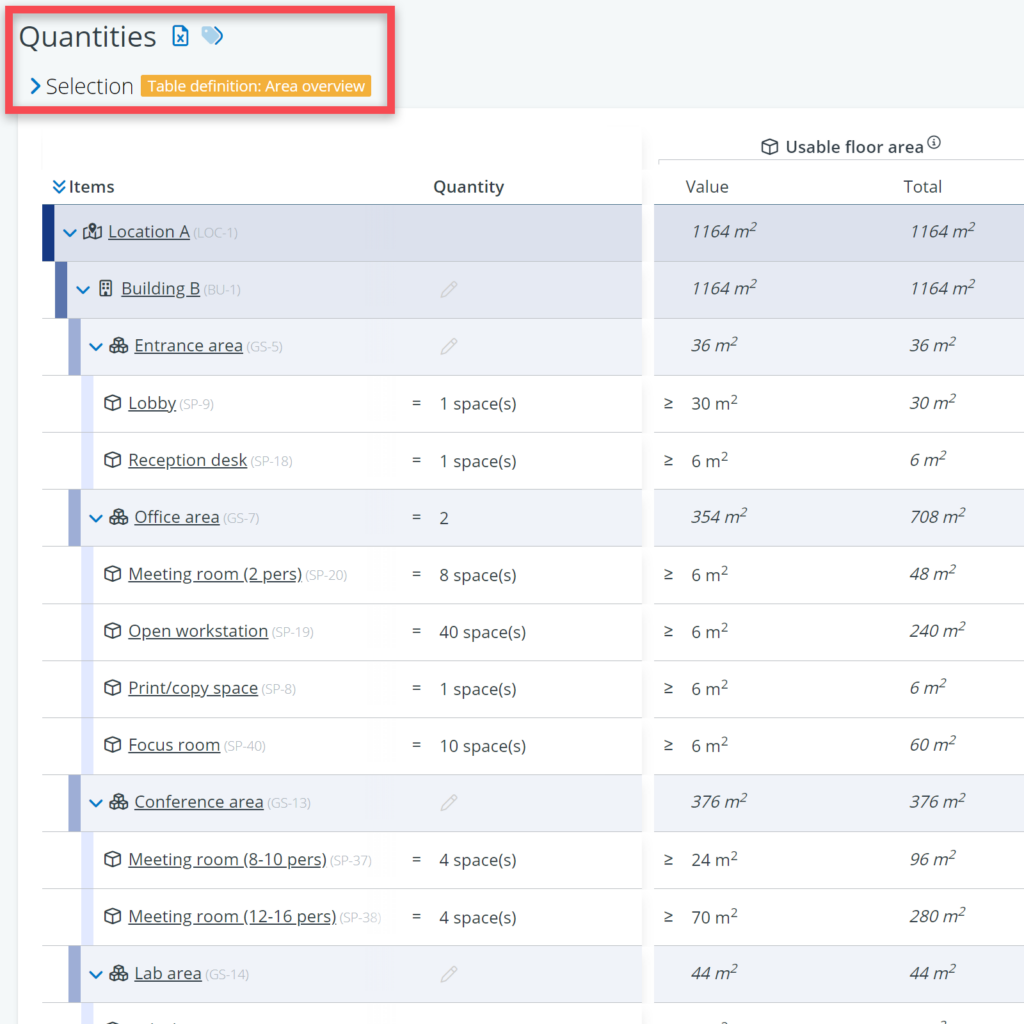
The relevant table is called Area overview and can be found via Quantities in the navigation menu.
This overview shows all the project model’s spatial objects (buildings, groups of spaces, spaces, outdoor spaces, connections, segments) with their quantities, sizes, and the calculated totals, in terms of both usable floor area and gross floor area.
To find (or create) the overview, go to Quantities in the main menu, which can be found under Overviews.
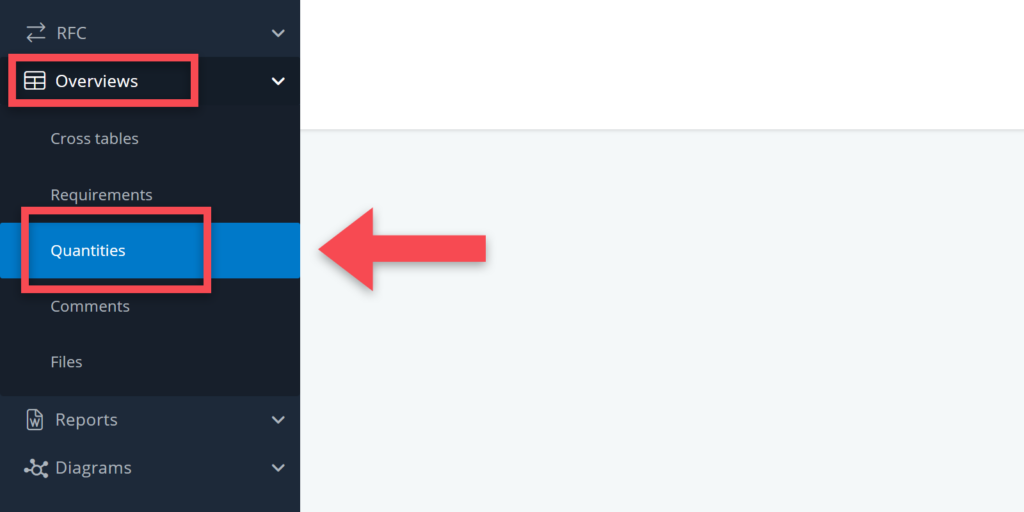
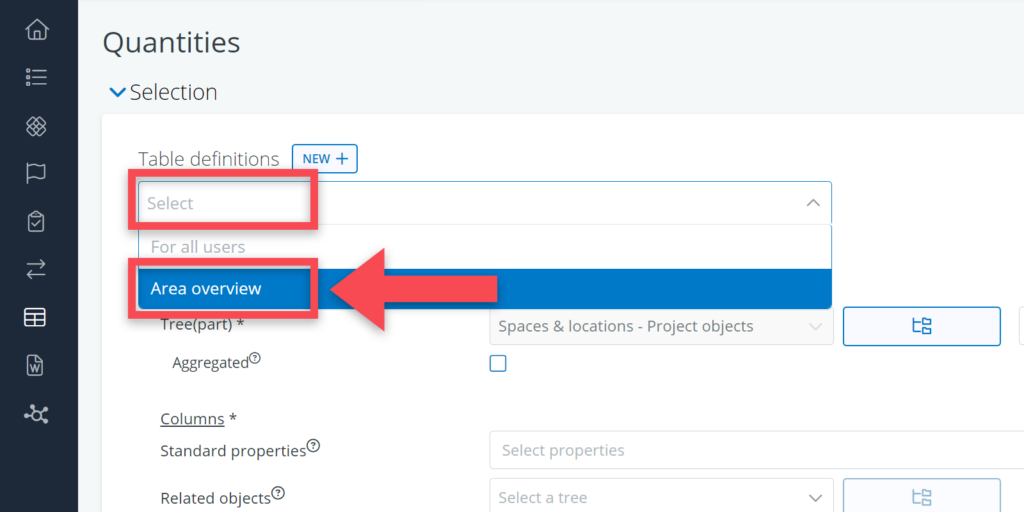
On the Quantities page, select Area overview, or create your own new overview by clicking on the New button.
Selections
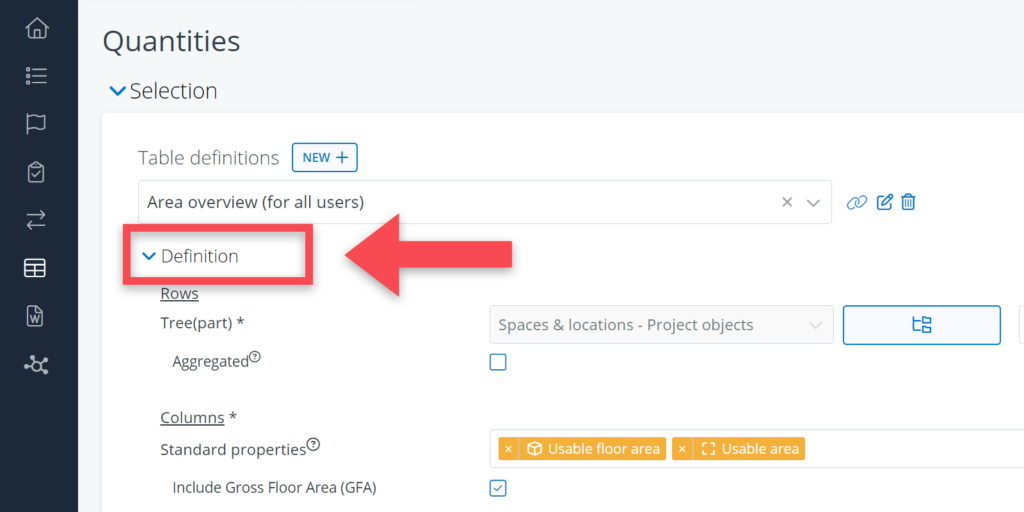
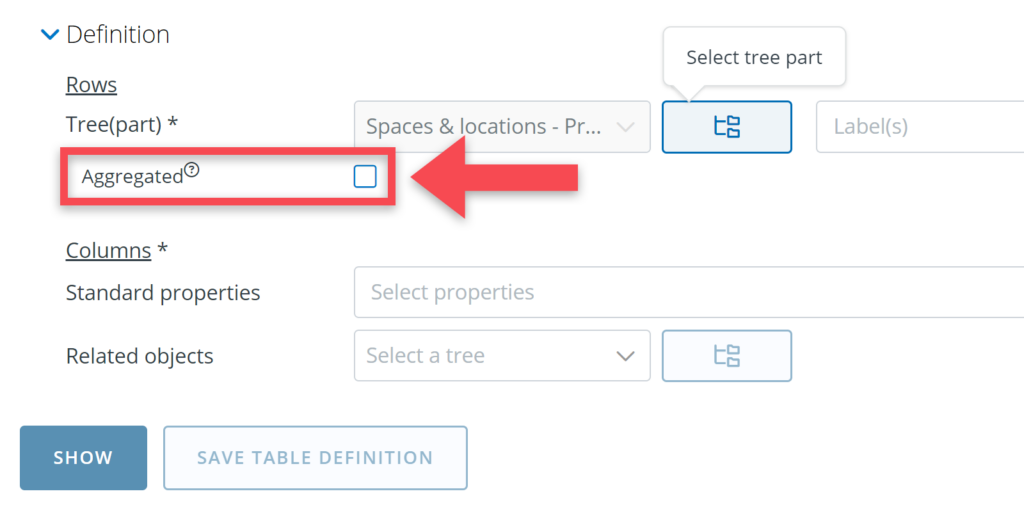
When selecting an existing overview, or creating a new one, you have to use the Definition (screenshot below) to modify and define the kind of quantity you want to calculate.
The table definition allows you to select data for both the rows and columns of the table:
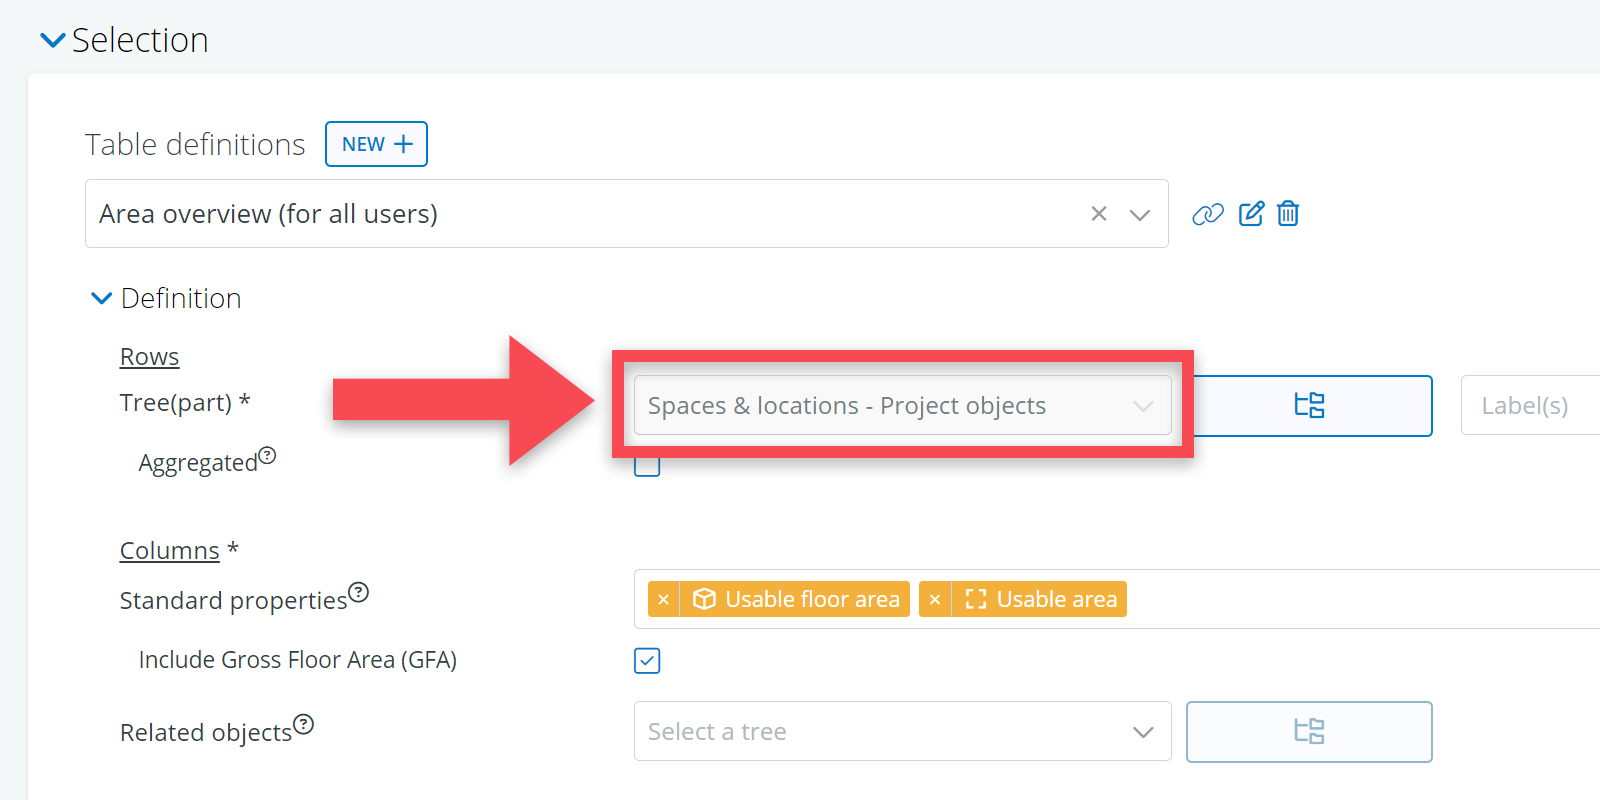
Rows
As you will see, the default selection is the Spaces & locations tree because this is the tree that contains the spatial objects for which it is is possible to calculate quantities.
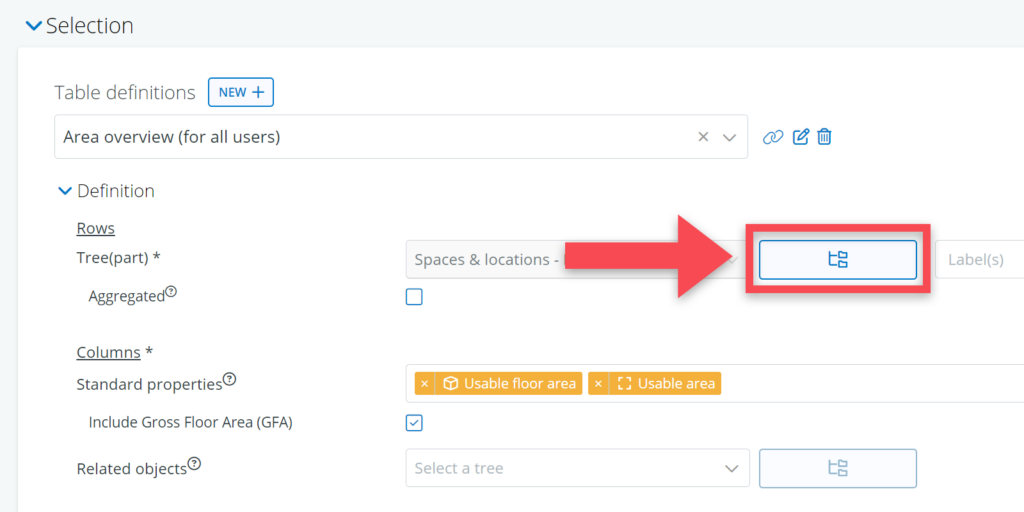
It is possible to narrow down your selecting by using the Select tree part button (see screenshot below). With this, you are able to calculate the size of a particular part of your project (e.g. a particular floor or department).
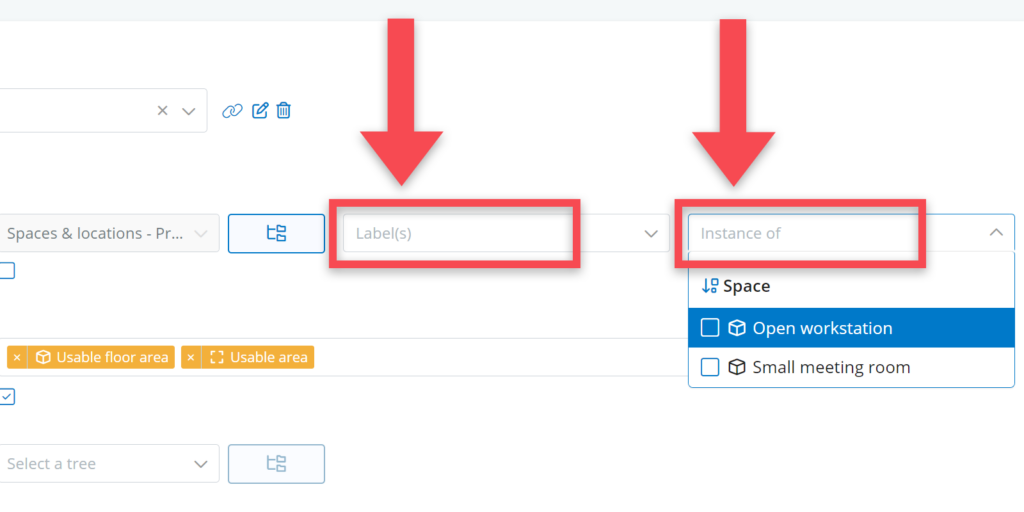
There are also selection possibilities for labels and typical spaces. These selections are relevant if you want to make calculations for particular types of spaces (e.g. calculating only the amount of space reserved for work or meeting spaces).
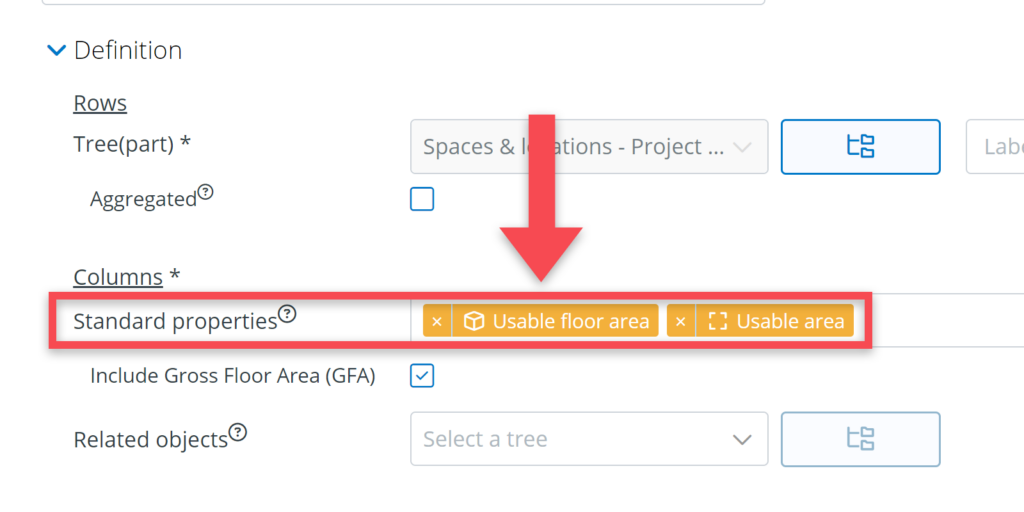
Columns
For the columns, you can select which property(s) you want to calculate with. For the area overview, this is the Usable floor area property for the (indoor) spaces and the Usable area property for outdoor spaces.
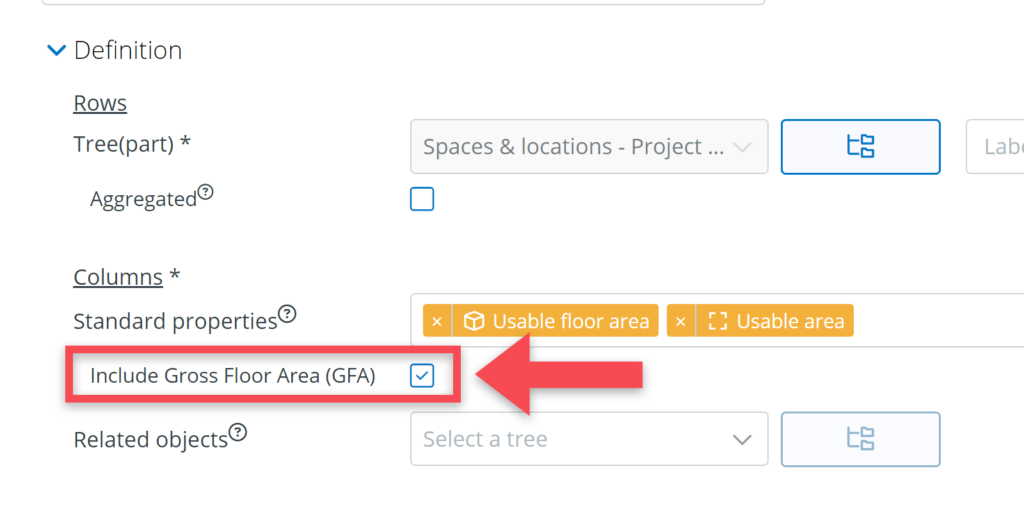
To see not only the usable floor area for (indoor) spaces, but also the calculated gross floor areas, you need to make sure that the checkbox Include gross floor area has been checked.
The overview
Once you have made your selection—and you have clicked on Show—you get to see the actual area overview. The overview consists of three parts:
- The spatial decomposition
- Usable floor area (UFA)
- Gross floor area (GFA)
Each part which will be explained below.
Spatial decomposition
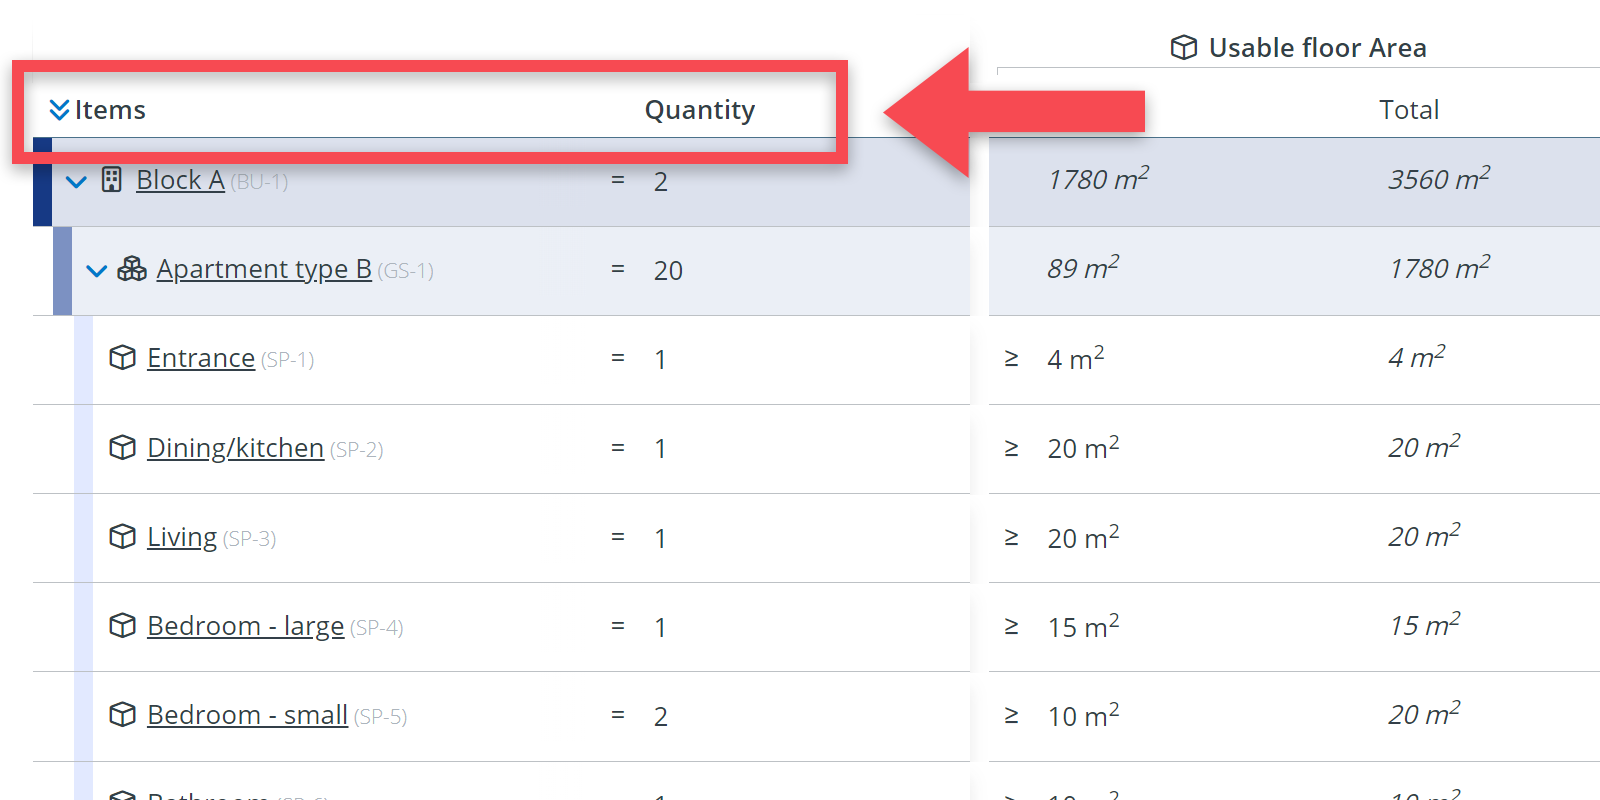
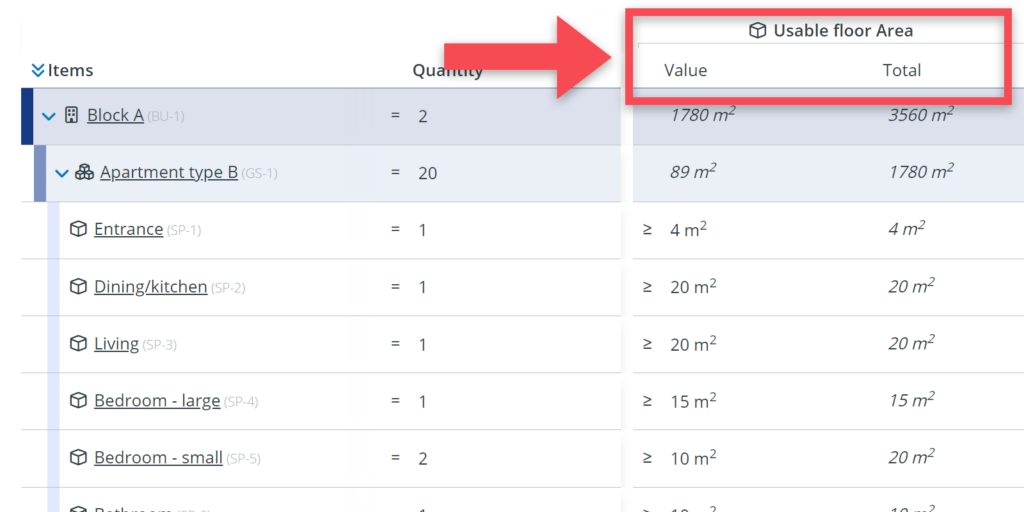
The spatial decomposition is the ‘backbone’ of your calculations. It shows the spatial objects (buildings, groups of spaces, segments, …) that are the basis for your calculation. It features two columns:
- Items: the name of the spatial object (e.g. Apartment type B).
- Quantity: the number of required spatial objects (e.g. specifying that you want 20 apartments of that type)
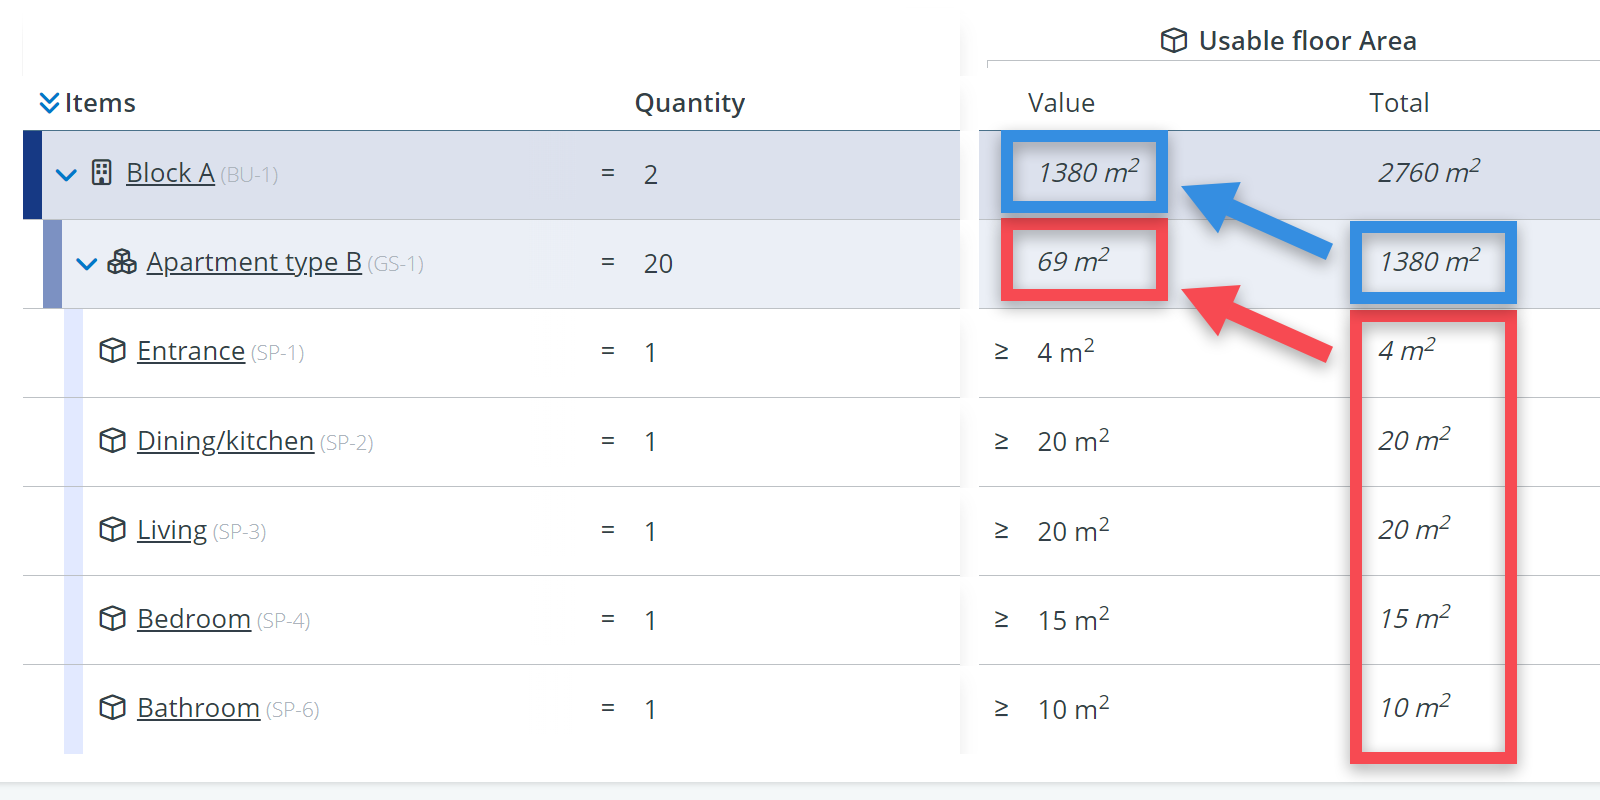
Usable floor area (UFA)
The UFA part shows the defined requirements in terms of usable floor area. Also this part of the table features two columns:
- Value: the value of for the property Usable floor area (e.g. 69 sqm)
- Total: the size per spatial object multiplied by its quantity (e.g. 1380 smq if you have 20 apartments of 69 smq each)
Gross floor area (GFA)
This part of the table concerns the calculation of the gross floor area (GFA) of your project.

The exact definition of what GFA is can differ per country, but generally it is defined as the total floor area contained within the building (or a part of it) measured to the external face of the external walls and thus including floor area used for shafts, walls, etc.
The total GFA is calculated in BriefBuilder by multiplying the usable floor areas with a particular factor (called a GFA factor in BriefBuilder, in practice also referred to as gross/net ratio or GFA/UFA ratio).
A simple example: if you have a building with 400 sqm of UFA, and the GFA factor is 1.5, you will get a total of 600 sqm GFA (see example below).
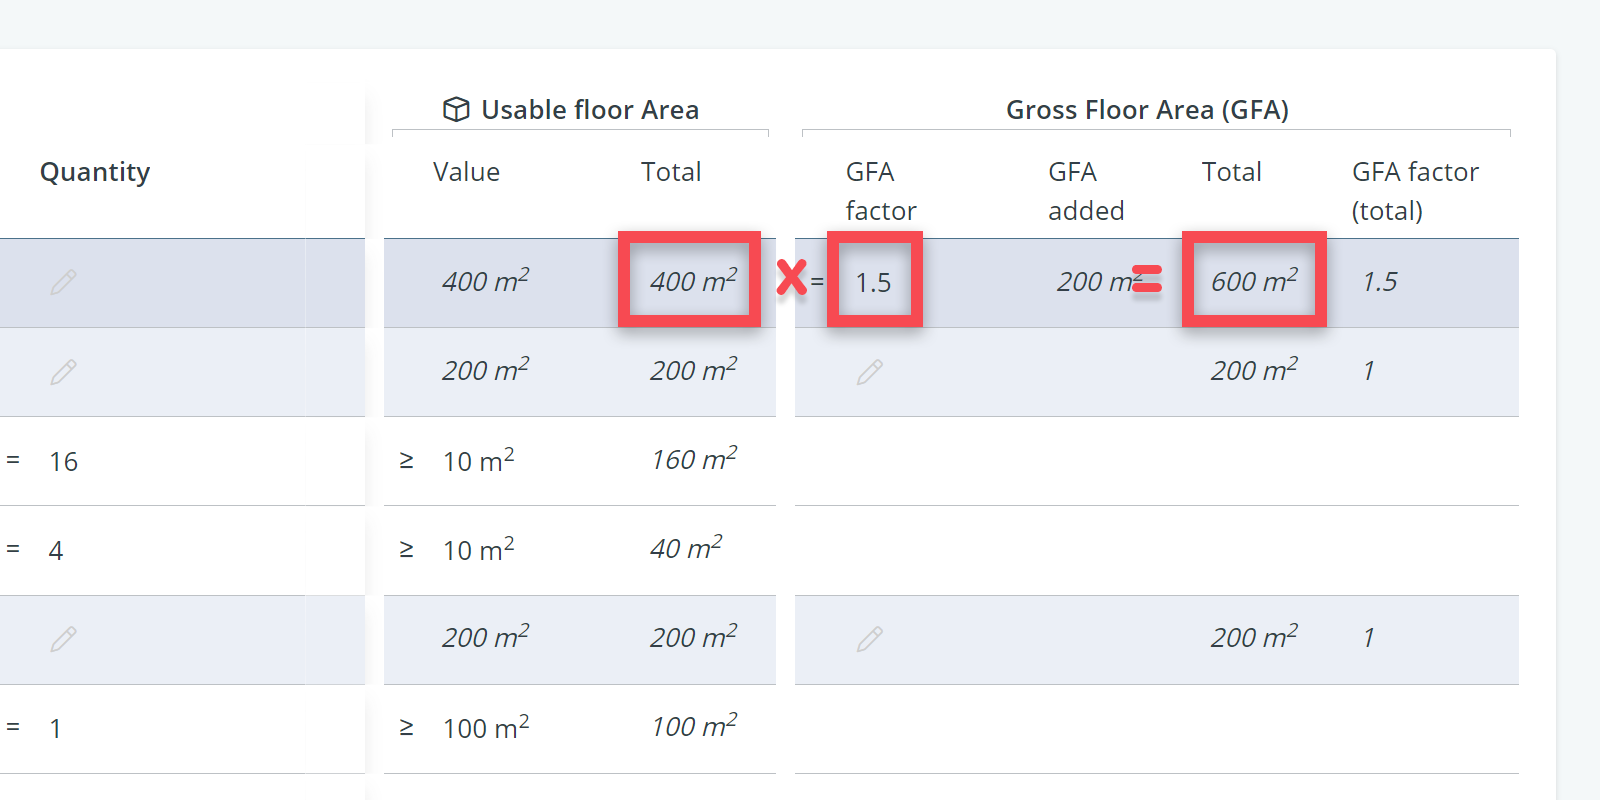
The GFA part of the table features the following columns:
- GFA factor: the factor that you want to apply to a building or specific group of spaces (1.5 in the example above)
- GFA added: the square meters/feet that you are adding by applying the aforementioned GFA factor (200 sqm in the example)
- Total: the calculated total gross floor area (600 sqm in the example). Please note that this figure is the sum of total usable floor area, plus the added GFA’s of that level, plus all the GFA’s that have been added on the underlying levels.
- GFA factor (total): the overall GFA factor, which is calculated by dividing the total gross floor by the total usable floor area (1.5 in the example above).
How to go from UFA to GFA?
It is important to know that you can work with the GFA factor in three different ways:
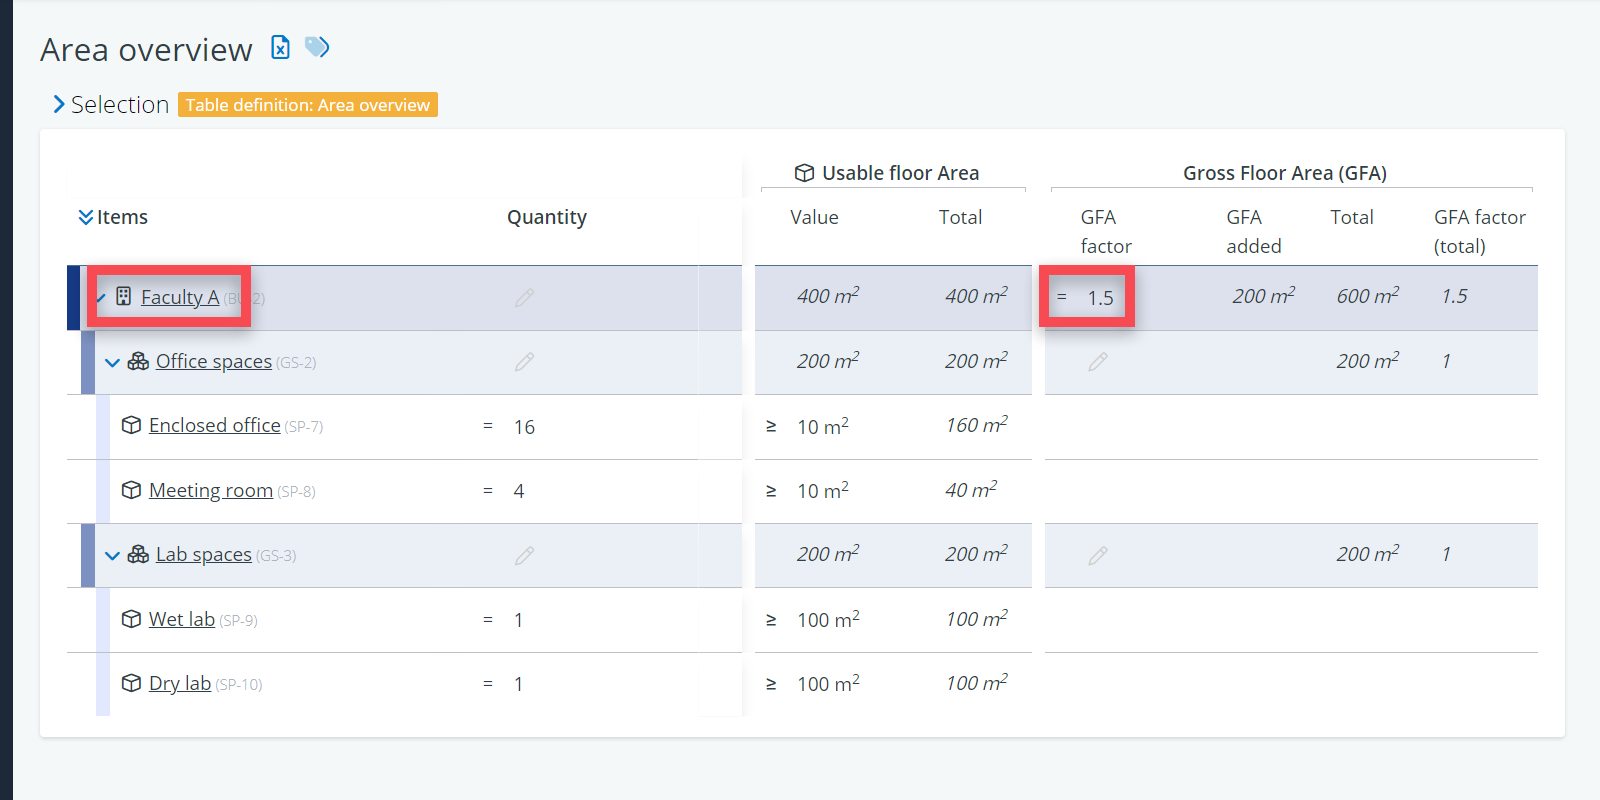
(1) A GFA factor on building level
This is the simplest and most common way of working with a GFA factor is that you only define a factor on building level.
It is a very correct way of working in the sense that it takes into account that most (gross) areas, such as the area for plant rooms or a central lobby, can only be assigned to the building as a whole and not to parts of it.
See the simple example below where a GFA factor of 1.5 has been applied to the building as a whole.
(2) GFA factors on group level (lowest level)
In some projects — in particular mixed-use projects — it is possible that you want to differentiate the GFA factor for different functions in your building.
For example: when working on a research building, you may use a factor of 1.4 for the office spaces and a factor of 1.6 for the lab spaces because the latter require more room for technical services. If this is the case, you can consider adding the factor on a group level. In this example, that would be the group ‘office spaces’ and the group ‘lab spaces’ (and thus not at building level).
See below for how that will turn out. It is a different way of calculating gross floor area, although it can still result in the same overall factor for the building as whole (in this case still 1.5).

(3) GFA factors on multiple levels
It is also possible to combine these two approaches. In that case, you are adding GFA at multiple levels. Mathematically there is nothing wrong with this, but you have to be aware of what you are doing: you are adding square meters at every level for which you have defined a GFA factor.
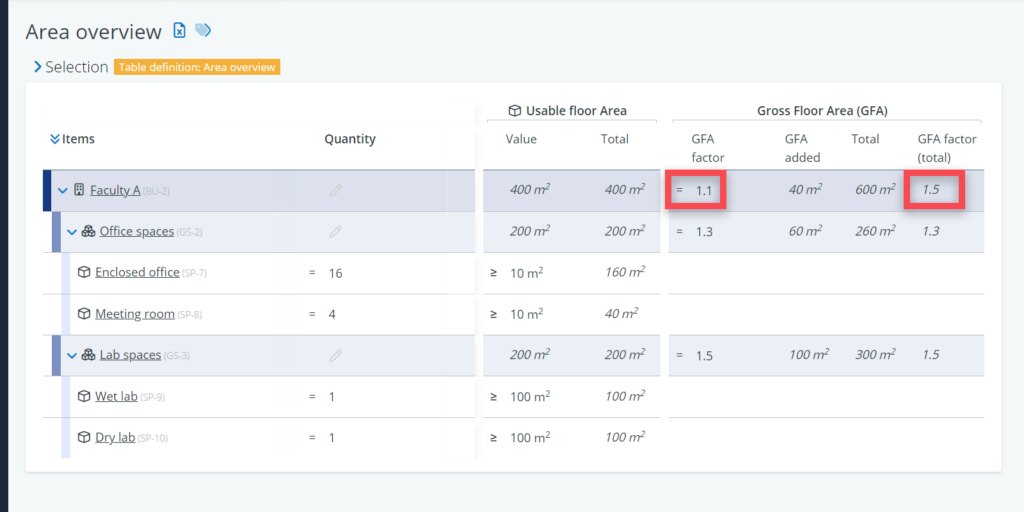
See the example below where the lab spaces have a factor of 1.5 and the office spaces a factor of 1.3. And then an additional factor of 1.1 has been added on building level, resulting, again, in an overall factor of 1.5.
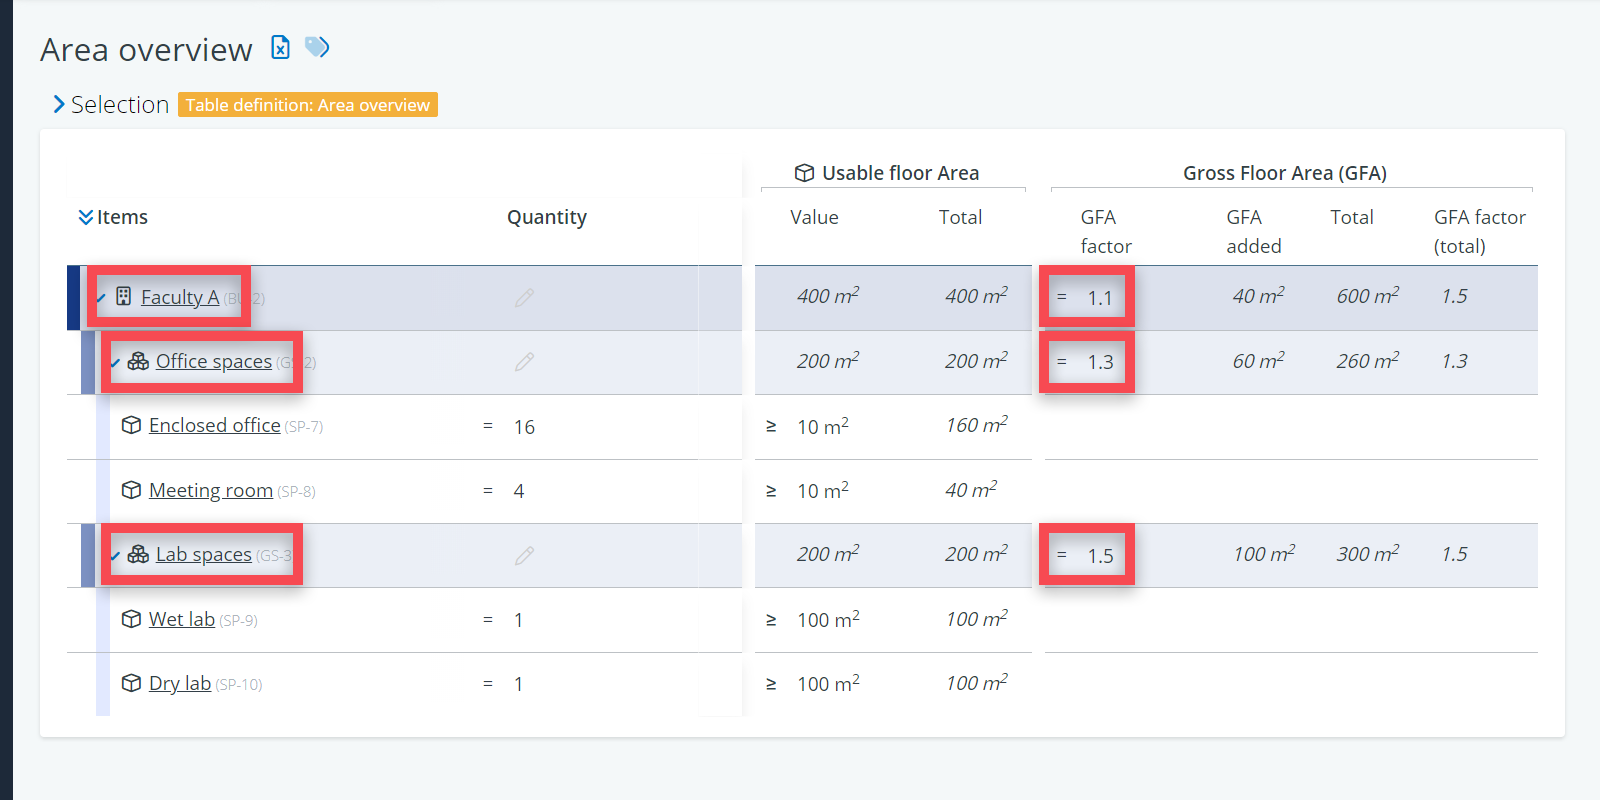
Note that in this case, in the GFA factor for building in the first column and the GFA factor (total) in the last column are different (resp. 1.1 and 1.5, see image below). These are different because the first is only being used to add extra square meters on building level, on top of the gross floor areas that have already been added on the levels below.