
BriefBuilder’s roles settings, enable users to manage permissions related to verifications. This article explains how it functions, addressing the following topics:
- Verification permissions in general
- Default verification roles
- Creating custom roles
Permissions
To manage verification permissions, you have to access the roles settings in your model:
Navigation bar > Settings > User access > Roles

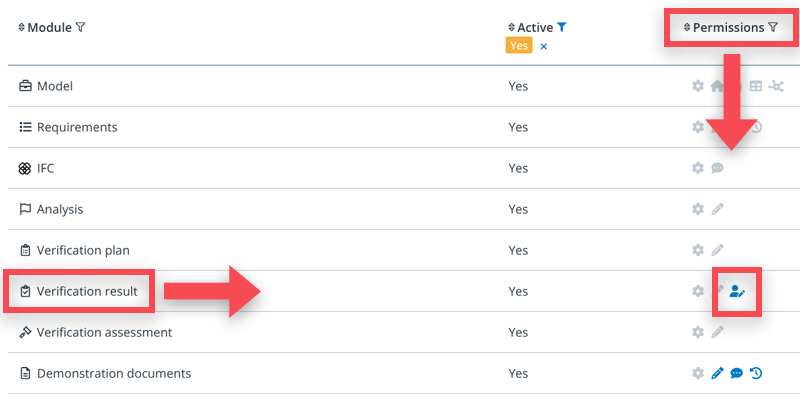
Once inside the roles settings menu, open the permissions settings for a specific role by clicking the permissions button located in that role’s row.

In the roles menu, there are four modules (row’s) that are relevant for verification:
- (Verification) Plan
- (Verification) Result
- (Verification) Assessment
- Demonstration documents

Each of these modules comes with a set of permissions, signified by the small icons in the table. When a permission is activated, the icon is blue. If not, it is grey. See below for an explanation of each icon.
Verification plan
| Configure | Allows you to configure the settings of the verification plan (i.e. defining verification methods and verification phases) |
| Edit | Allows you to add and edit the content of the verification plan (e.g. defining when, how, and by whom requirements should be verified) |
Verification result
| Configure | Allows you to configure the settings of the verification result (i.e. result categories, like compliant, non-compliant, partially compliant) |
| Edit all objects | Allows you to add and edit all verification results |
| Edit assigned objects | Allows you to add and edit only those verification results that are specifically assigned to you |
Verification assessment
| Configure | Allows you to configure the settings of the verification assessment (i.e. defining assessment categories like Accepted and Rejected) |
| Edit | Allows you to add and edit the actual assessments. |
Demonstration documents
| Configure | Allows you to configure the standard properties of the demonstration document (i.e. format or author) |
| Edit | Allows you to create, edit and delete demonstration document objects in the demonstration document tree |
| Comment | Allows you to make comments regarding demonstration documents |
| History | Allows you to see the history data of demonstration documents. |
Default roles
A set of default verification roles has been created to assist users in getting started. These roles are automatically included whenever a new project model is created. Below is an explanation for each of these roles.
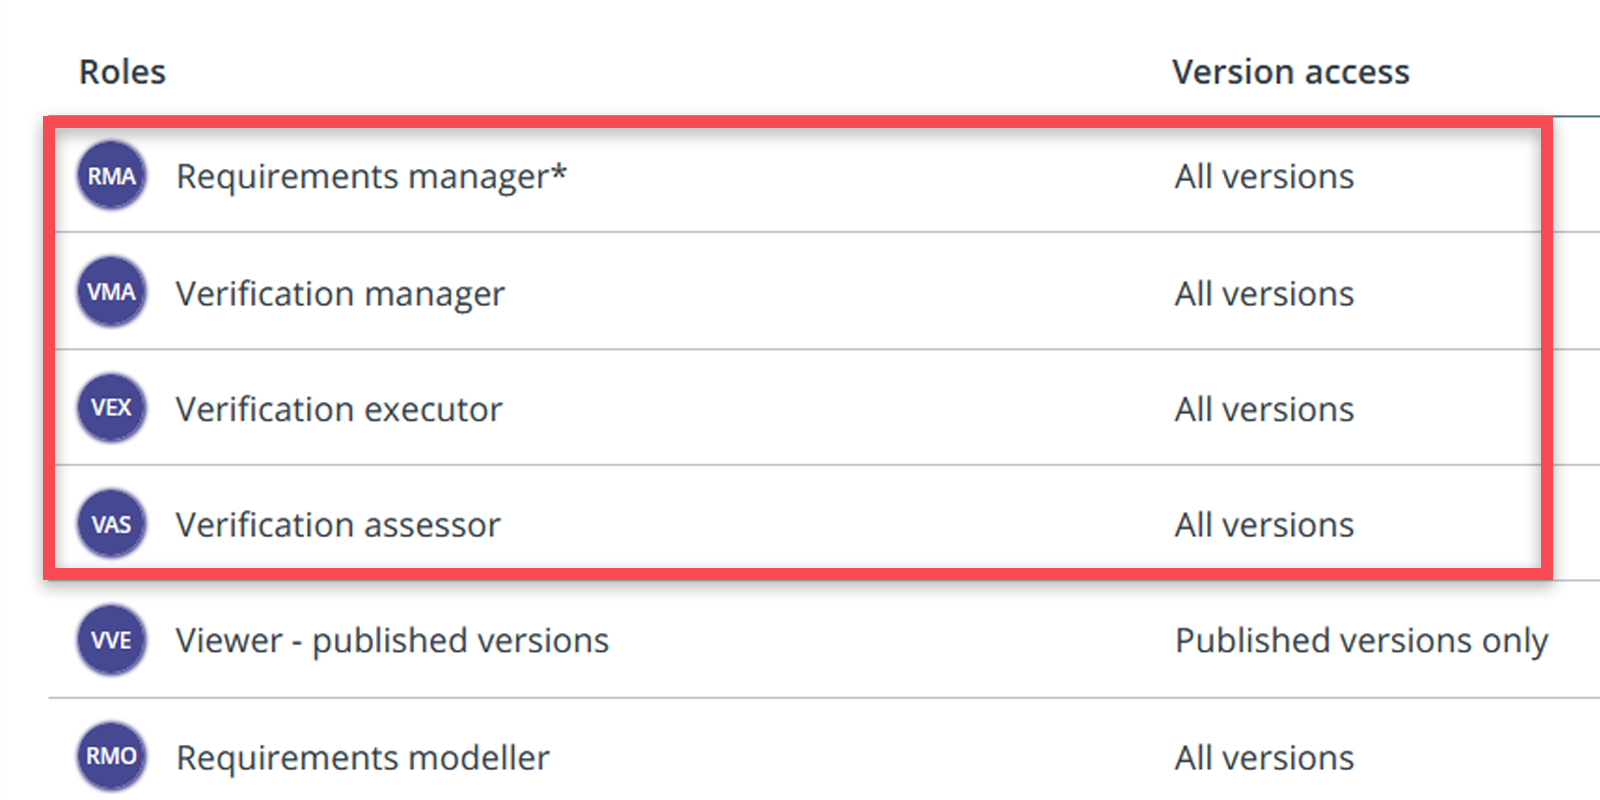
Requirements manager
This role is not specifically targeted at verification, but it is a good one to be aware of as this role has all permissions for the model, and thus also all permissions in relation to verification. It is a role that will be only relevant for a few people (e.g. the project’s quality manager).
Verification manager
This role is for those that are in charge of setting up and organizing the verification process. They can configure and develop the verification plans, configure the set-up for verification results (e.g. outcome categories), and configure the set-up for the demonstration documents and the verification outcome assessment, if relevant.
Verification executor
This role is for those that have to do the actual verifications. If you look in the verification result column, you will see that it has the permission Edit assigned objects for verification results. This means that users with this role can edit only those verifications that have been explicitly assigned to them in the verification plan.
Verification assessor
This role is for those that are responsible for conducting an additional review process for the verification outcomes, such as the project’s quality manager. Users assigned to this role have the authority to determine whether verification outcomes should be accepted or rejected (NB exact terminology can differ from project to project).
Creating your own verification roles
Rather than relying on the default roles, users can opt to create custom roles tailored to the project’s needs. For instance, roles can mirror the functional positions within the project, such as architect, contractor, electrical engineer, and similar designations.
For each of these custom roles, specific permissions related to verification can be defined.
In many scenarios, the Edit assigned objects permission, mentioned earlier, proves most appropriate. This setting restricts editing rights to only those verifications explicitly assigned to the user. Refer to the image below for an example.
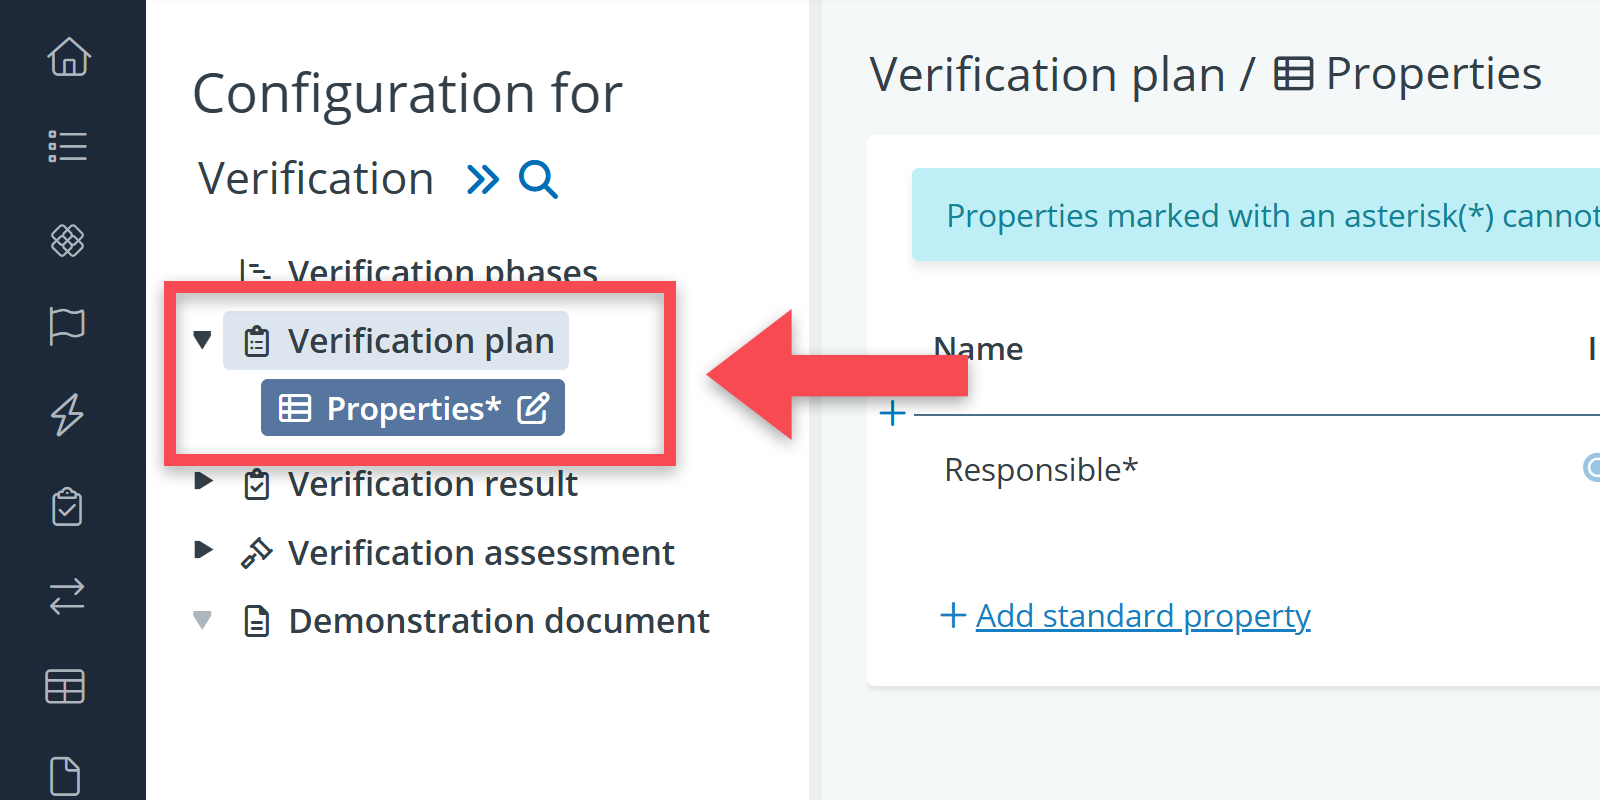
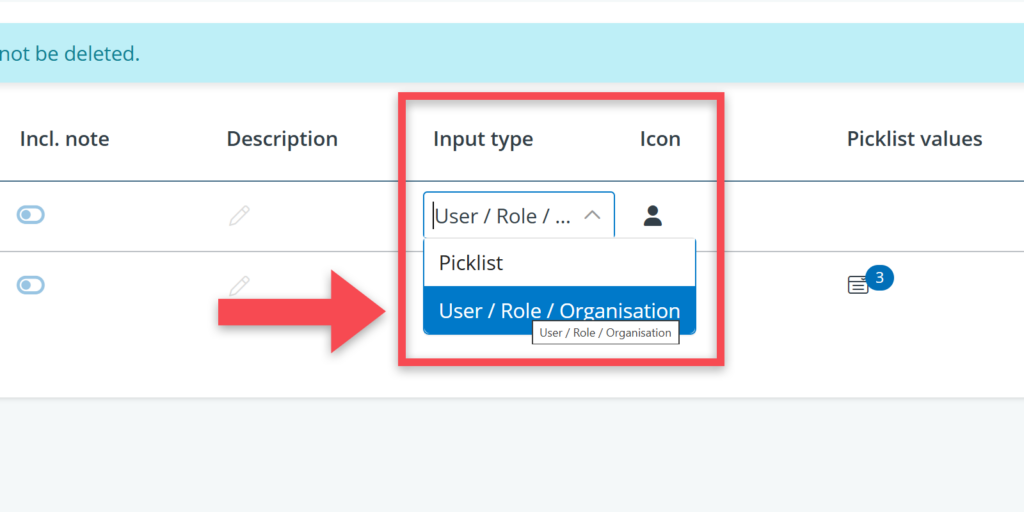
Important: input type for responsible
In order to properly use the Edit assigned permission, you need to make sure that the verification plan’s standard property Responsible is configured with input type User / Role / Organisation.
This input type is the default setting, but it is possible to change it (e.g. to picklist). Our recommendation, however, is not to do that because then you will no longer be able to assign verifications to specific users.
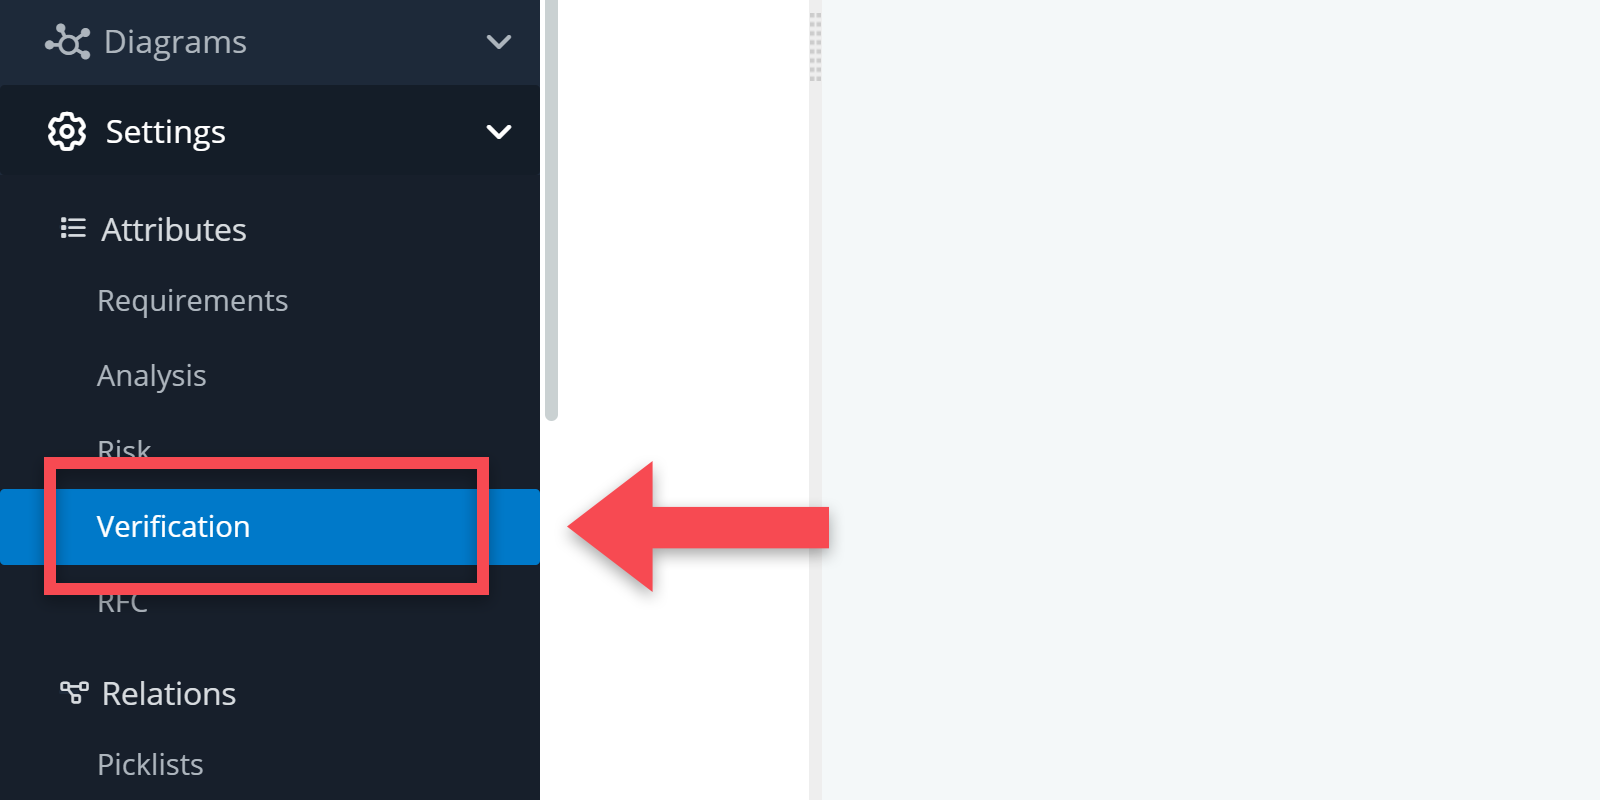
You can check this setting in in the Settings menu:
Settings menu > Attributes > Verification > Verification plan
Once you have done that, you can work on your verification plan and assign verifications to the right people.
Note that there are three way to do this. You can assign a verification to:
- a user (e.g., assigned to Timothy Jackson)
- an organisation (e.g., assigned to organisation BriefBuilder)
- a role (e.g., assigned to role Architect)
If you assign a verification to an organisation, it will be editable for all the persons that are part of that organisation.
Likewise, if you assign a verification to a role, it will be editable for all the persons that have been given that role.