Introduction
For design teams who work with Autodesk Revit, we have developed a dedicated add-in that will allow them to view and work with BriefBuilder data in Revit.
The current version of the BriefBuilder Revit add-in is focused on the management of room data. It offers the following functionalities:
- Creating rooms in Revit based on BriefBuilder spaces.
- Mapping existing Revit rooms to BriefBuilder spaces.
- Viewing BriefBuilder data in Revit.
- Creating room parameters in Revit based on a subset of BriefBuilder data.
This article explains these functionalities and covers practicalities such as installing our add-in.
The purpose of these functionalities is to make it easier to link briefing information and design information.
A very practical advantage in this respect is that the add-in will also make it easier to work with IFC files in BriefBuilder as Revit rooms can (semi)automatically get a BriefBuilder object-ID, which can then be used as a mapping rule when importing IFC files into BriefBuilder.
Terminology: spaces and rooms
In BriefBuilder, we talk about spaces, whereas Revit uses the term rooms. While not intentional, this difference is quite practical for explaining the difference in status between spatial entities in BriefBuilder and Revit.
We use the term spaces to refer to the spaces as they are defined in BriefBuilder, which have the status ‘as required’, as in “the client asks for 5 meeting rooms”.
We use the term rooms to refer to the rooms in the Revit/BIM model, which have the status ‘as designed’, as in “the architect has designed 5 meeting rooms”.
The central idea of the add-in is to help align these two concepts, linking spatial requirements to design solutions.
Downloading and installing
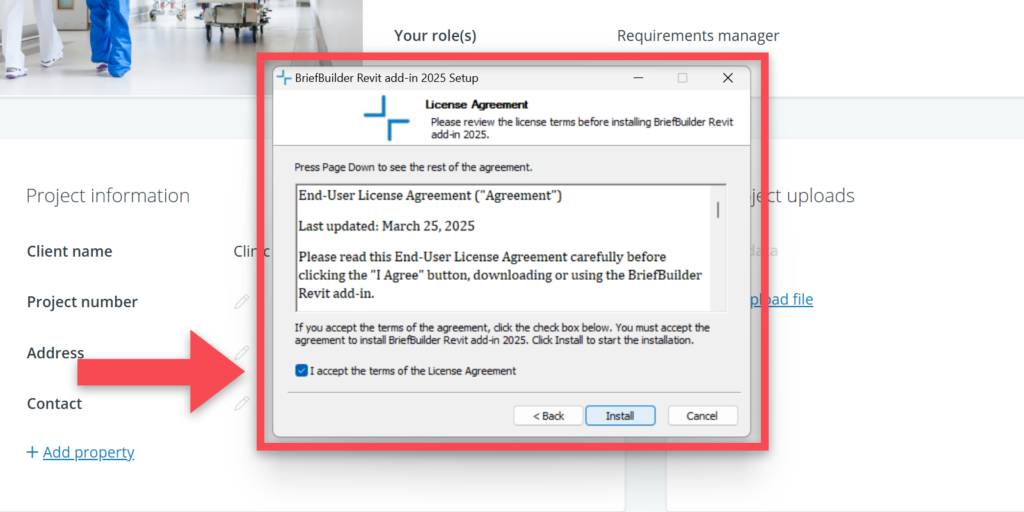
To install the add-in in Revit, you first need to download the installer file from our website. Once downloaded, unzip the file and click on the installer file (named BriefBuilderRevitAddinInstaller).
Starting the installer, you will first get a prompt concerning our license agreement. The terms must be accepted to install the add-in.
After this, open your Revit application and open the model that you want to work on.
When opening Revit the first time after installing the add-in, you will get to see a notification screen that asks you whether you want to load the add-in. It is standard security message from Autodesk with the following options:
- Always Load: select this option to stop this message from showing every time when opening Revit and always have the add-in available.
- Load Once: select this option if you want to load the add-in right now, but also want keep the option to choose differently next time you open Revit.
- Don’t Load: select this option if you don’t want to load the add-in at this moment.
The add-in in Revit
When you have installed the Revit add-in, you can find it in Revit’s Add-ins menu.

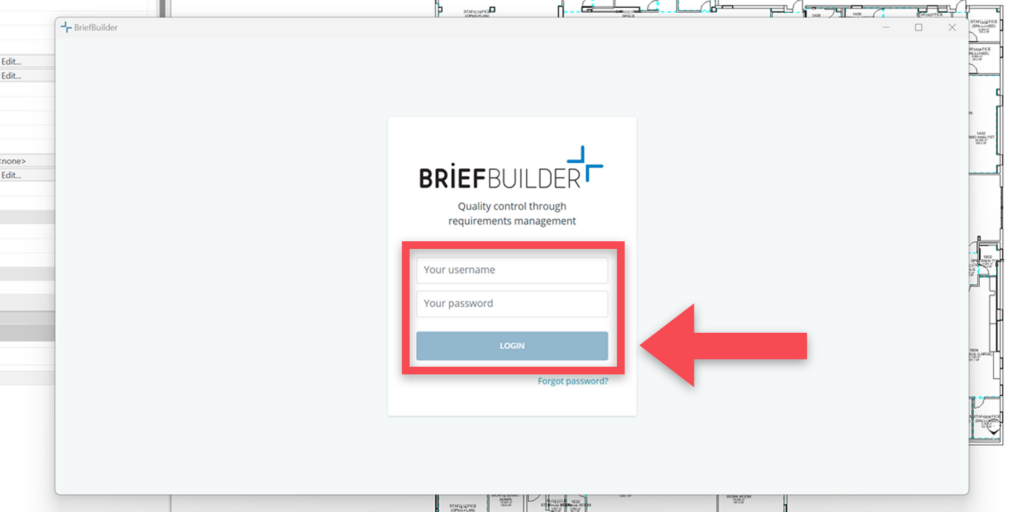
When activating the add-in, you will be asked for your BriefBuilder credentials (username and password) to be able to connect to a BriefBuilder model. These are the same credentials as those you would use for logging into BriefBuilder via a browser.
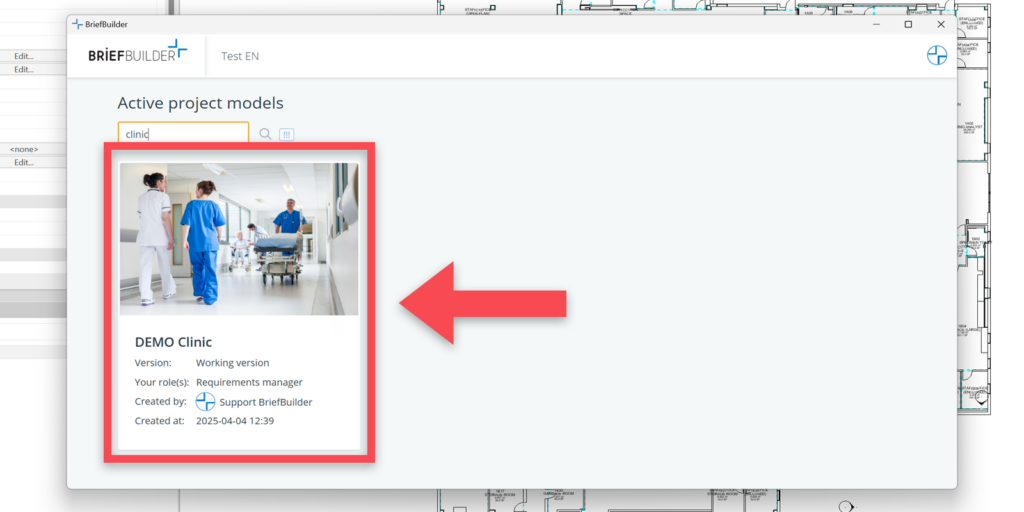
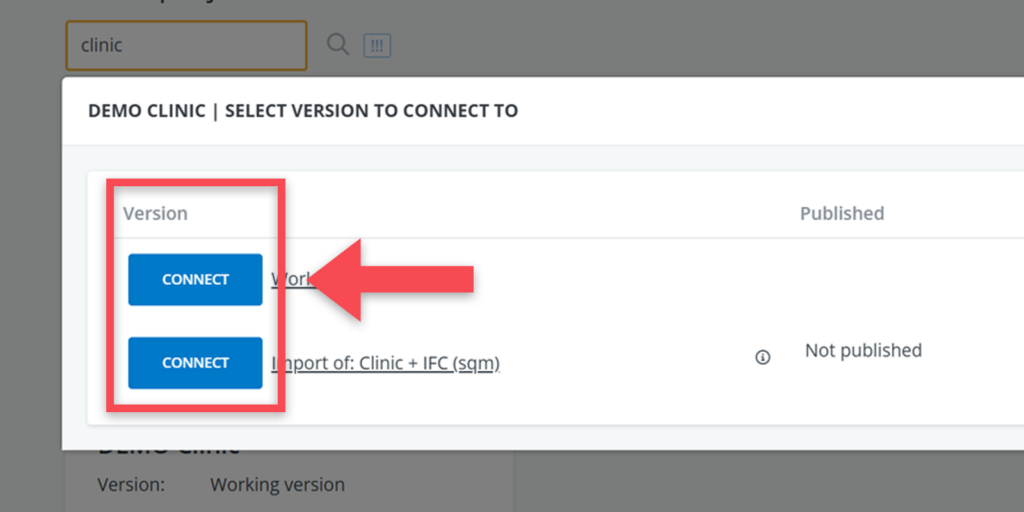
In BriefBuilder, you’ll see the project model(s) to which you have access. You have to click on the relevant project ’tile’ and then select the version of the model that you want to connect to.
The BriefBuilder add-in window in Revit
You will notice that the add-in’s user interface is very similar to the one you see when logging into BriefBuilder via a browser. The main difference is that there is an additional menu item at the top of the navigation bar, named Autodesk Revit.
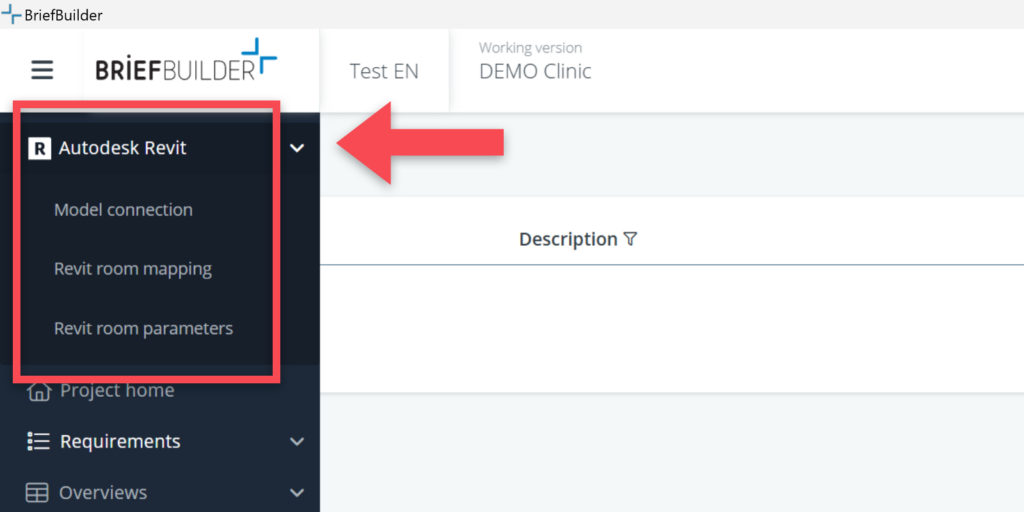
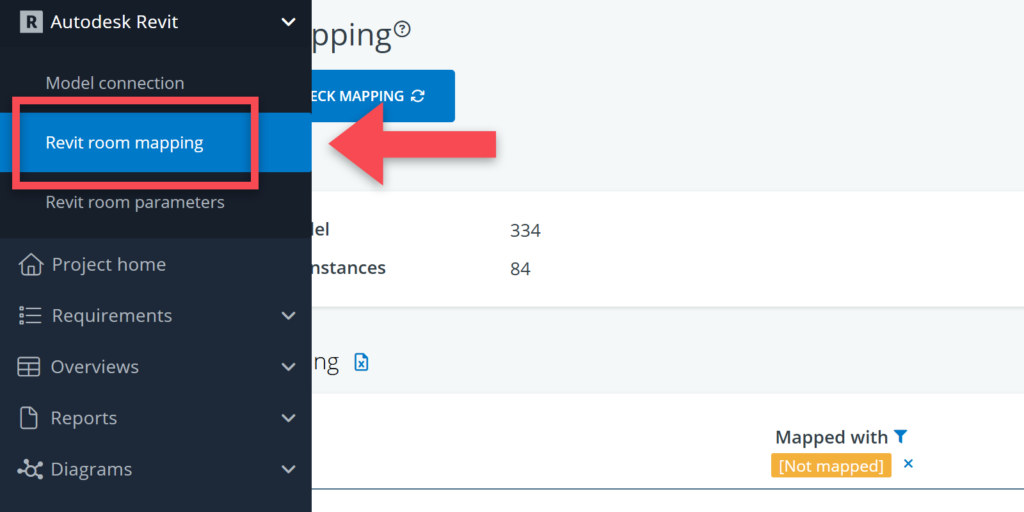
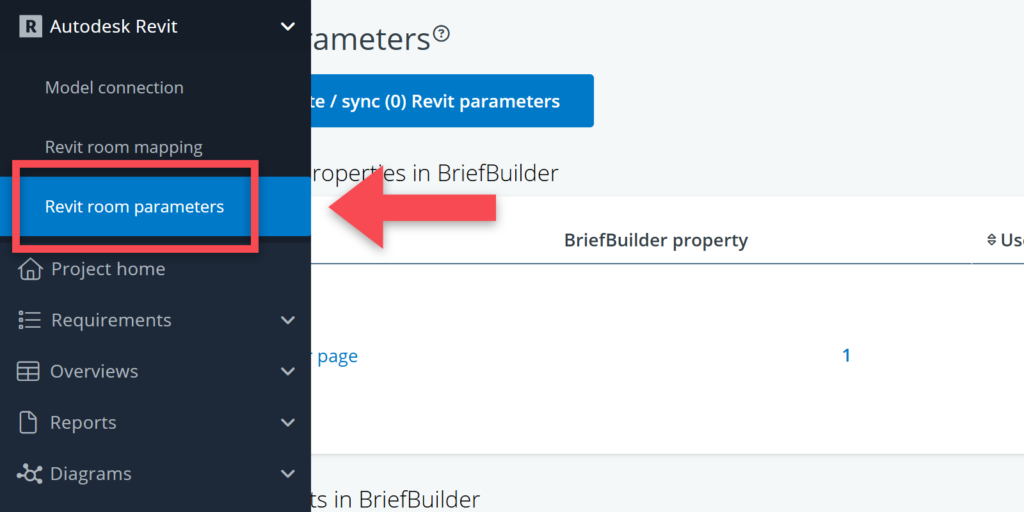
This Revit menu has three menu-items:
- Model connection: this where you can see information about the connected models. It is also where can disconnect your model and/or connect to new versions.
- Revit room mapping: this where you can see and manage the mapping of BriefBuilder spaces and Revit rooms.
- Revit room parameters: this is where you can select BriefBuilder properties/relations that you want to ‘push’ to the Revit model as room parameters.
Each of these menu-items is explained below.
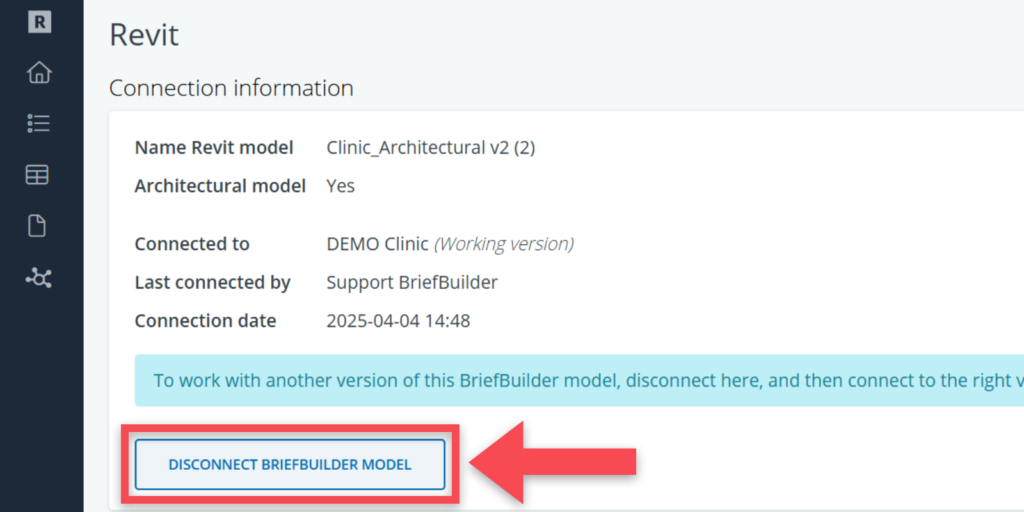
Model connection
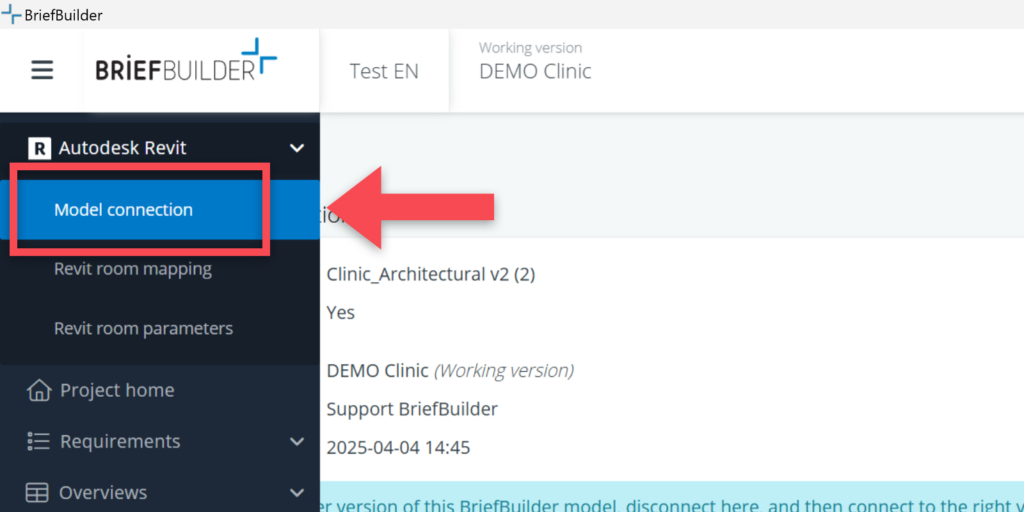
As explained earlier in this article, you need to connect the Revit model to a BriefBuilder model and a specific version of that BriefBuilder model. In this part of the menu you can find information about to which model, and which version, you are currently connected.
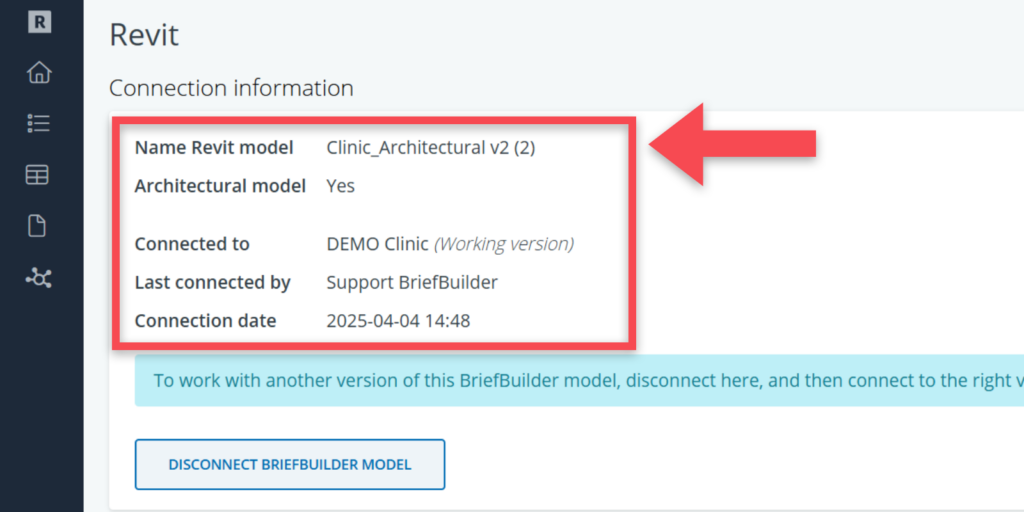
When you want to connect to a different BriefBuilder model, or a new version of your existing model, you must first click on the Disconnect button. After disconnecting you get send back to the project ’tiles’ where you can connect to another model/version again as described earlier.
Revit room mapping
On the Revit room mapping page, you see the status and can manage the mapping between BriefBuilder spaces and Revit rooms.
On the mapping page, there are three sections:
1) Current totals
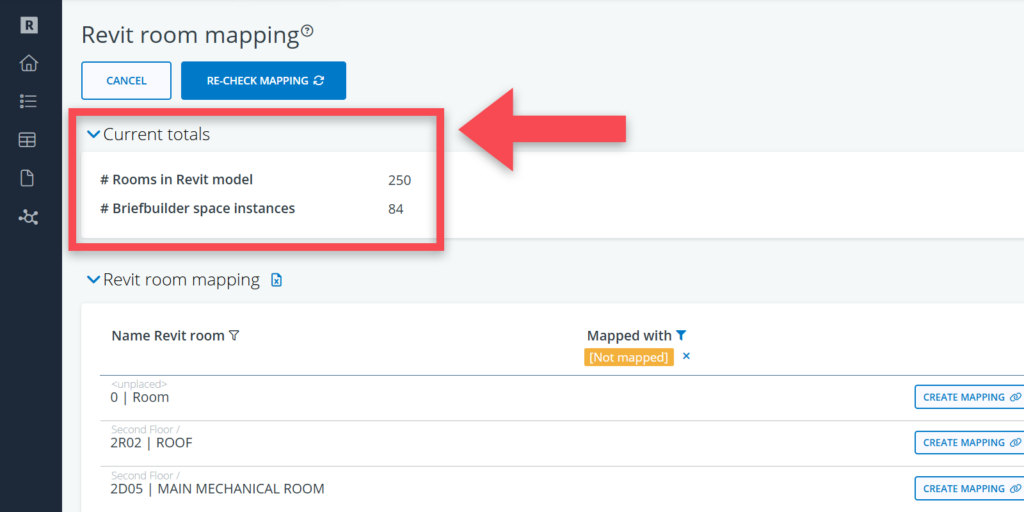
This section shows the total of rooms in the Revit model and the total number of spaces in the BriefBuilder model. Depending on how the BriefBuilder model has been set up, these numbers should, ultimately, be more or less the same.
There can be different reasons for differences in these quantities between BriefBuilder spaces and Revit rooms. It is quite common, for example, that the Revit model features all sorts of technical rooms and circulation spaces that haven’t been quantified in the BriefBuilder model.
Differences can also be caused by a different level of granularity when defining spaces and rooms. For example: if, in a hospital project. a patient room is seen as two entities in Revit (e.g. a bedroom and a bathroom), while these two are combined into a single space in the BriefBuilder model, you will get an (unwanted) difference in totals. This can be avoided by agreeing beforehand how rooms and spaces should be modelled.
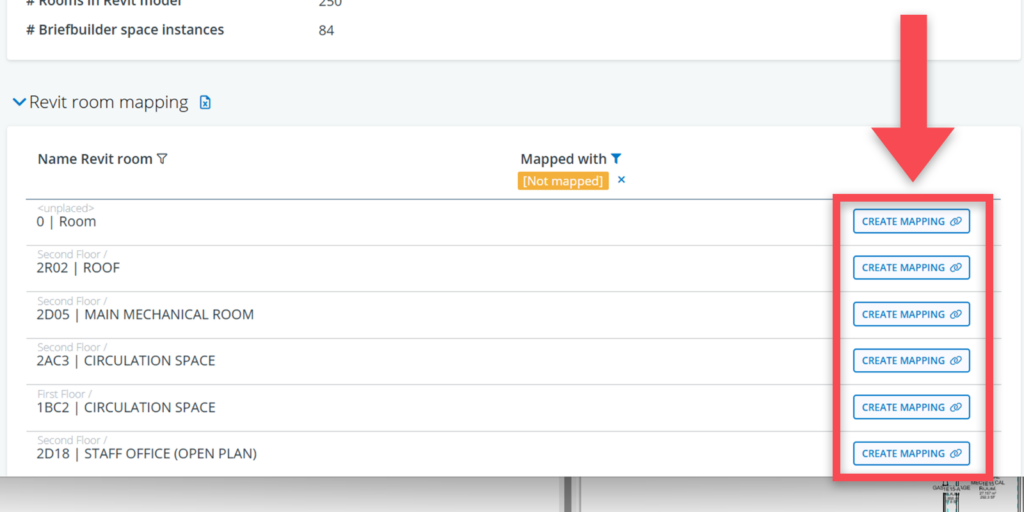
2) Revit room mapping
In this section, you can see how each Revit room is currently mapped to BriefBuilder spaces. The first column shows the name of the Revit space, the second column has the name of the correlating BriefBuilder space (if mapped).
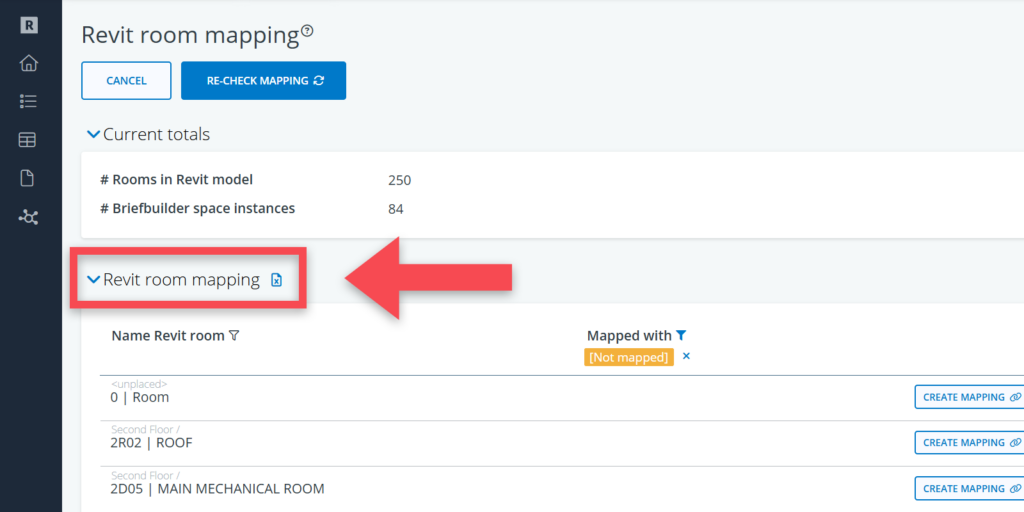
To map a Revit room to a BriefBuilder space, you can click on the Create mapping button and select the relevant space.
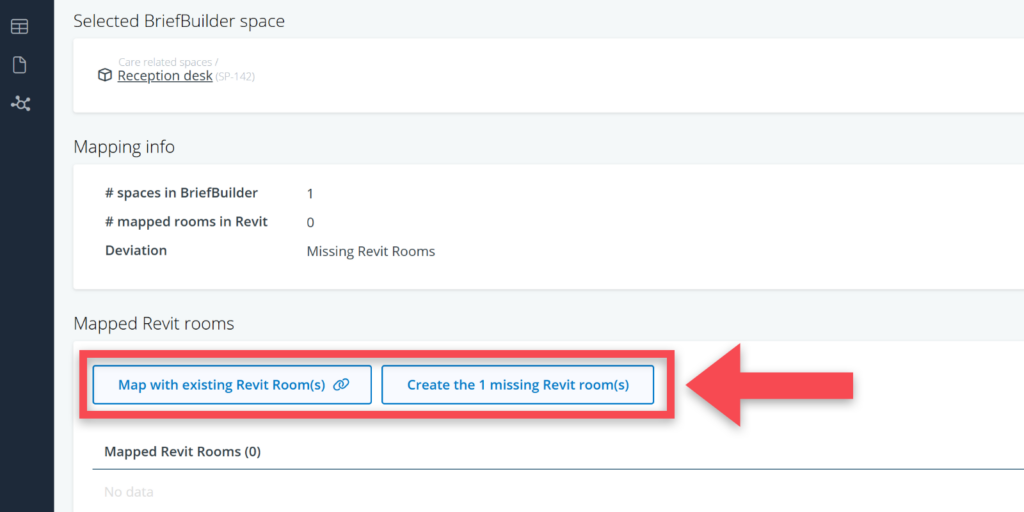
3) Deviations from BriefBuilder
This section basically shows the same data as the section above, but from the perspective of the BriefBuilder spaces, including the deviation between the requested number of spaces and the designed number of Revit rooms.
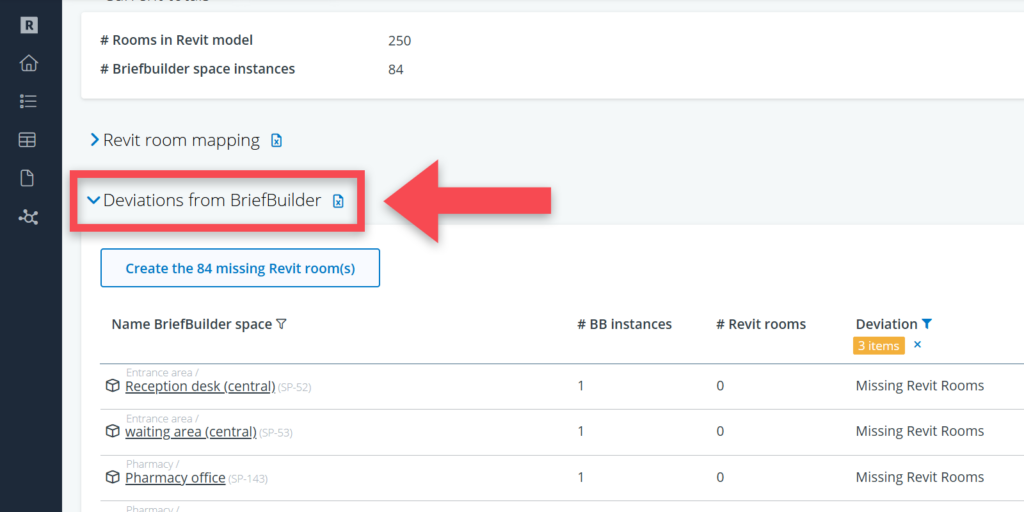
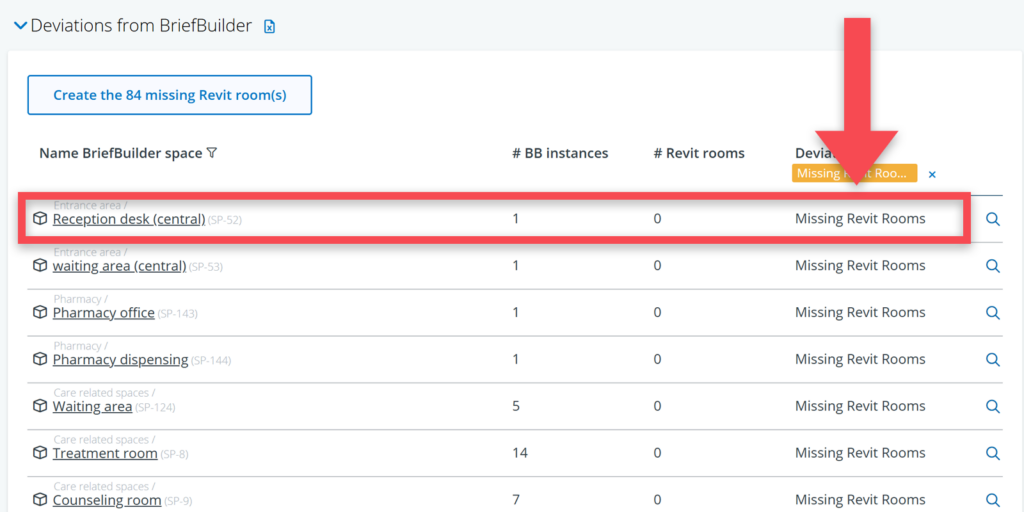
Example: in the screenshot below you can see, in the first row, that the brief asks for a Reception desk (central), with a quantity of one, and that there are no (zero) Revit rooms mapped to this BriefBuilder space. This triggers the message Missing Revit Rooms in the deviation column.
To see and manage the mapped Revit Rooms for a BriefBuilder space, you can click on the magnifying glass icon at the end of the row ().
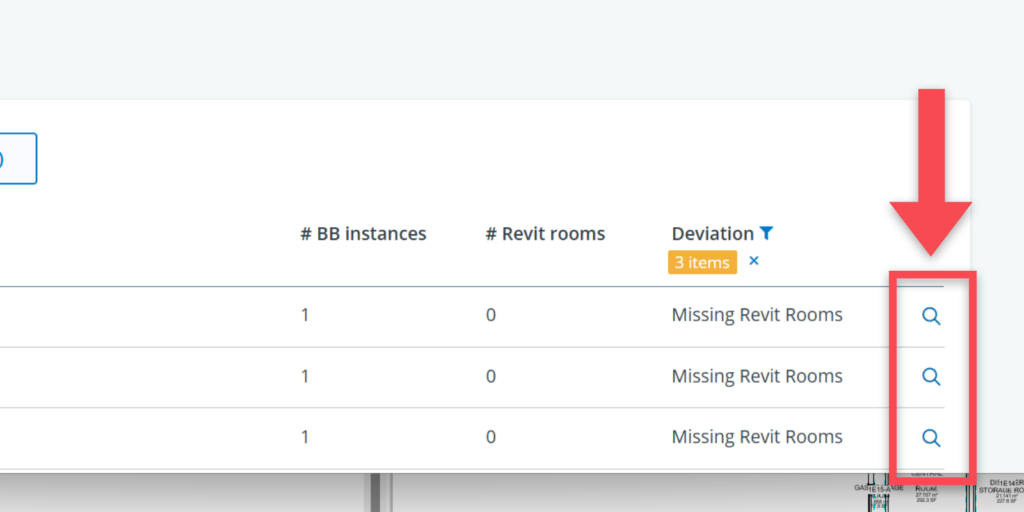
When clicking on the magnifying glass, you get a popup-window where you can manage the Revit room mapping for the selected BriefBuilder space.
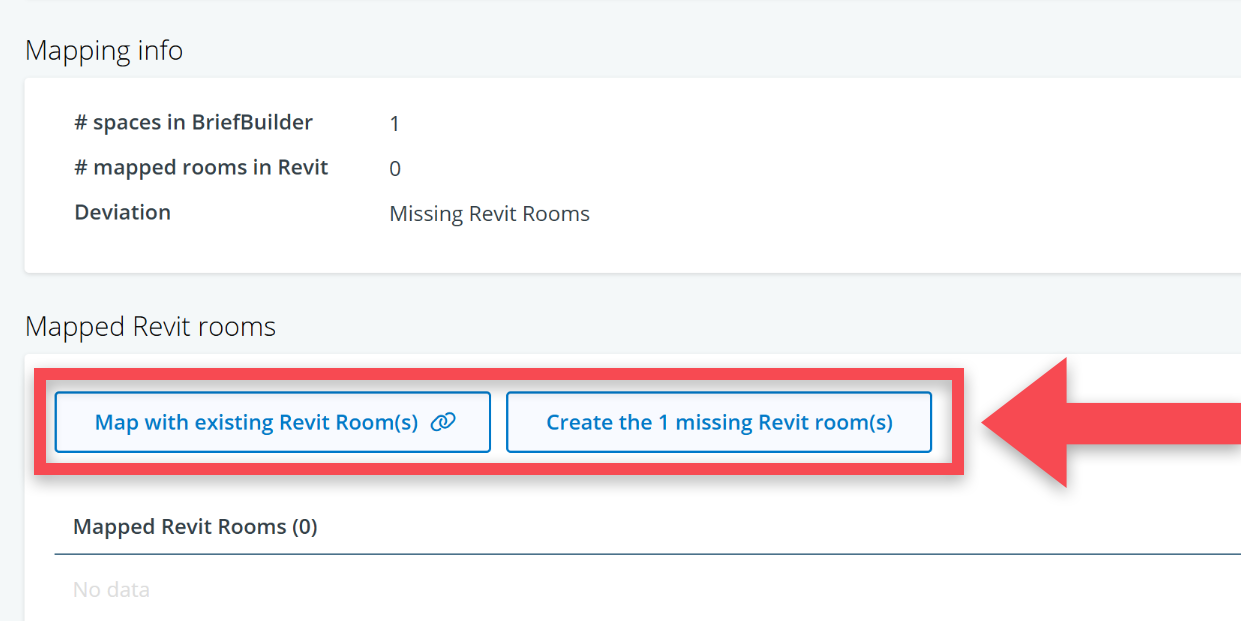
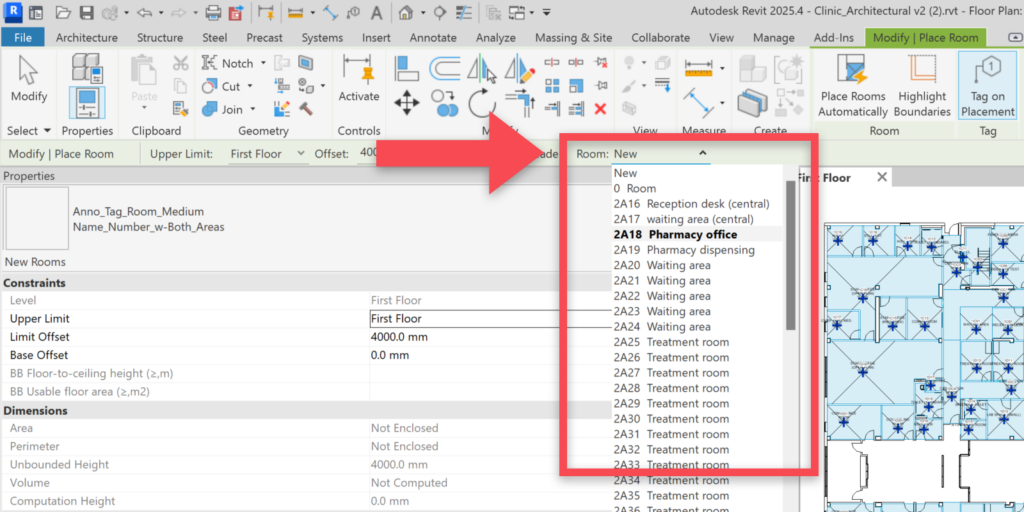
If the BriefBuilder space has too few Revit rooms, you can create these missing rooms as new unplaced rooms in Revit. These new rooms will be mapped to and named after the selected BriefBuilder space.
If there are a lot of Revit rooms missing (typically at the very start of the design process), you can consider using the main Creating the [number] missing Revit room(s) button.
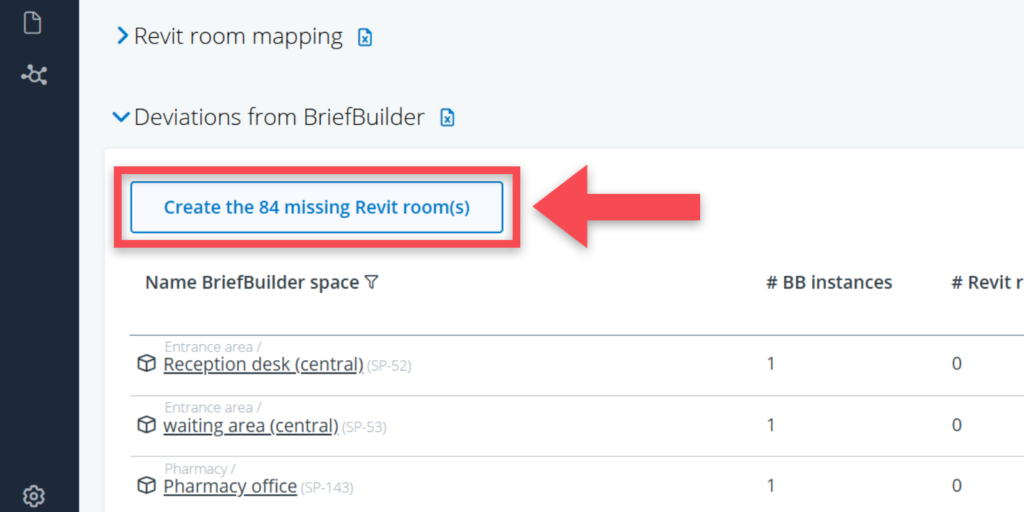
If you have used the add-in to create missing rooms in Revit, these rooms were created as unplaced rooms carrying the name of the corresponding BriefBuilder space.
Undefined quantities
It happens that BriefBuilder spaces do not feature a quantity, e.g. in case of circulation spaces and technical spaces as their quantities are very much design dependent.
In that case, the deviation table shows the message not defined for the number of BriefBuilder instances. As there is no quantity, it is not possible to create new rooms for these. You can, however, easily manually link them to existing Revit rooms, by clicking on the magnifying glass icon and using the select option.

Revit room parameters
In this part of the Revit add-in, you can create and synchronise Revit room parameters based on data in BriefBuilder.
The following BriefBuilder data can be transferred:
- Space properties (e.g. usable floor area, floor-to-ceiling height, occupancy)
- Quantities of elements (e.g. the number of power sockets or water outlets per space)
- Quantities of user equipment (e.g. the presence of a CT scanner in a space)
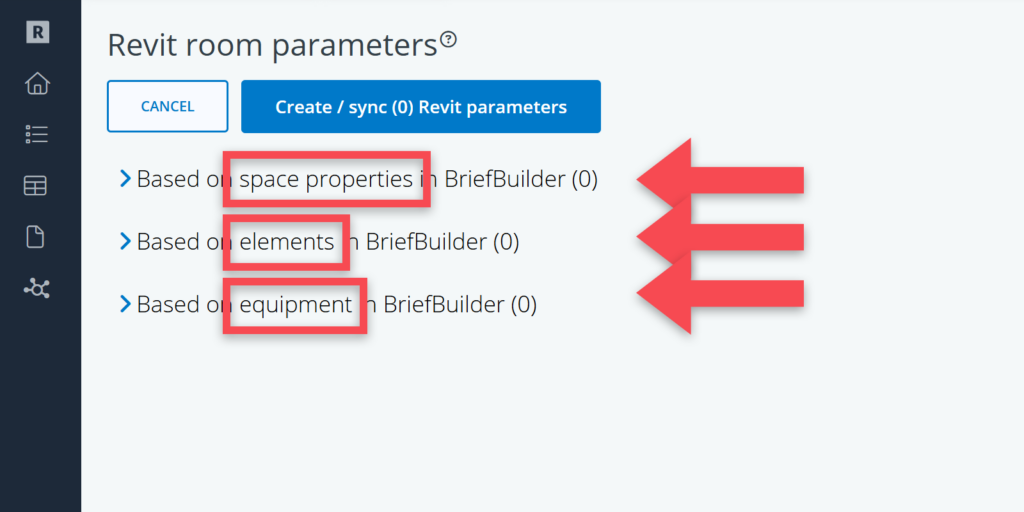
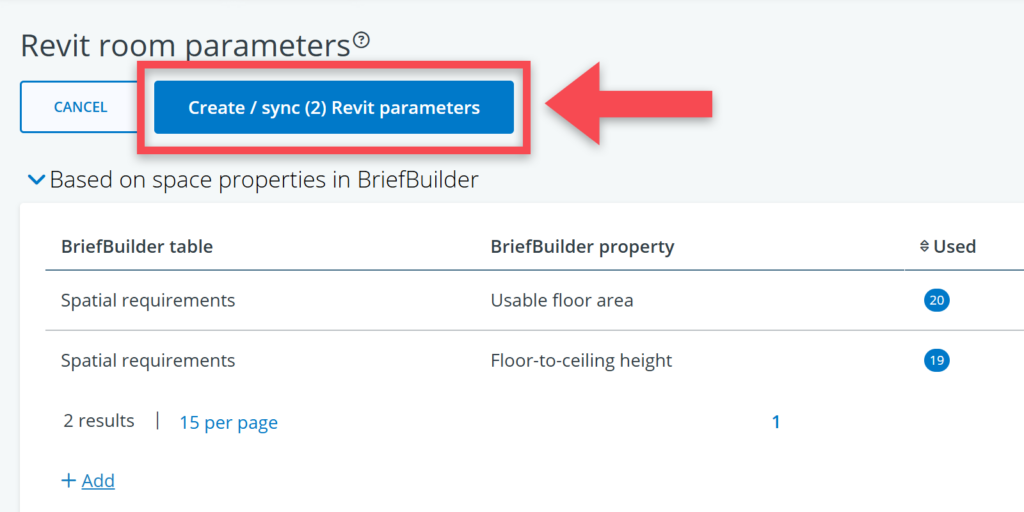
To create the room parameters, you have to click on the + Add button. You can then choose from the properties or relations as they are defined in BriefBuilder.

Both in the pop-up and the parameter tables, there is an indicator that shows you how often a parameter or relation has been used in BriefBuilder (see screenshot below).
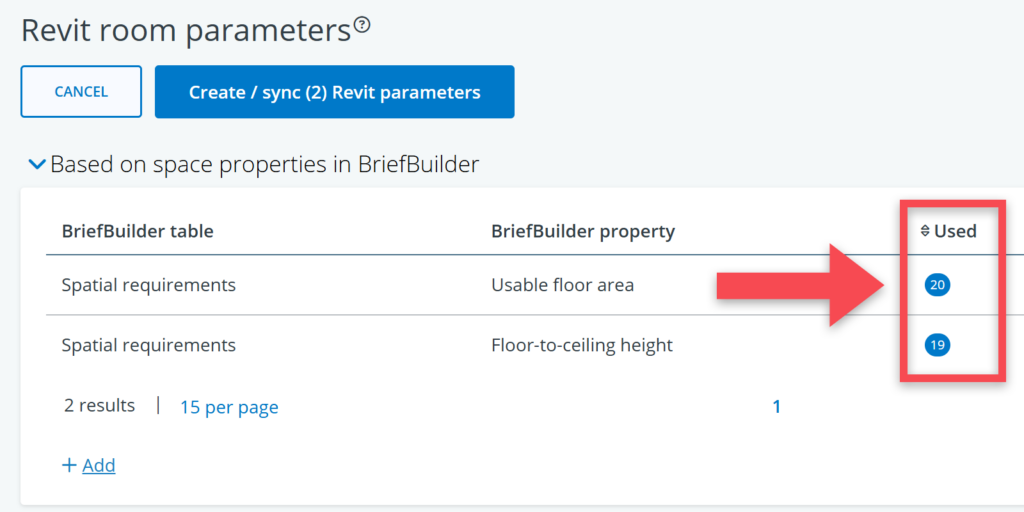
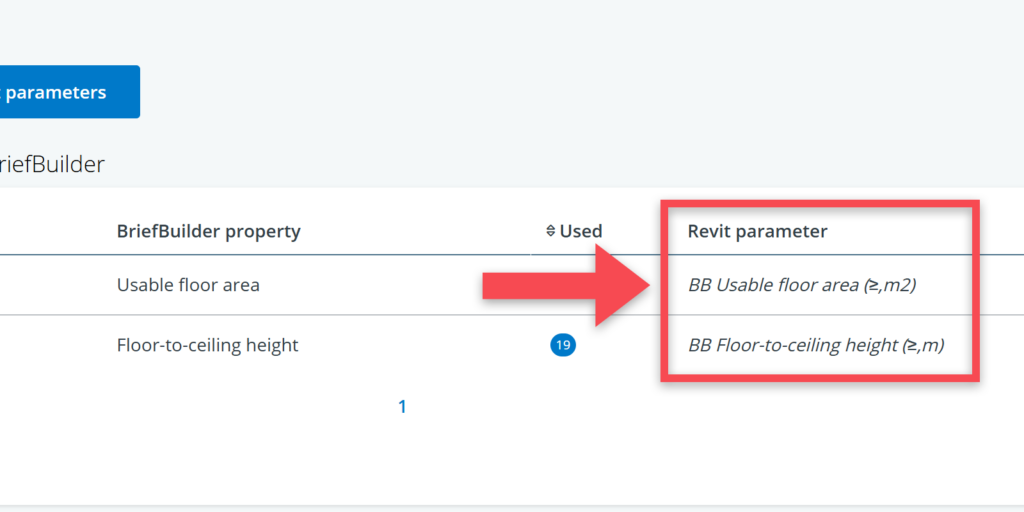
In the parameter overview, the Revit parameter column shows the name of the parameter that will be added to the Revit rooms. Note that this name starts with BB to indicate that it is a parameter based on BriefBuilder data, and that the comparator (<, >, =, …) and unit of measure (m2, m, mm, …) are shown in brackets behind the name.
When happy with your selections, you can click on the Create / sync button at the top of the table to ‘push’ the data to the rooms in Revit.
In Revit, the created parameters are for each room visible in the Constraints block.
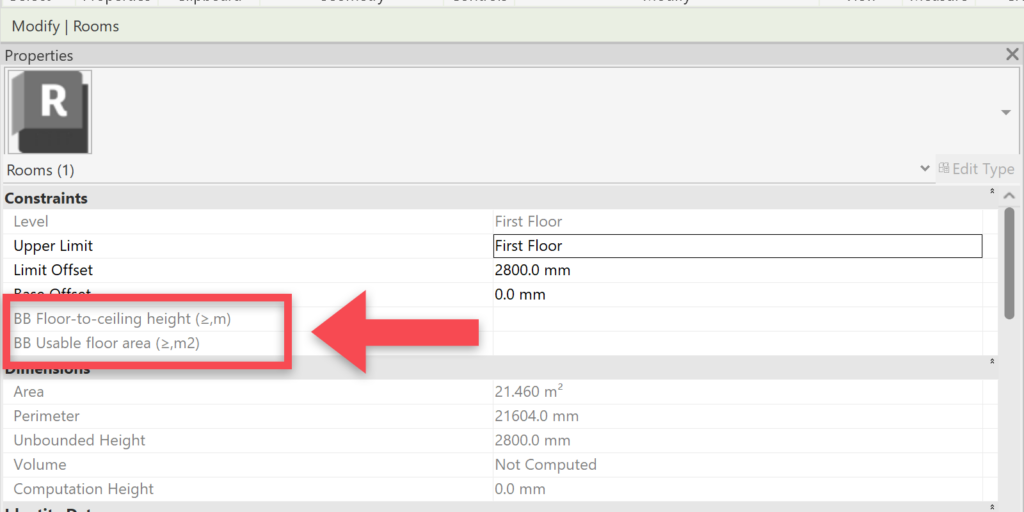
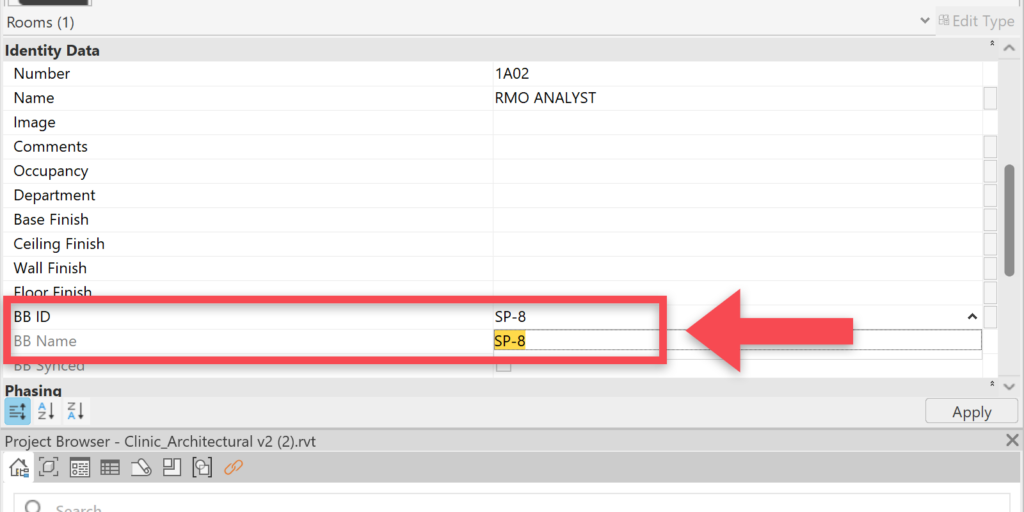
The BriefBuilder space name and object ID can be found in the Identity data block.
Navigating to the add-in from a room in Revit
When selecting a room in Revit, you can check whether it has been mapped by looking at the parameter BB ID in the Identity Data section. If that field features a BriefBuilder object-ID (SP- …). it has been mapped with a BriefBuilder space.
If you then move to the add-in, you can either create a mapping (if a room isn’t mapped) or see the relevant space in BriefBuilder (in case there is mapping).
1) The Revit room is unmapped
When clicking on an unmapped room in Revit (or a Revit room mapped to a BriefBuilder space that no longer exists), the BriefBuilder add-in will provide the option to choose a BriefBuilder space to map to.
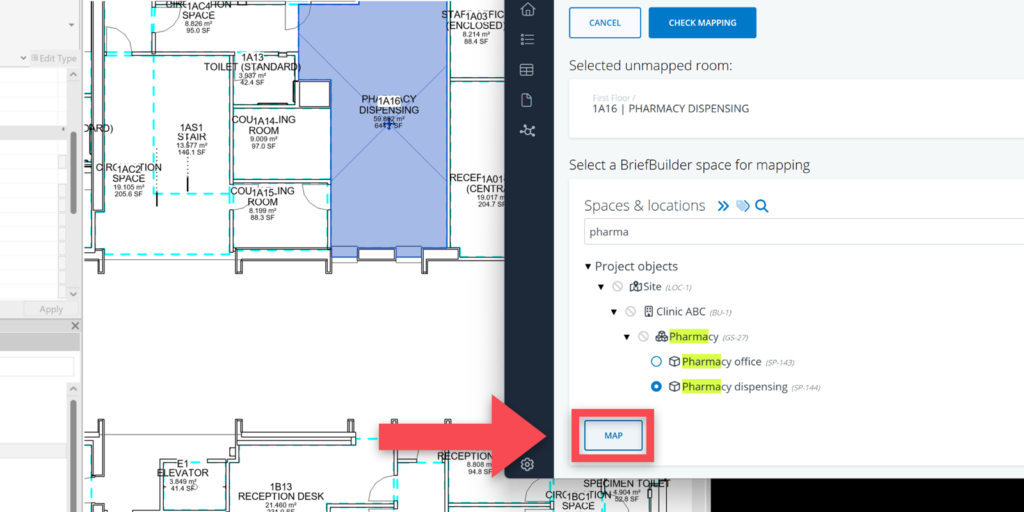
After mapping the Revit room, the add-in will jump to the selected BriefBuilder space where you can see all the related requirements.
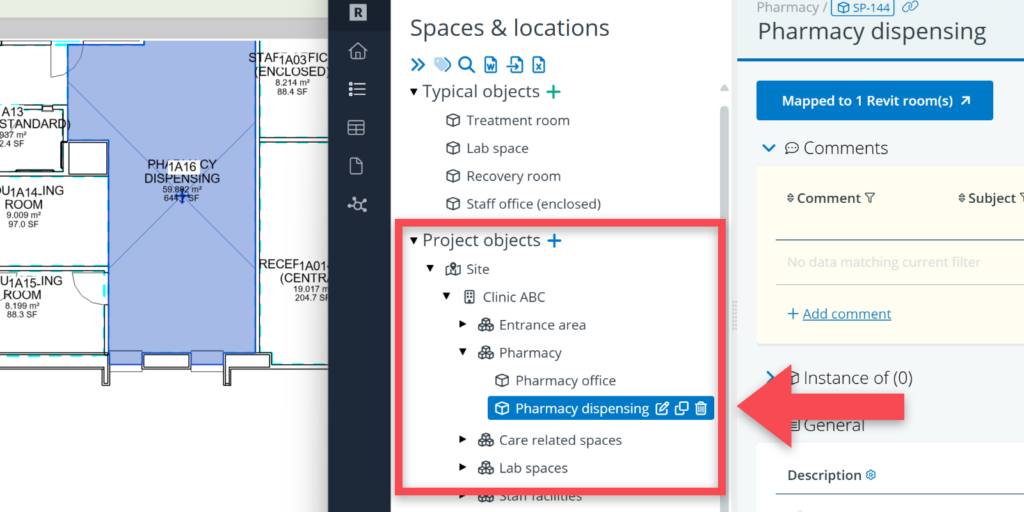
2) The Revit room is mapped to a BriefBuilder space
If a Revit room is already mapped to an existing BriefBuilder space, selecting that room in Revit will bring you to the relevant BriefBuilder space where you can see all the related requirements.
BriefBuilder tree view
When navigating in the BriefBuilder list of spaces (Navigation menu > Requirements > Spaces & locations) in the add-in, you can also find a link to related Revit data via the detail view of a space.
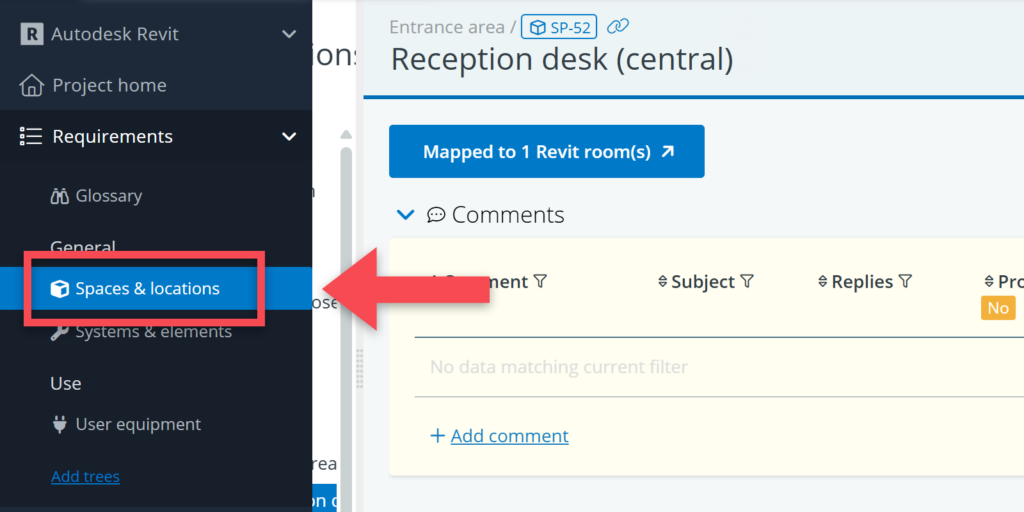
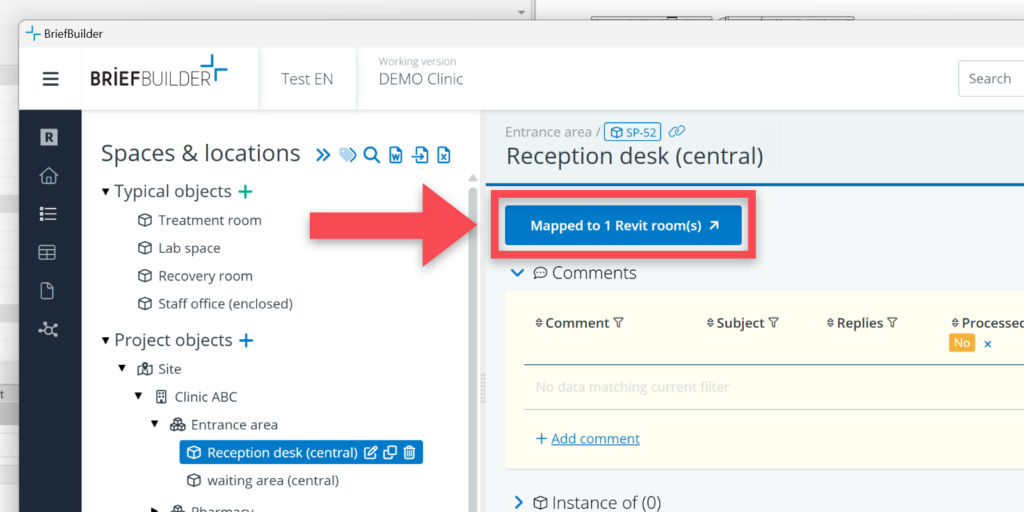
The button shows whether the space is mapped with any Revit rooms or not. Clicking on the button will bring you to a mapping page for that specific BriefBuilder space. This page works similar to the deviation popup of the Revit Room mapping page.